Journey 2 Nebula - Rock Candy: Finished!

I haven't been sure about this particular project in the Journey 2 Nebula. I do love the design of Rock Candy, but I'm not sure about my fabric choice. I am trying to use up some of my stash and not buy fabric that I don't need, but there's so much beautiful fabric out there. The next project will be new fabric because I couldn't resist it. You'll see it later this week!

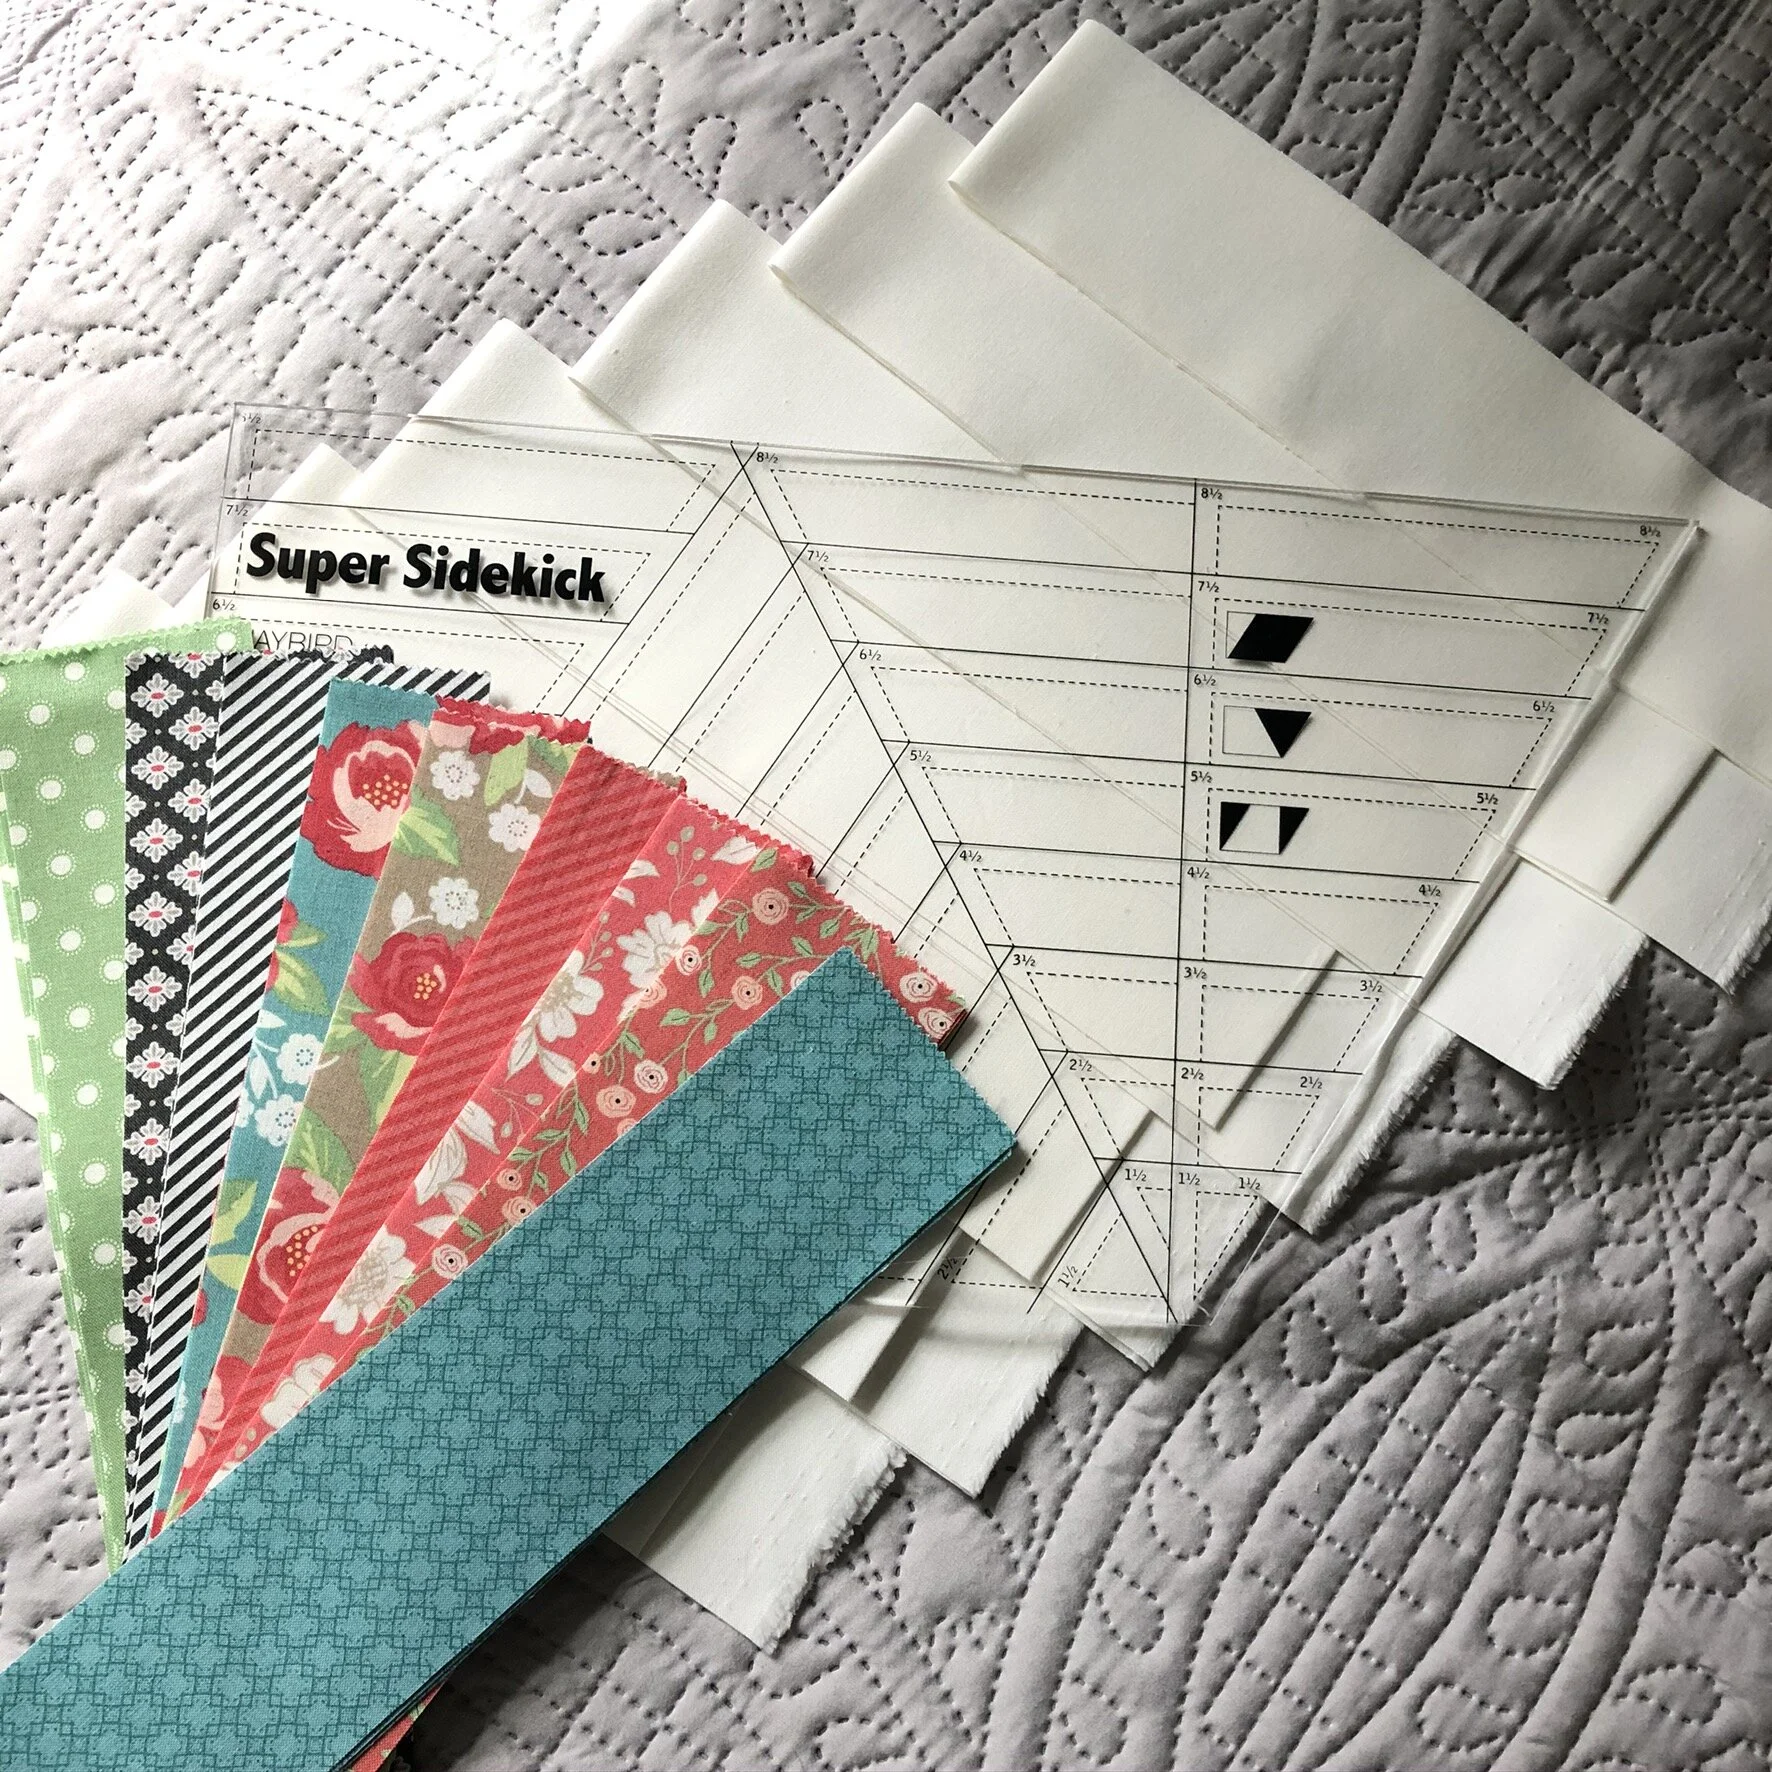
The piecing went together much quicker than I thought that it was going to. Once I had it all laid out and the sections separated, I completed it in a bit over an hour and a half. I tried to be careful not to stress the bias edges unnecessarily, but there are a couple of places that the points aren't exact (which I really noticed when quilting since I got a good look at every spot).

I finished piecing the top last Tuesday, the day the piecing video came out, but I had no clue what I would do with my backing or quilting. I didn't like not having a plan since I've had a plan for all of the other projects, so I don't think I'll jump in with Gazebo either since I already have Candy Dish planned out. I'll have to take some time in the next couple of weeks to dig through the stash and put together what I need to make it work. For the backing, I ended up settling on a solid I had leftovers of and adding in a label and a coordinating 10" square from the Arctic line that was leftover. Cut it to fit the label, and then pieced it with the solid. It used up all of the solid fabric's leftovers, so at least I'm not wasteful in using what I have.

IMG_2976.jpg

I even pieced together my backing fabric. I've done this before and been pleased with the results, so I did it again here. If you've never done this, it's super easy. You take your two batting pieces and butt them up next to each other, not overlapping, and zigzag stitch them together. You can also use fusible, but I prefer just stitching them together. Doing this also used up all of a leftover batting piece, contributing to not being wasteful and cleaning the sewing space.

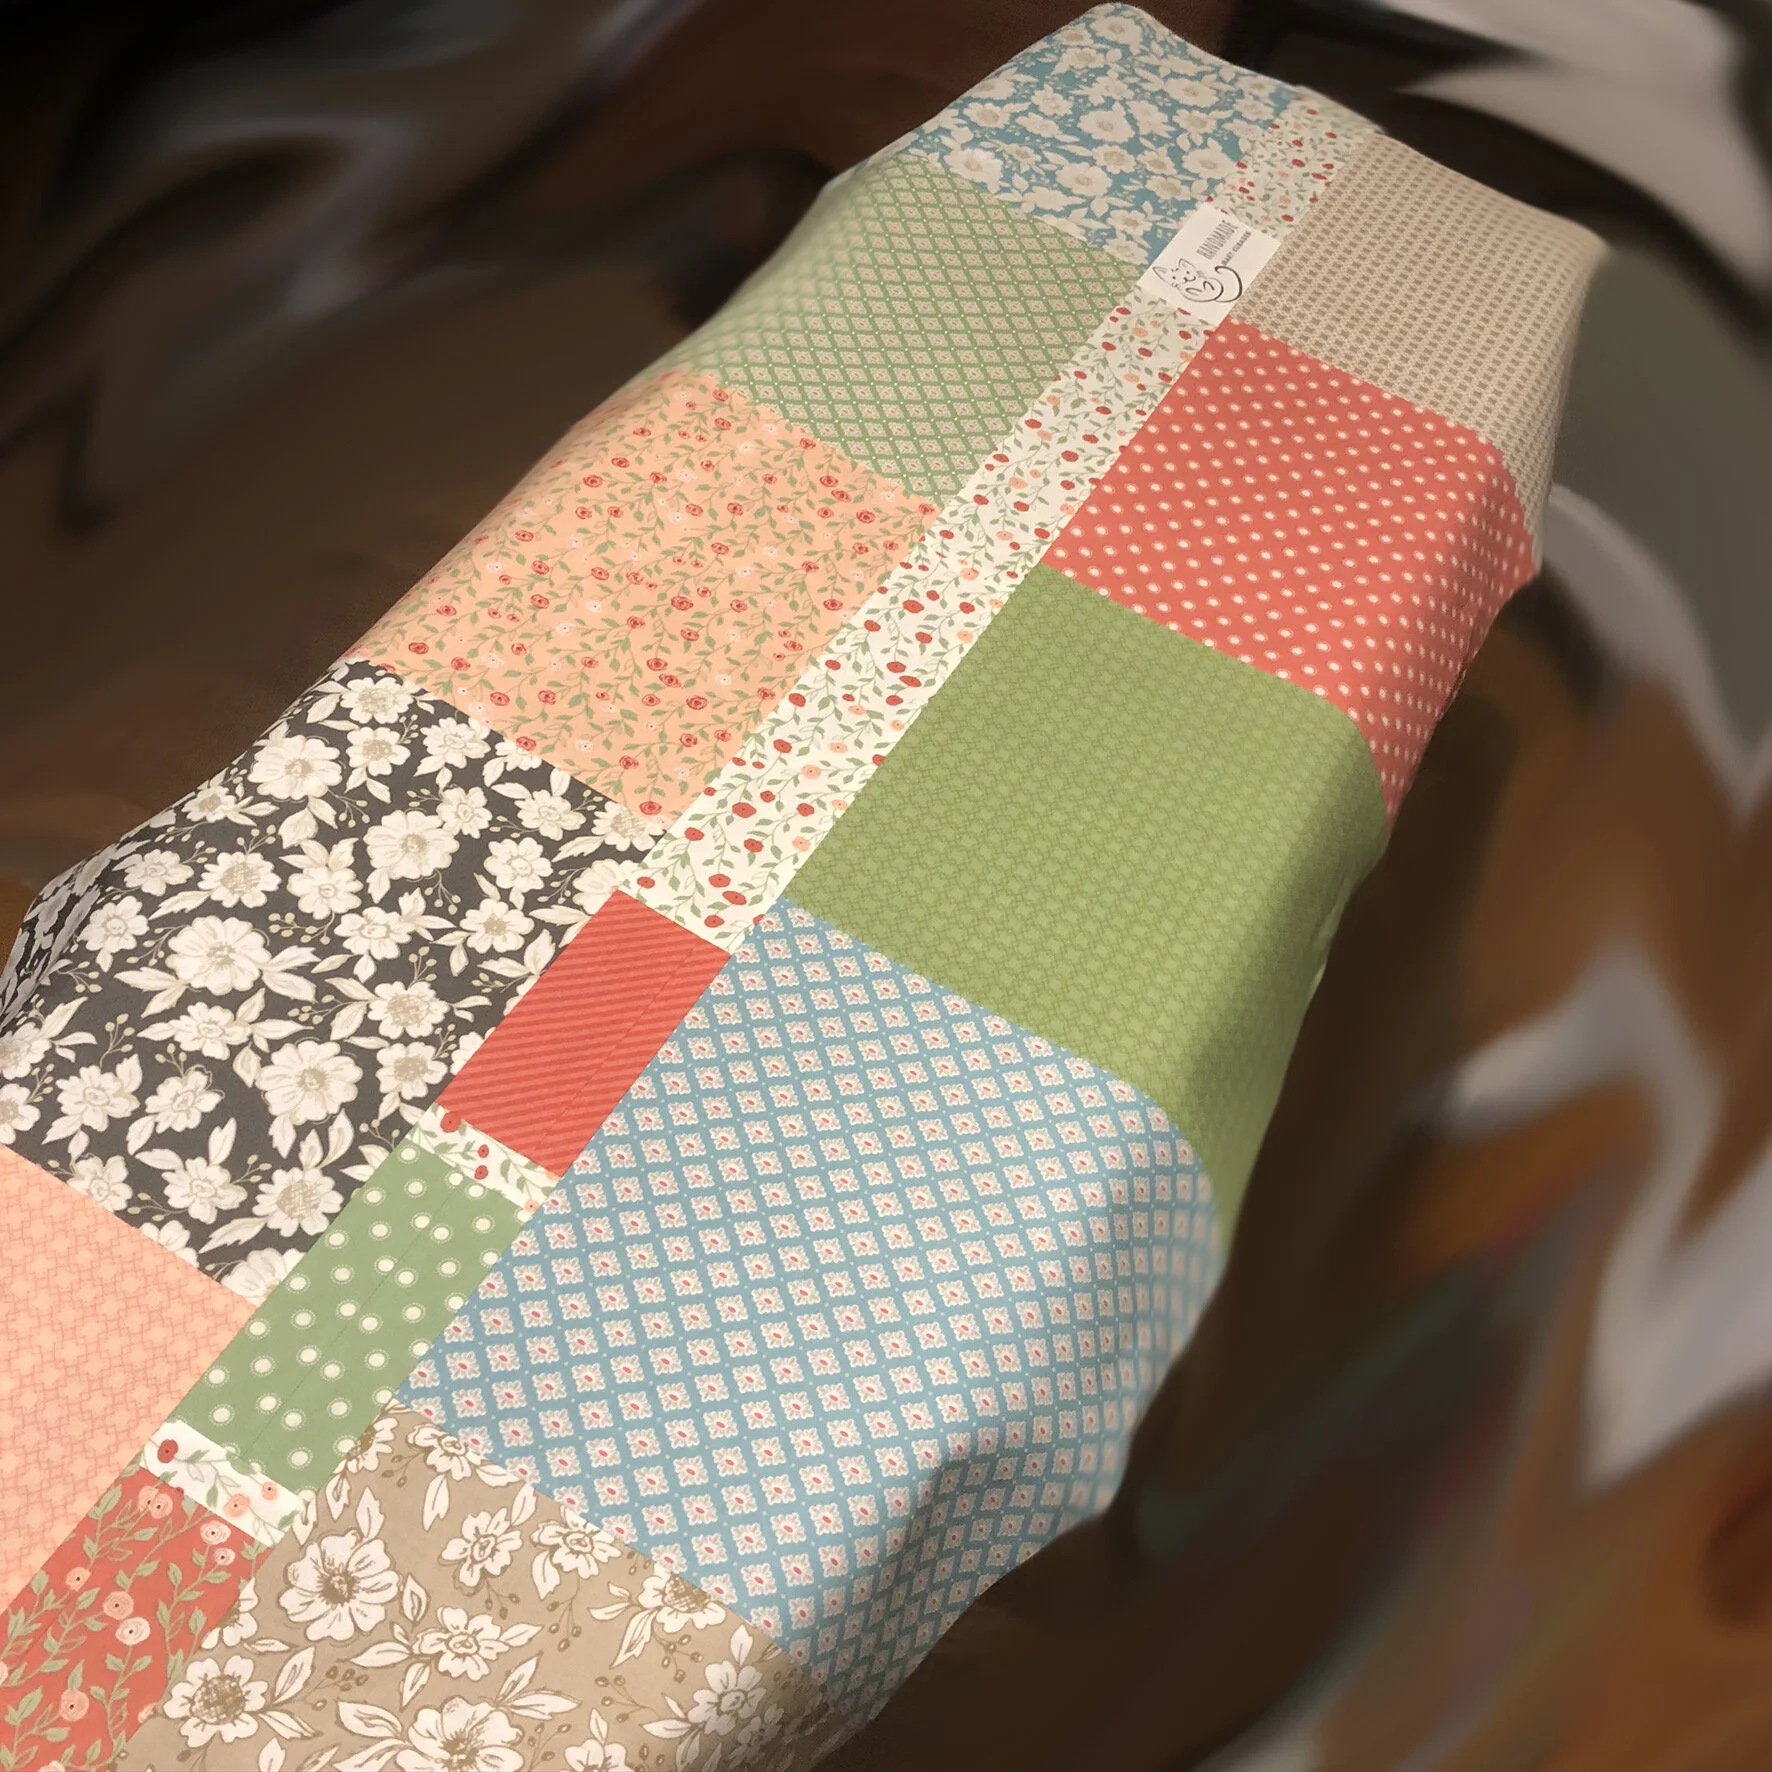
I had zero clue what I was going to do with the quilting, so I just sat down on Friday night and went for it. I ended up doing diagonal lines that crossed into a diamond pattern. I've seen some beautiful free motion quilting in the Facebook group, but instead of using these pieces to practice that, I've decided to go with what I feel comfortable with, at least so far. I'm fairly positive the next project will be straight line quilting as well. Overall, I'm happy with the way it looks. I used a light gray solid fat quarter for the binding, and I think it comes together nicely.

IMG_2971.jpg

Details
Fabric: Arctic by Elizabeth Hartman for Robert Kaufman, unknown white, unknown gray, unknown teal (all from stash)
Thread: Aurafil, 50wt: Piecing, 2000; Quilting, 2021; Binding, 2615
Batting: 100% cotton from scraps
Pattern: Jaybird Quilts Rock Candy
Total Hours Spent: 6 hours, 20 minutes

Journey 2 Nebula - Rock Candy: Cutting & Layout

We've now reached the point in the Journey 2 Nebula, where I got stuck deciding which stash fabric I was going to use, so I stopped with the planning. So, before I started cutting for Rock Candy, I had to do some digging around in the fabric drawers. I'm still not sure about my choice, but I've cut everything, so I'm going to go with it.

I've been a subscriber to the Fat Quarter Shop's Sew Sampler Box from the beginning, and the August 2018 box included the Petite Arctic 10″ Squares by Elizabeth Hartman for Robert Kaufman Fabrics. The included pattern was nifty, but I wasn't interested in sewing it, so into the stash, everything went. I did make one mask with one of the 10" squares and meant to make more, but didn't get around to it. While digging, I came across the squares and decided to give it a try. Since the pattern calls for 5" squares, one 10" square made four charm squares. I didn't want to use all of the prints, so I selected six squares, grabbed some solid from my stash, and got to cutting my diamonds and triangles.

I tried several layouts grouping the colors, pairing the colors, and finally doing a more scrappy look. None of them were giving me the feeling I was looking for. I have plenty of autumn and Christmas decorations, but I have nothing for after Christmas, so my house is very sad when I take everything down, so I decided to go for a wintry look, but this wasn't doing it for me. I walked away for a bit and eventually wandered back and stared at it.

I liked the way the scrappy layout looked, but something wasn't right. I said to myself, "well, let's see what happens when I take the mauve out." I think that's exactly what it seemed to need! It's wintry, and it will coordinate well with the colors that are already in my kitchen. I'm excited to sew this one next week!

IMG_2864.jpg

Journey 2 Nebula - Seaside: Finished!

This week, I finished the first step on the Journey 2 Nebula, the Seaside table runner from Jaybird Quilts. I watched Julie's video that had tips for successful piecing. Even with that, I have a few points that don't exactly match, but I know what adjustments I need to make, so I do not doubt that I'll successfully complete the diamond section of Nebula.

IMG_2555.JPEG

Since I'm not always happy with my quilting, I decided to go simple here to have a finished project. It's not that I can't do the quilting, I'm just the kind of person that wants to be perfect from the start, and free motion quilting is an entirely different skill from any that I have. It also doesn't help that my machine has a painfully small throat space. Even navigating the simple walking foot lines on the table runner got a little cumbersome.

For my binding, I went with a coordinating solid. I usually do a 2.5" binding, but since this is a smaller project, I went with 2.25". I know that the quarter-inch shouldn't make that much of a difference, but it did. It would've been faster to machine bind it, but I prefer hand binding. It always comes out cleaner. Even after attempting it many times over the years, I've never been happy with the finished results on anything I've done machine binding on.

IMG_2540.JPEG

Since I wanted to use up my scraps, I did a pieced backing for this project. I've started adding labels to my projects since I don't always know what I'm going to do with them. When figuring out the backing for this project, I selected the layer cake squares I knew I wanted to use for the front, then laid out the remaining squares. I wanted to make sure to get the label in there and liked the lighter flower print, so I decided to use that as a strip down the center. I wasn't going to have quite enough length, so I went even scrappier with it. I'm almost as happy with the back as I am with the front.

IMG_2558.JPEG

I really enjoyed this project, using my stash and seeing what everyone else is doing with theirs. It's a great way to use scraps, so I'm sure this will be a project that I revisit!

Details
Fabric: Bloomington by Lella Boutique for Moda (Petite Layer Cake), unknown white from stash, Bella Solid from Moda in Lead
Thread: Aurafil 50wt; piecing and quilting: 2000, binding: 5004
Batting: Happy Cloud from Fat Quarter Shop 80/20 Silky Blend
Pattern: Jaybird Quilts Seaside
Total Hours Spent on Project: 13 hours, 24 seconds

Journey 2 Nebula - Seaside: Cutting

I spent a couple of hours this week working on my Jaybird Quilts Seaside table runner. I've used the Super Sidekick Ruler many times over the years and have occasionally found it tedious (truth be told, there are times I find ALL cutting tedious), so I was a little apprehensive about starting.

IMG_2435.JPEG

I was pleasantly surprised this time when the cutting felt like it was a breeze. I'm not sure if it was because this was the first time I was starting with 2.5" strips that I cut myself instead of fiddling with a jelly roll or just excited to be working on the project, but the cutting seemed to go quickly. I did break it up into chunks, so I'm sure that helped as well.

IMG_2438.jpg

I know that some people found the Super Sidekick a little cumbersome for the smaller diamonds, but I think my familiarity with the ruler helped. The only issue I had was picking it back up off the mat to move it, but that has nothing to do with the ruler.

In her video on cutting, Julie recommended trimming off the points for best piecing results. I know that I'm not great at estimating what 1/4" looks like, so I trimmed mine and got a little pile of cute confetti in the process. While I won't be using this for anything, it was still fun to play with.

IMG_2458.JPEG

I've laid out my diamonds and will spend the next couple days making sure I like the layout, and there aren't any prints next to each other that I don't want next to each other.

Journey 2 Nebula - Seaside: Planning & Prep

I have spent a lot of time digging around in my stash, doing some figuring with pen and paper, and throwing fabric around the room in preparation for Journey 2 Nebula. As I mentioned, I wanted to purchase new fabric for this project, since new and shiny is fun, but I also have a lot of it that doesn't have a reason to be in my stash. I like to keep it mostly project-based to actually see what I'm doing with the fabric. It doesn't mean I'll stick with the intended project, but at least I've kept yardage and/or yardage and pre-cuts together.

After much digging, I decided on the Petite Bloomington Layer Cake by Lella Boutique that came in the May 2020 Sew Sampler Box. The pattern that came with the box was lovely, but it didn't speak to me, so I added the layer cake to my stash. It has 20 10" squares, and after putting pen to paper, I worked out that I would have enough for the contrast diamonds and a scrappy backing.

IMG_2357.JPEG

Next, I had to locate background fabric. This is harder in my stash. I've thought about purchasing bolts of a couple of solid basics, but I haven't made that leap yet. After more digging, I found an ancient layer cake that had background and backing yardage. I may revisit this particular layer cake later in the journey, but for now, I grabbed 5/8 yard of the white (I don't know which white it is, but it's likely a Bella Solid) for Seaside.

IMG_2419.JPEG

In addition to the pieced, scrappy backing I assembled this weekend, I also prepped my fabric for the front. I cut the background into 2.5" x WOF strips, and cut my layer cake pieces into 2.5" strips. I know it's a bit controversial, but I prefer to starch my projects, so I starched my layer cake pieces, knowing that they would shrink. This would not affect what I was going to do with the fabric, so I went for it.

IMG_2421.JPEG

I've completed several Jaybird Quilts patterns, so I'm familiar with how the rulers work, but I have found any time I participate in a quilt along I always pick up some tidbit, so I'm looking forward to starting tomorrow!