

NEW! Silly Snaps - Monster Kitties
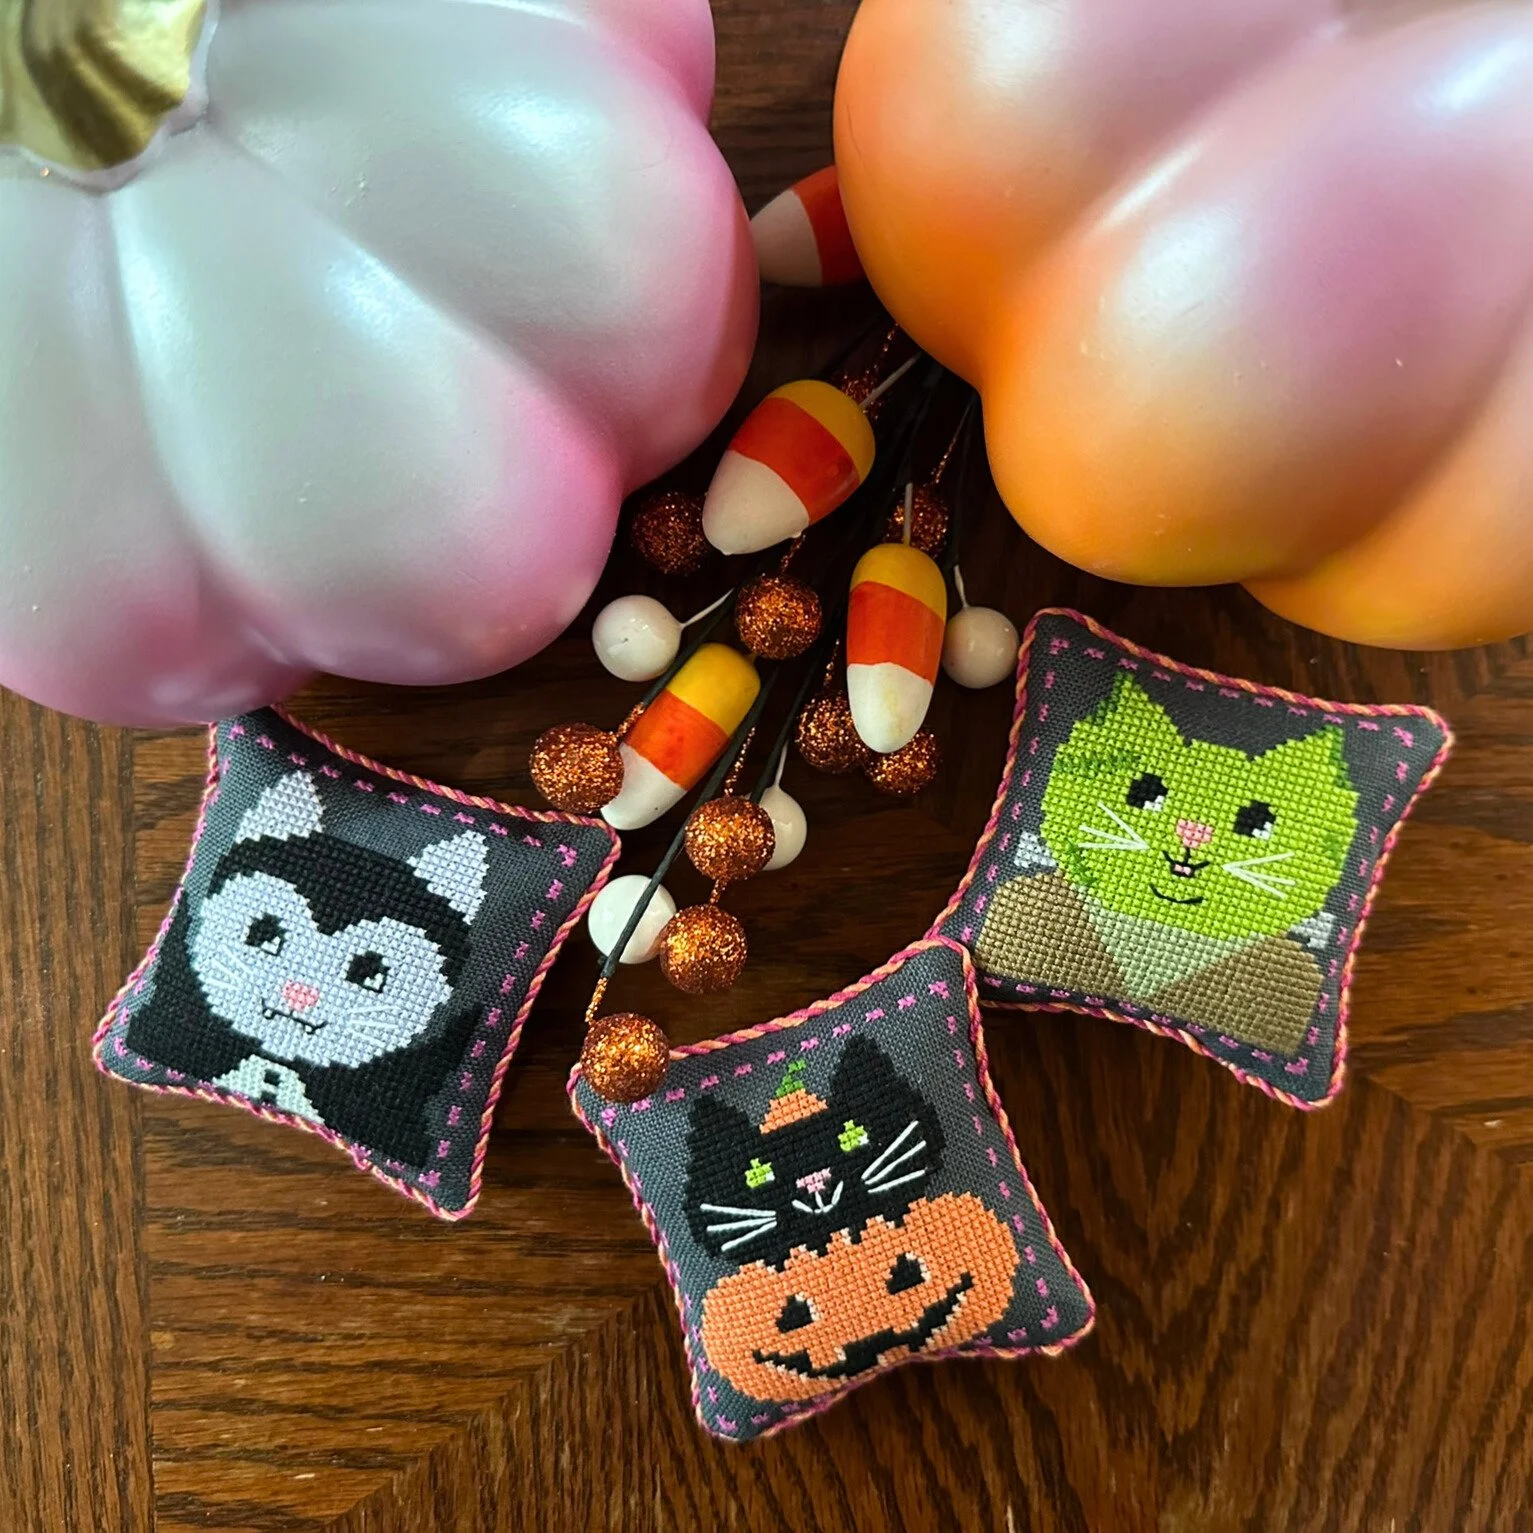
It's been a while since I designed anything, but I was inspired this summer by kitties, of course. I don't know if I've shared, but I'm a cat lady. I have one elderly kitty named Minnie. We've been together for 15 years, and we've been through a lot together. One of my favorite things to do in the evening is flip through cat stories on Instagram.
Anyway, I think I've also shared I'm not much into Halloween (scary movies sign me up, Halloween, eh), but I am a fan of cutesy Halloween. I thought about Halloween and kitties and what I'd like to have up in my house, and these adorable monster kitties were born.
I wanted something small since I'm a slow stitcher, and it could be finished differently depending on the stitcher's preference. I also wanted something that could be expanded, like a series, so Silly Snaps was born. I've already got ideas around other themes. Quick little projects that are cute and likely involve a cat in some way.
If you wanted to finish them as something other than pillows, they could be finished individually or as one piece, horizontally or vertically, with a few stitches between the frames.
You can grab them as a set, or individually in my Etsy shop here.

Tiny Temperature Rainbows Cross Stitch Pattern!
It’s been quite a while since I’ve posted things on the blog. I’ve been pretty busy, with what, I could not tell you, but there’s been a lot of crafting going on and a lot of work going on in my day job.
Anyway, I do have something to share! I’ve created my first cross stitch pattern. I jumped on the temperature train! Okay, it’s not my first cross stitch pattern, but it is the first one that I’m sharing with the world. Since it makes me so happy every time I walk by it, I put together a pattern for it!
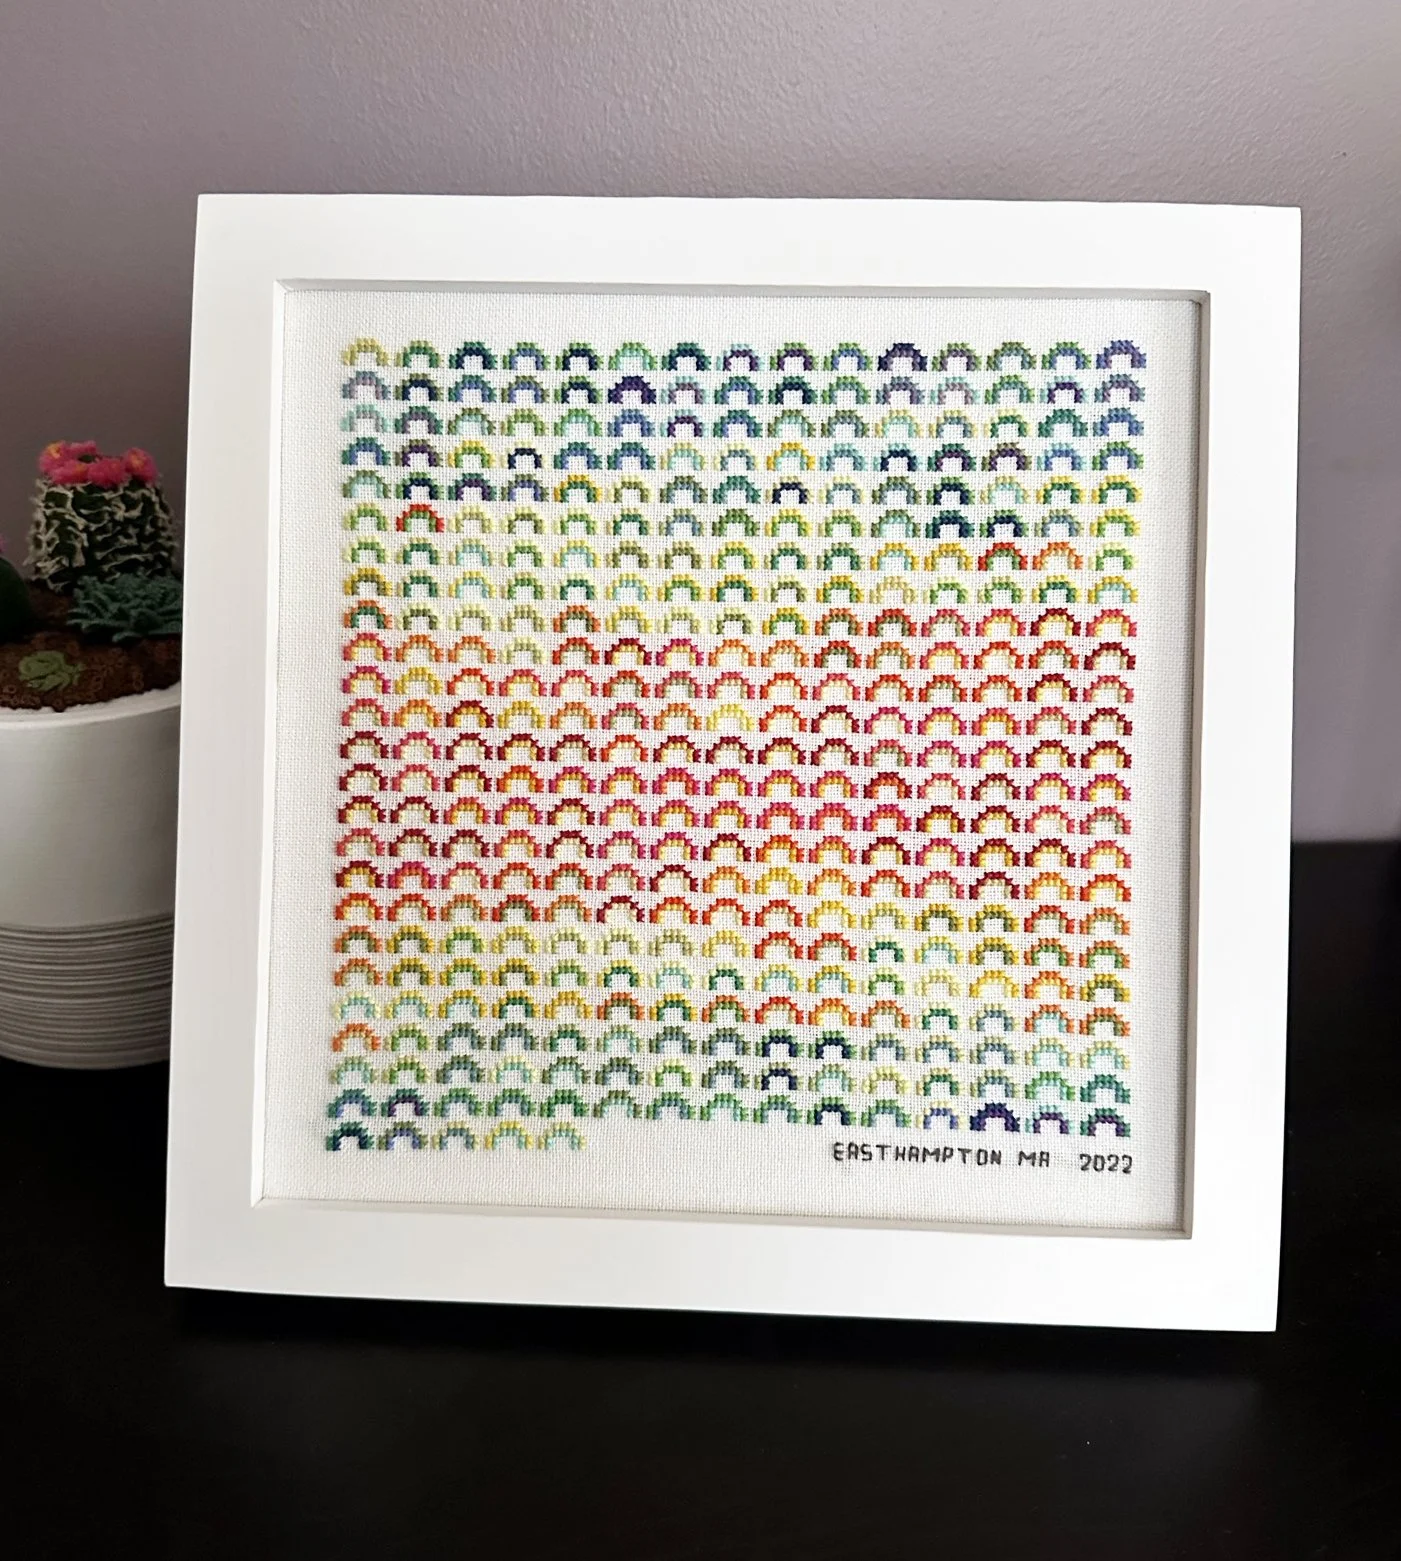
The pattern is available in my Etsy shop. It is $10.00 and includes the pattern in both color and black and white, an alphabet so you can create your location, a close up of the actual rainbow pattern in case you need to see it a little bit better, and a blank chart area so you can chart you location. It also includes the DMC and Paintbox Crafts Embroidery Floss temperature chart (with a blank chart if you’d prefer to create your own color scheme), plus charts to record your highs and lows in case you get behind (like I did).

I used antique white 32-count Lugana from Zweigart and Paintbox Crafts Embroidery Floss for mine. It was a super fun project, and I love it even more now that it’s done and I get to enjoy it.

January Calendar Crates + Tiny Sweater Pattern
It's been a very long time since I shared anything here on the blog. I've mostly been posting to Instagram, and even that has been sporadic lately. I've been thoroughly enjoying everyone else's posts, though! I don't know that there's a particular reason I haven't been posting other than it's winter, and I have a tough time in the winter.
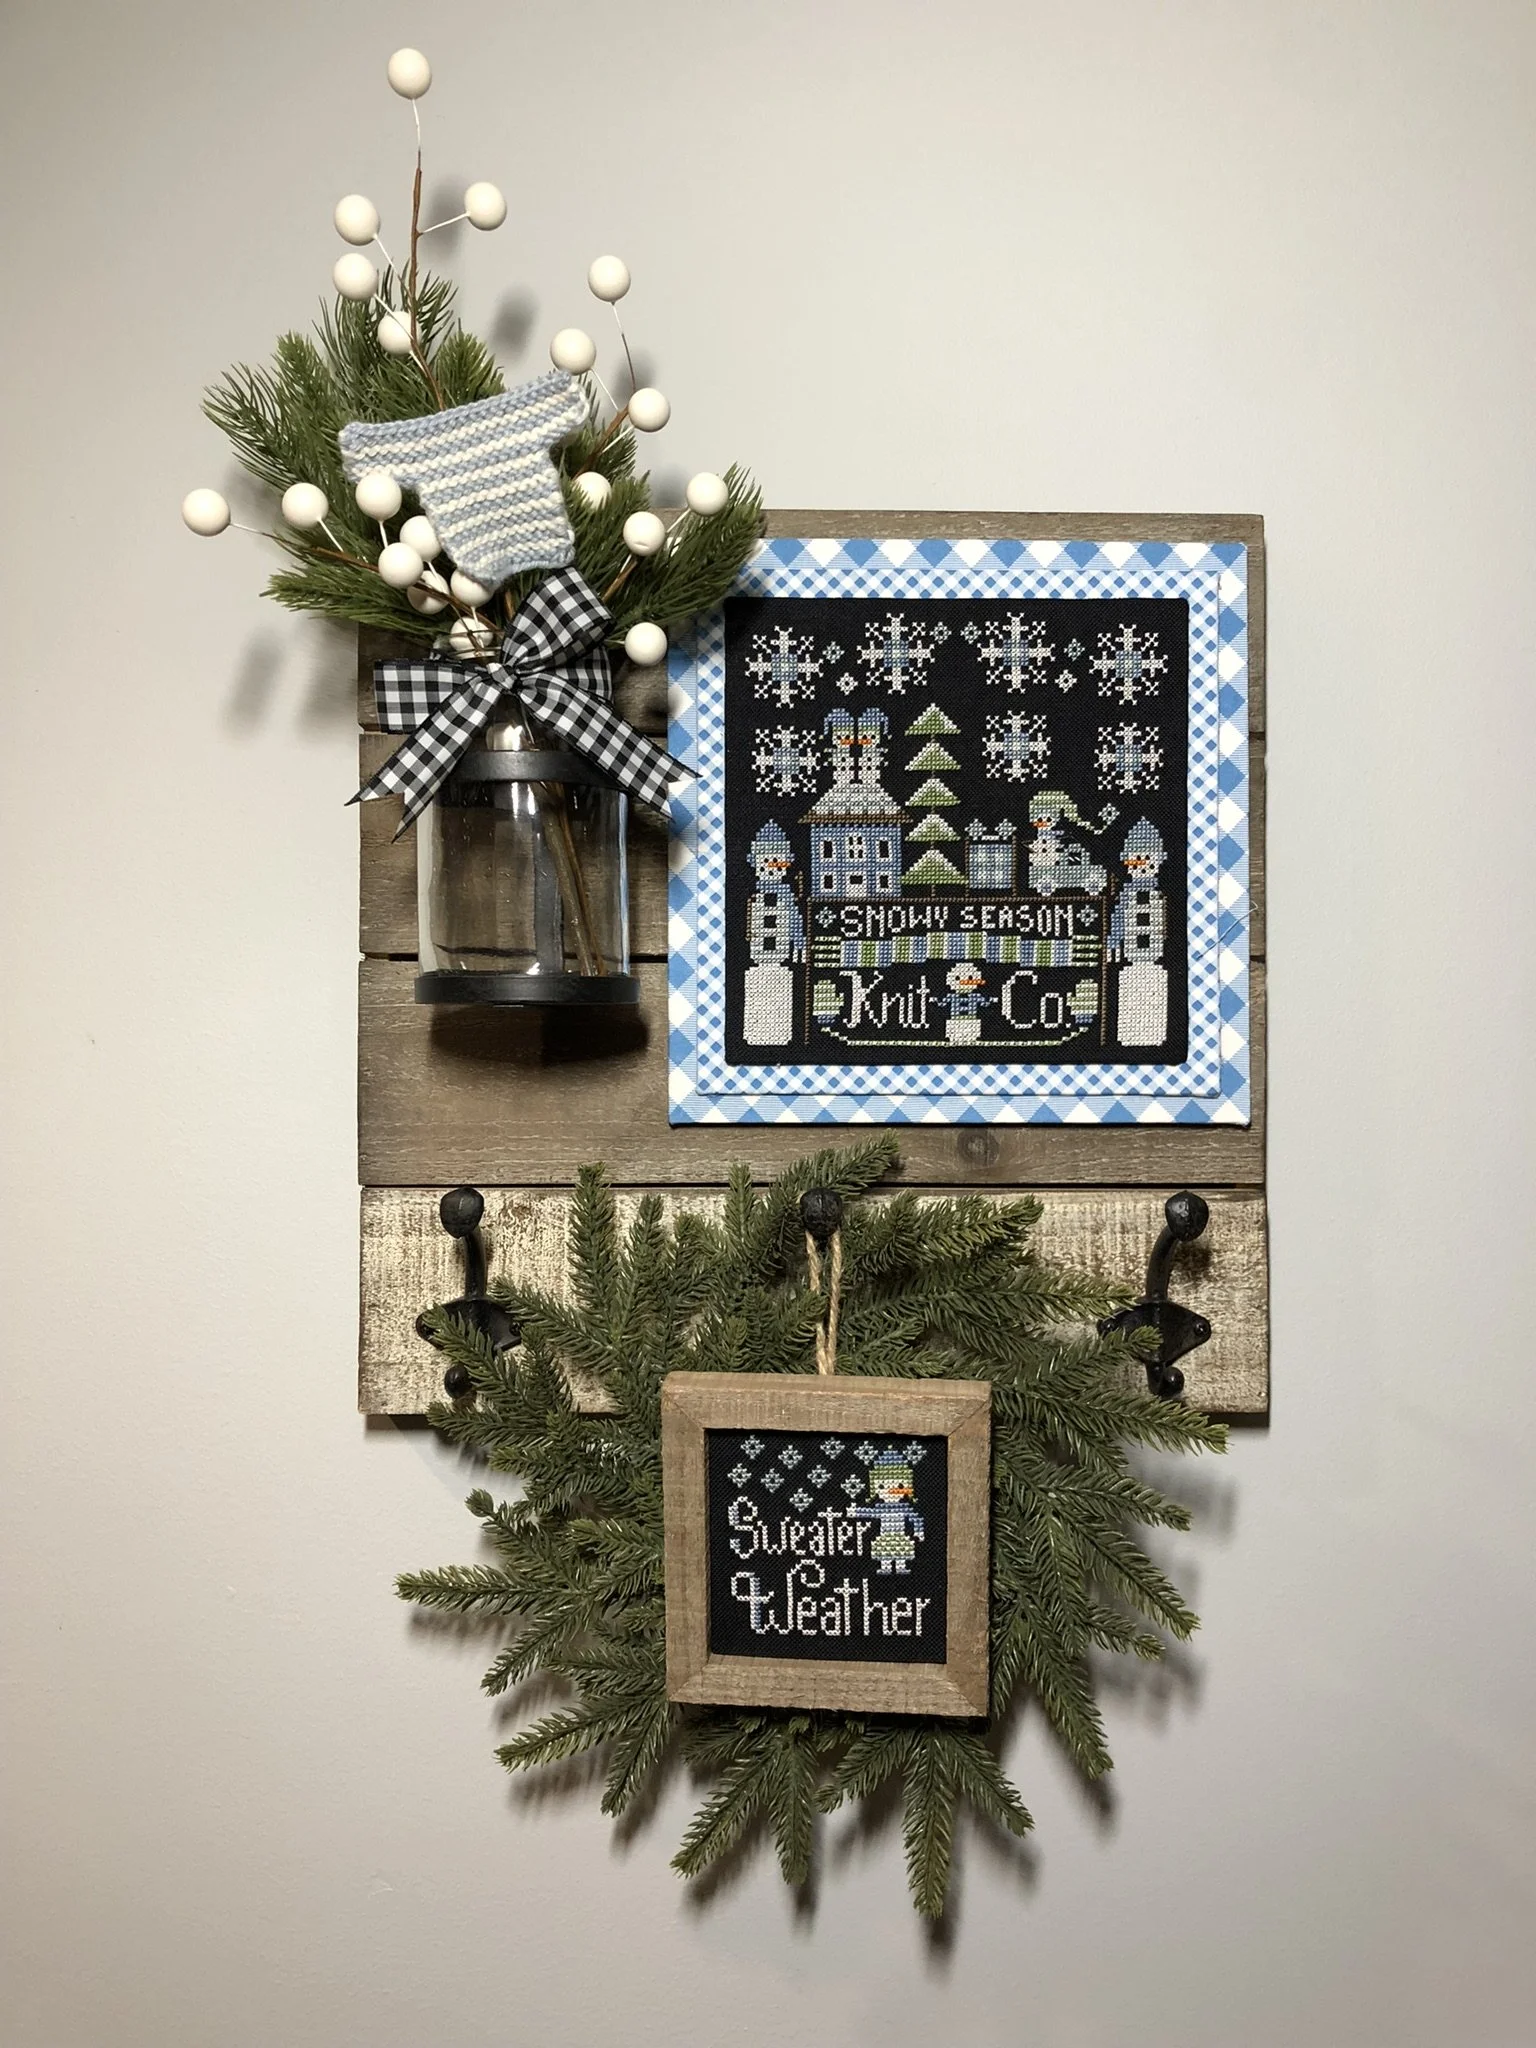
Since the first release, I have been stitching all of the Calendar Crates from Stitching with the Housewives. I finally FFO'd the January version even though the stitching has been finished since the beginning of the month. Since it was somewhat knitting-themed, and that's my day job, I decided to add a little knitted element!
I made a really, really lazy tiny sweater to go with the January Calendar Crate! It's just a worsted weight yarn knit on size US4 needles to give it a little bit of density. I was also super lazy about finishing it. I bound it off a little too tight but didn't go back and fix it, because like I said, lazy knitter over here.
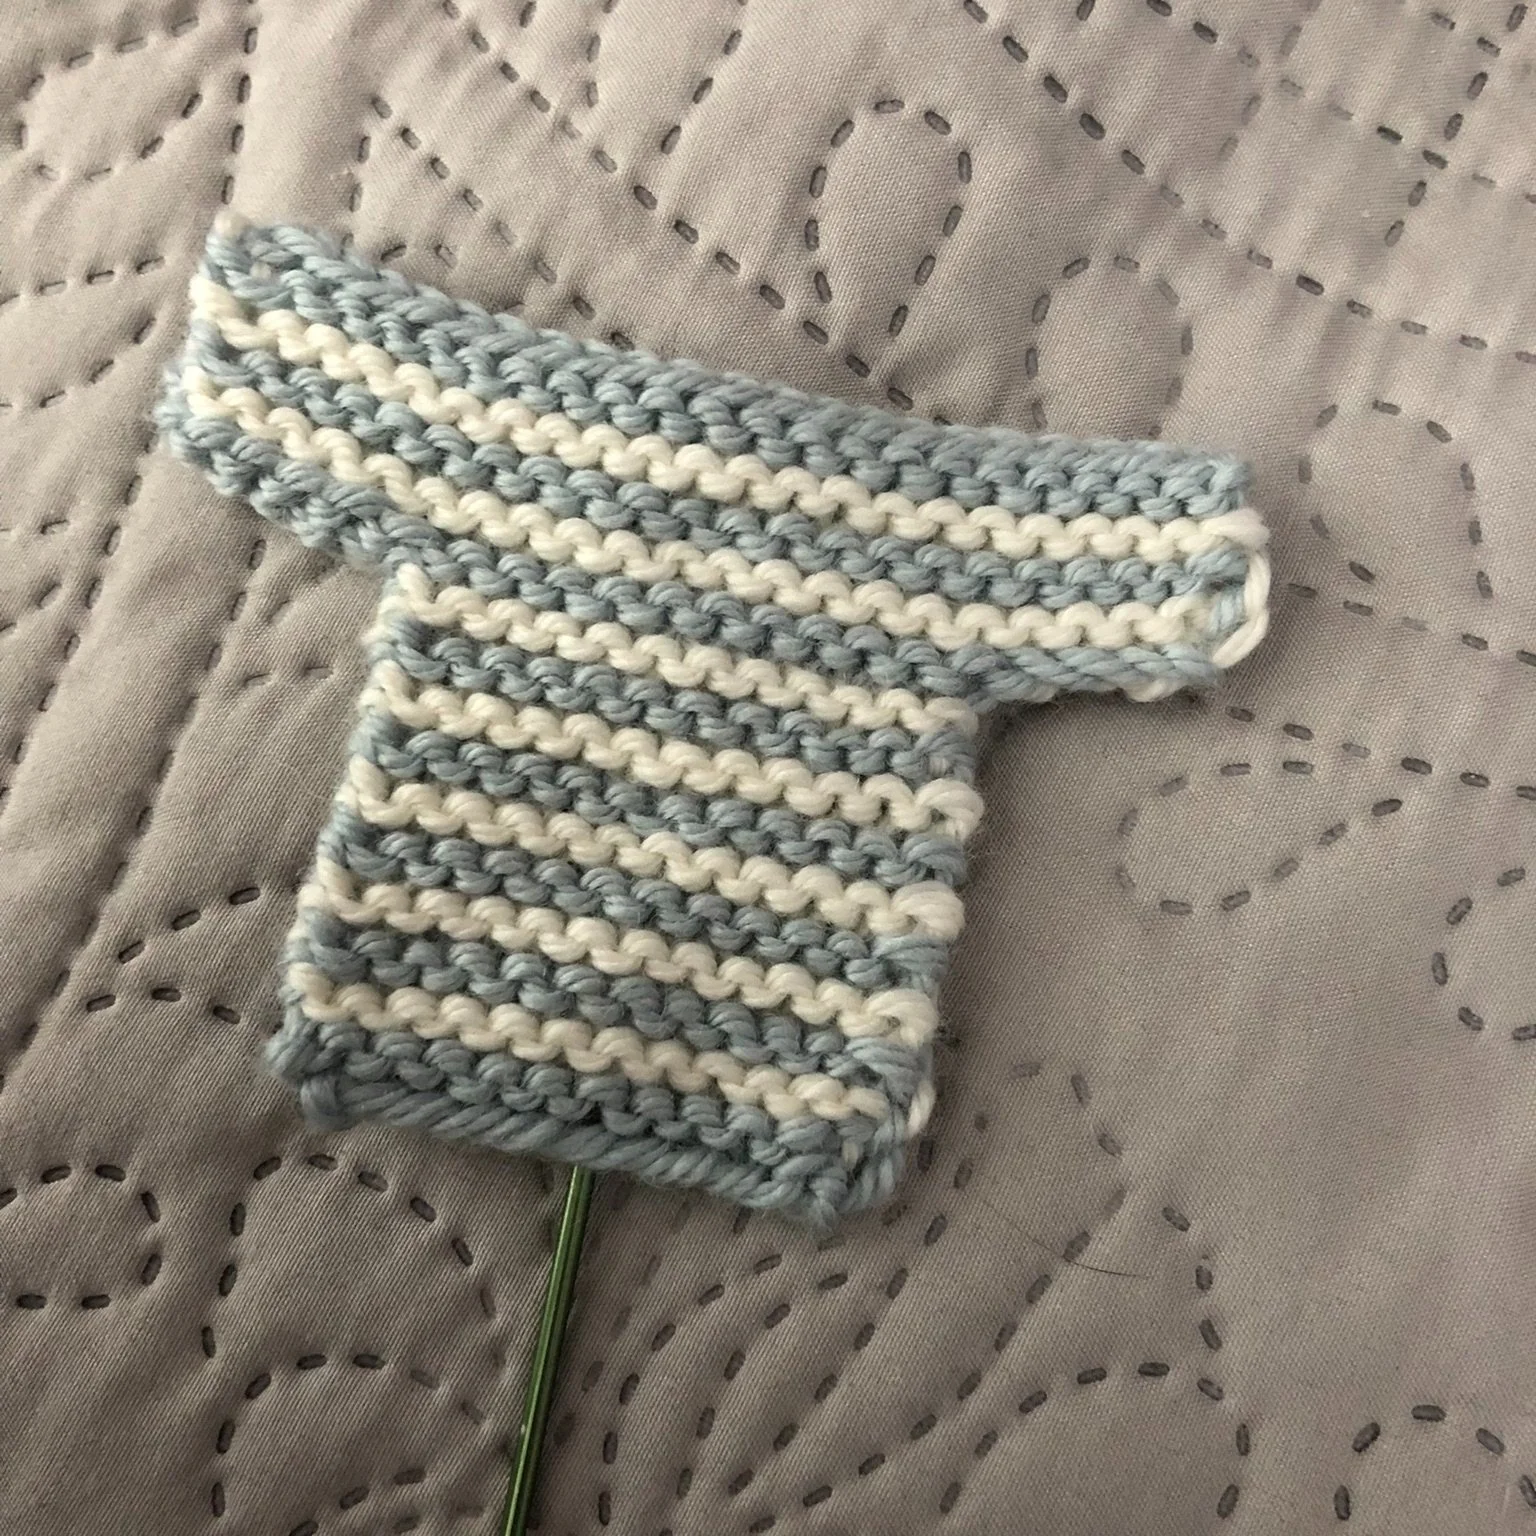
I used Debbie Bliss Cashmerino Aran in colors 202 and 25. I suppose it's sort of a fancy yarn for something so small, but I do love the yarn, and again…day job.
I quickly wrote down the pattern as I was working on it and figured I'd share it here for anyone who wants to make one too.
Tiny Sweater Pattern
In MC CO 12 sts
Knit 1 row
*Change to CC
Knit 2 rows
Change to MC
Knit 2 rows
Repeat from * 3 more times
Change to CC
Knit 2 rows
Change to MC
Knit and CO 6 sts at end of row
Next row: Knit and CO 6 sts at end of row
Change to CC
Knit 2 rows
Change to MC
Knit 2 rows
Repeat this stripe sequence one more time
BO
I just used an old DPN to thread it through the back to help prop it up in the jar. I know it's not perfect, but overall, I'm pleased with the result, and it's another project that makes me smile when I look at it!


Sew Sampler Box February 2021
The February 2021 Sew Sampler Box from Fat Quarter Shop found its way to my mailbox this morning! It arrived a day before I was expecting to receive it, so it was a pleasant surprise.
This month's box is themed "Make a Splash," and it certainly does. The contents this month are colorful, fun, and happy. It's definitely nice to see so much color, especially as I'm looking out the window at far more snow than I'd like to be seeing. And it has reached the partially melted, gross, and dirty phase.

I wasn't super surprised with part of the box. The preview from Fat Quarter Shop gave it away a bit, but I'm glad because I was thinking about purchasing anyway. Let's get on with what's in the box!

This month's fabric is the My Favorite Color is Moda Quilt Kit. It is a collection of 12 fat eighths, and the My Favorite Color is Moda Quilt Panel.
So much fabric, you say? I am so excited that this month's pattern only requires about a yard and a half of additional fabric for borders and binding, and there's a pretty good chance many of us already have it in our stash since it's a basic. The pattern is the Color Factory Quilt Pattern. It highlights the My Favorite Color is Moda Panel and finishes at 48 1/2" x 54 1/2". It would look great hanging on the wall in my sewing area.
Clover Water Soluble Pencil Set - 3 colors of a classic water-soluble pencil, perfect for marking your fabric.
Teal Magnetic Spool Pin Holder - Not only is this cute, but it is also useful. This cute pin holder has a magnet, so if you knock it over, as I recently did with my pin container, you don't end up with pins all over the place. It'll definitely save me from another pause in sewing to crawl around on the floor picking up pins.
Spool of 50wt Aurafil - My preferred thread! I received color 2110, which is called light lemon.
I'm so excited about this box. It just makes me smile looking at it!

Sally's Baking Addiction Chocolate Soufflé Review
I have checked out Sally's Baking Addiction for years. Any time I need a dessert recipe, it's one of the first sites I head to. Every month she features a baking challenge. This year, I've tried both of the recipes, but this post is about the Chocolate Soufflé recipe for February.
I've never made a soufflé before, but I've certainly watched the French Chef episode where Julia Child makes a cheese soufflé plenty of times, and it didn't seem overly scary, so why not give it a try with this chocolate version. I'm not usually afraid of dealing with egg whites. I haven't done it many times since the recipes I usually use don't include whipped egg whites, so maybe it's just false confidence, but the worst I can do is beat the crap out of them and ruin it. It helps that this was only for the two of us, and if it didn't work out, we had ice cream in the freezer!
Sally's directions on the blog are fantastic for someone who has never attempted a soufflé before. There are notes on where you might hit a snag and helpful tips for completing the recipe.
I didn't have the perfect ramekins for the project, so I went with my 7-ounce Corningware dishes. They have a wider lip, so I didn't get the impressive picture with the lift, but I can tell you that the soufflés did their thing and rose, even if you can't see it in the finished product. If I were to make these for company, I'd get the right container.
There are only two of us, so I decided I'd also take the recipe's tip for preparing ahead of time. We had the first pair on Saturday night and the second pair Sunday night. I thought this would also be a great way to test the make-ahead aspect of the recipe.
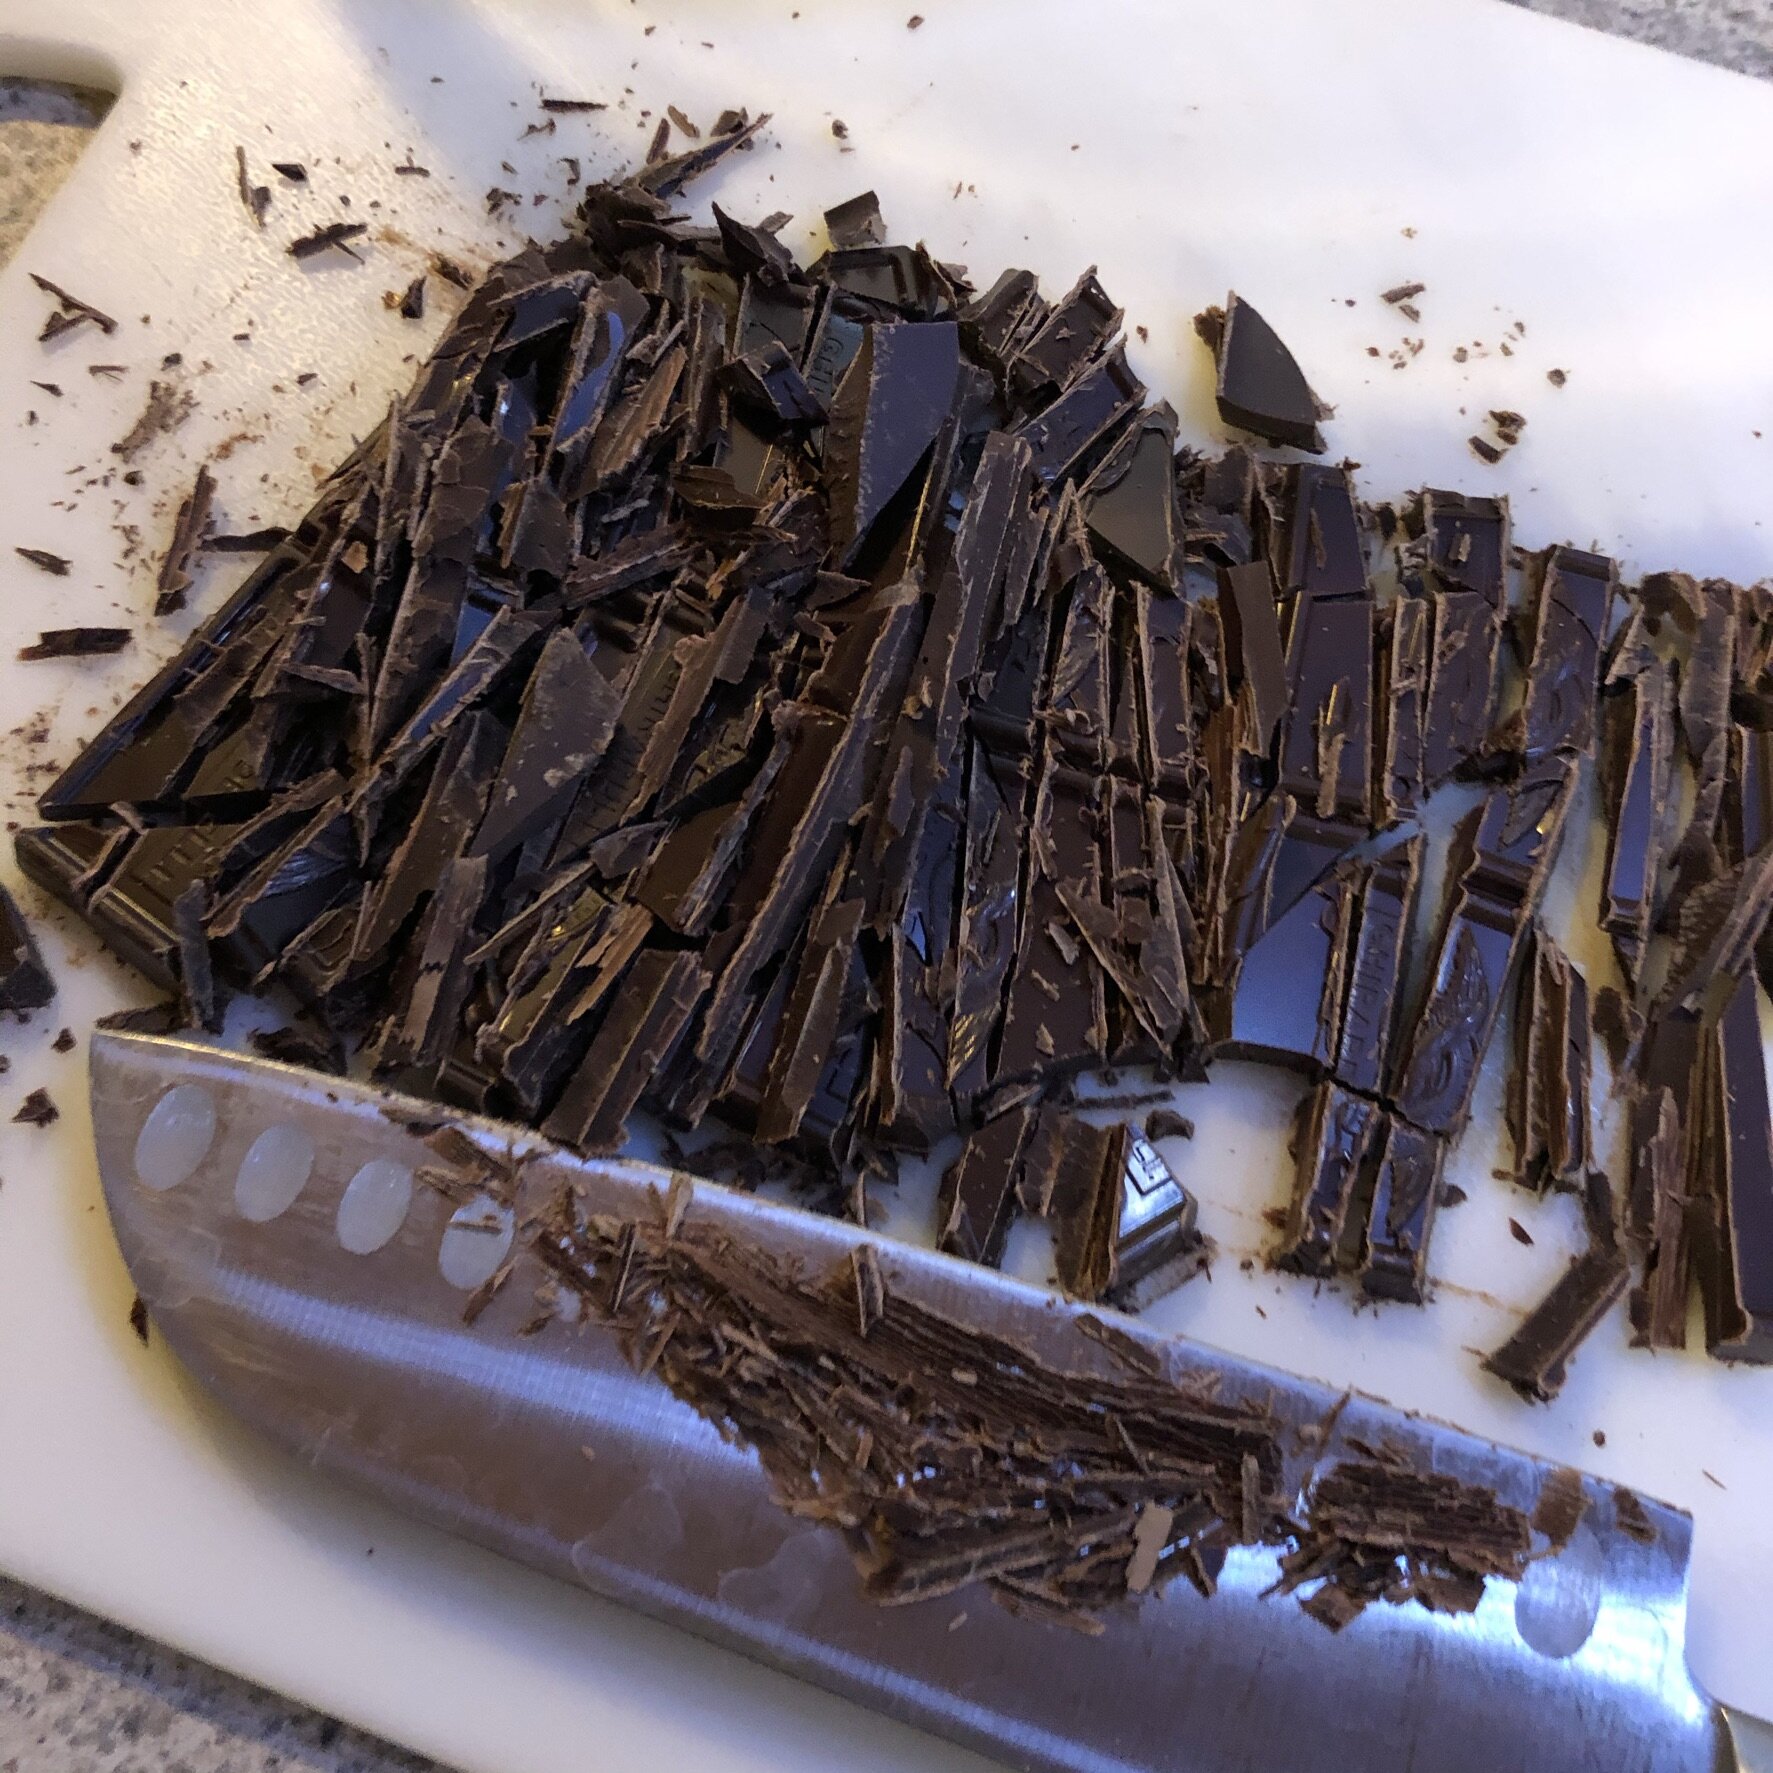
With the clear directions, the mixture came together quickly. I was surprised how fast it went. For the chocolate, I used a Ghiradelli semi-sweet bar from the baking aisle. I've used the Ghiradelli bars many times and have always been pleased with the chocolate flavor.
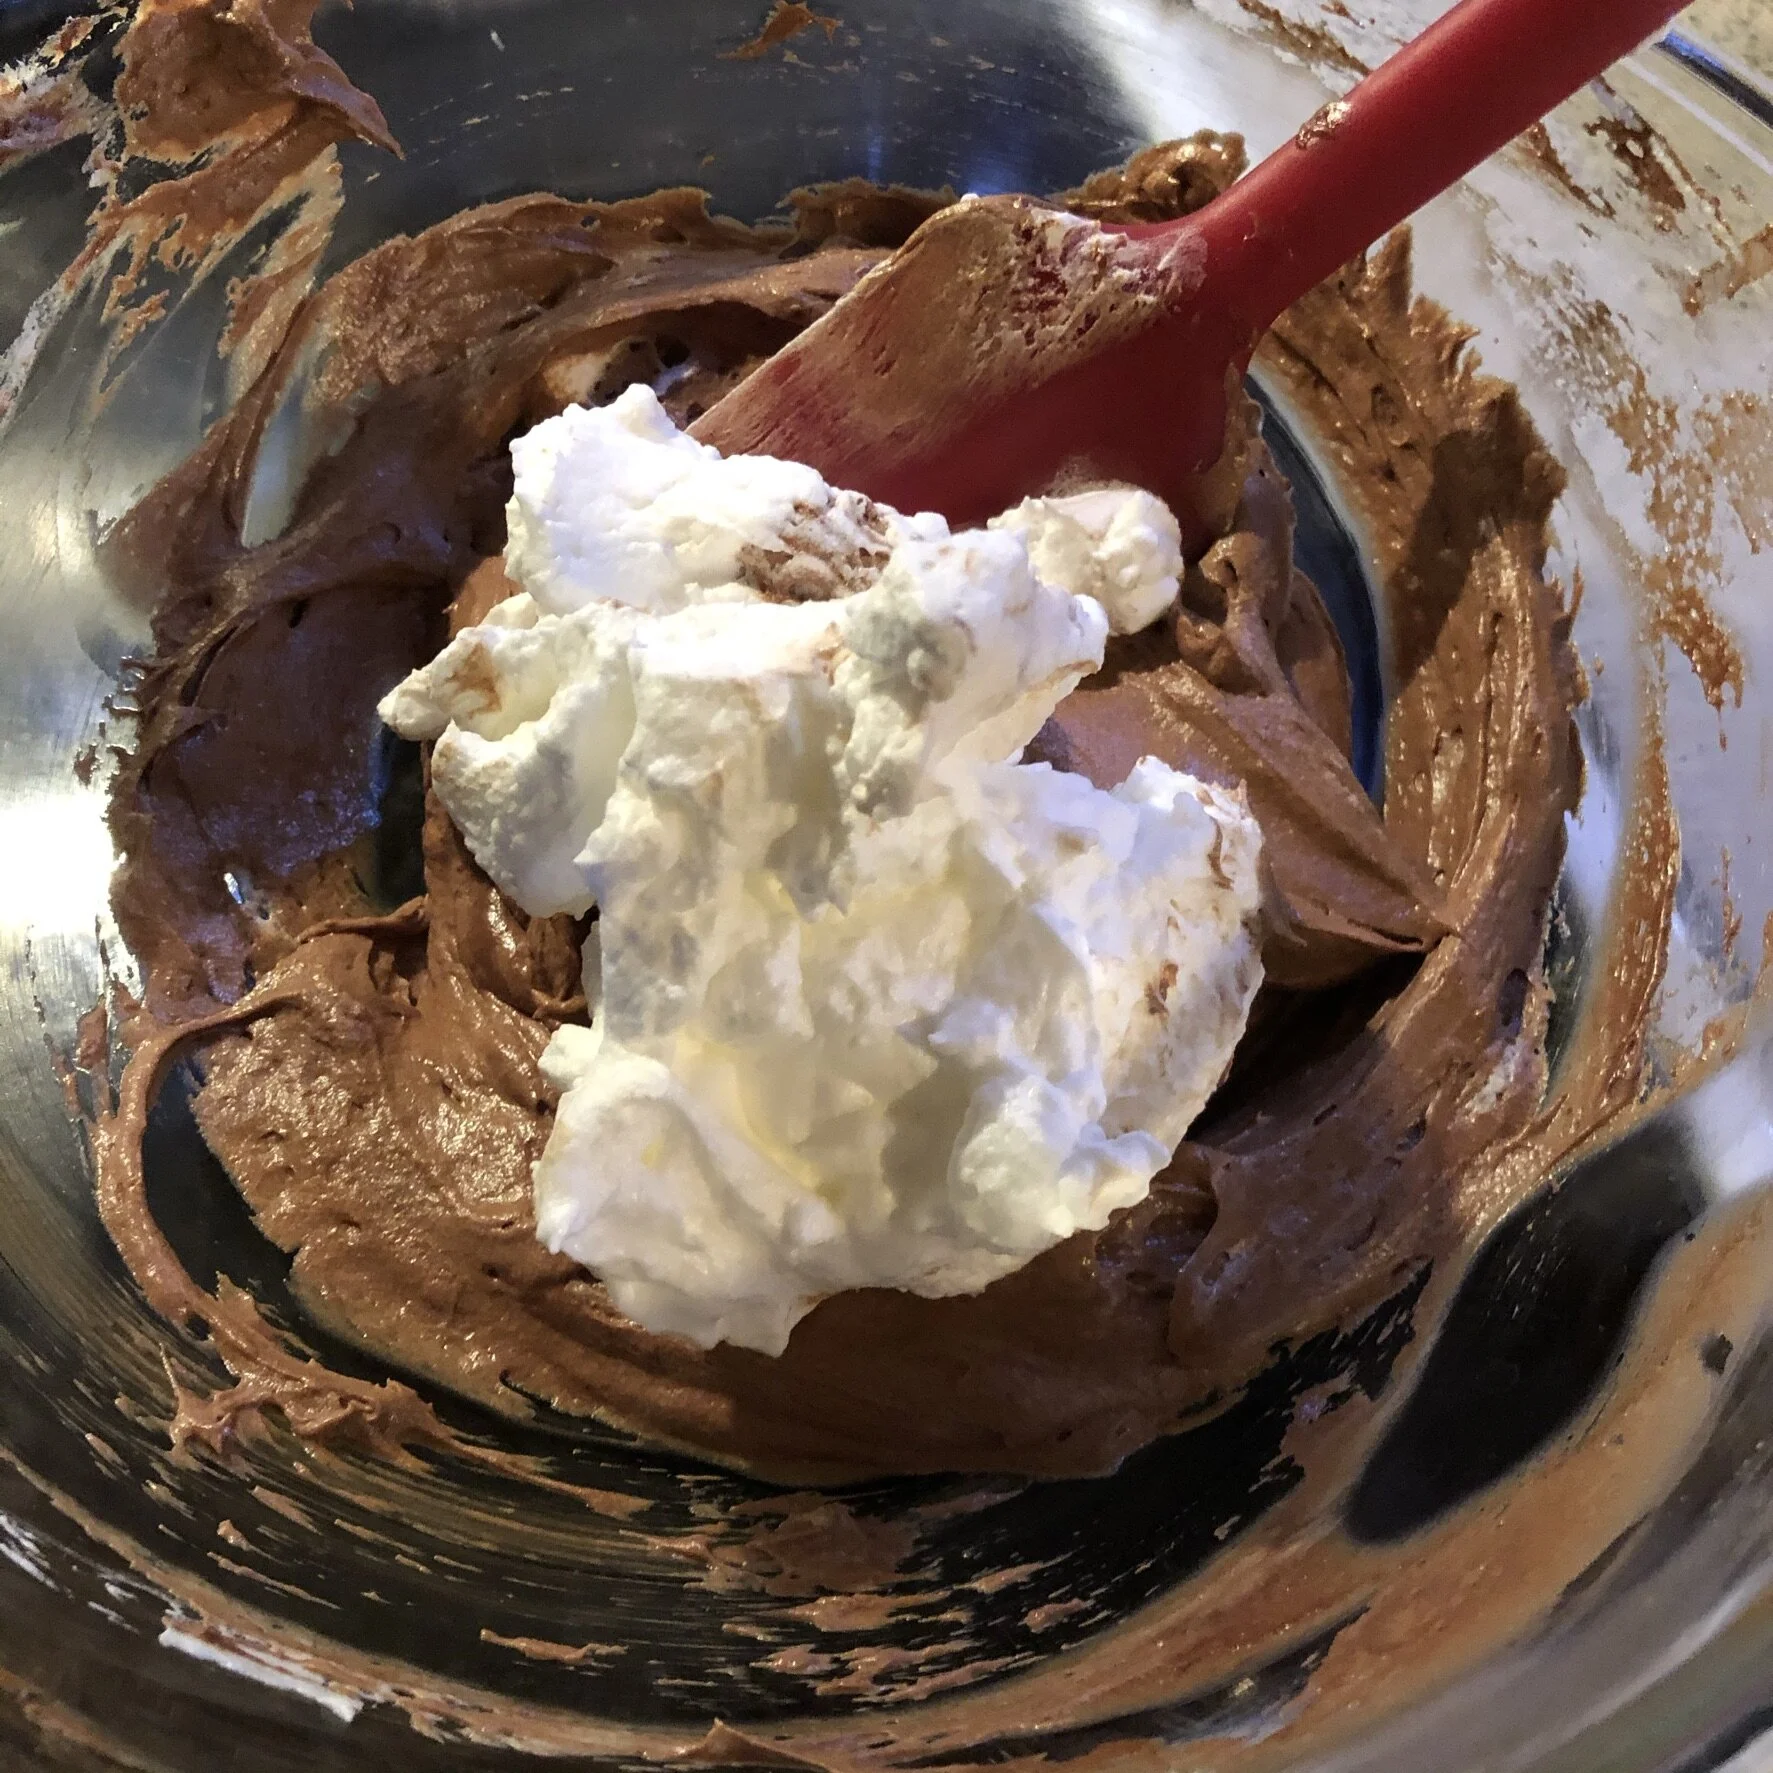
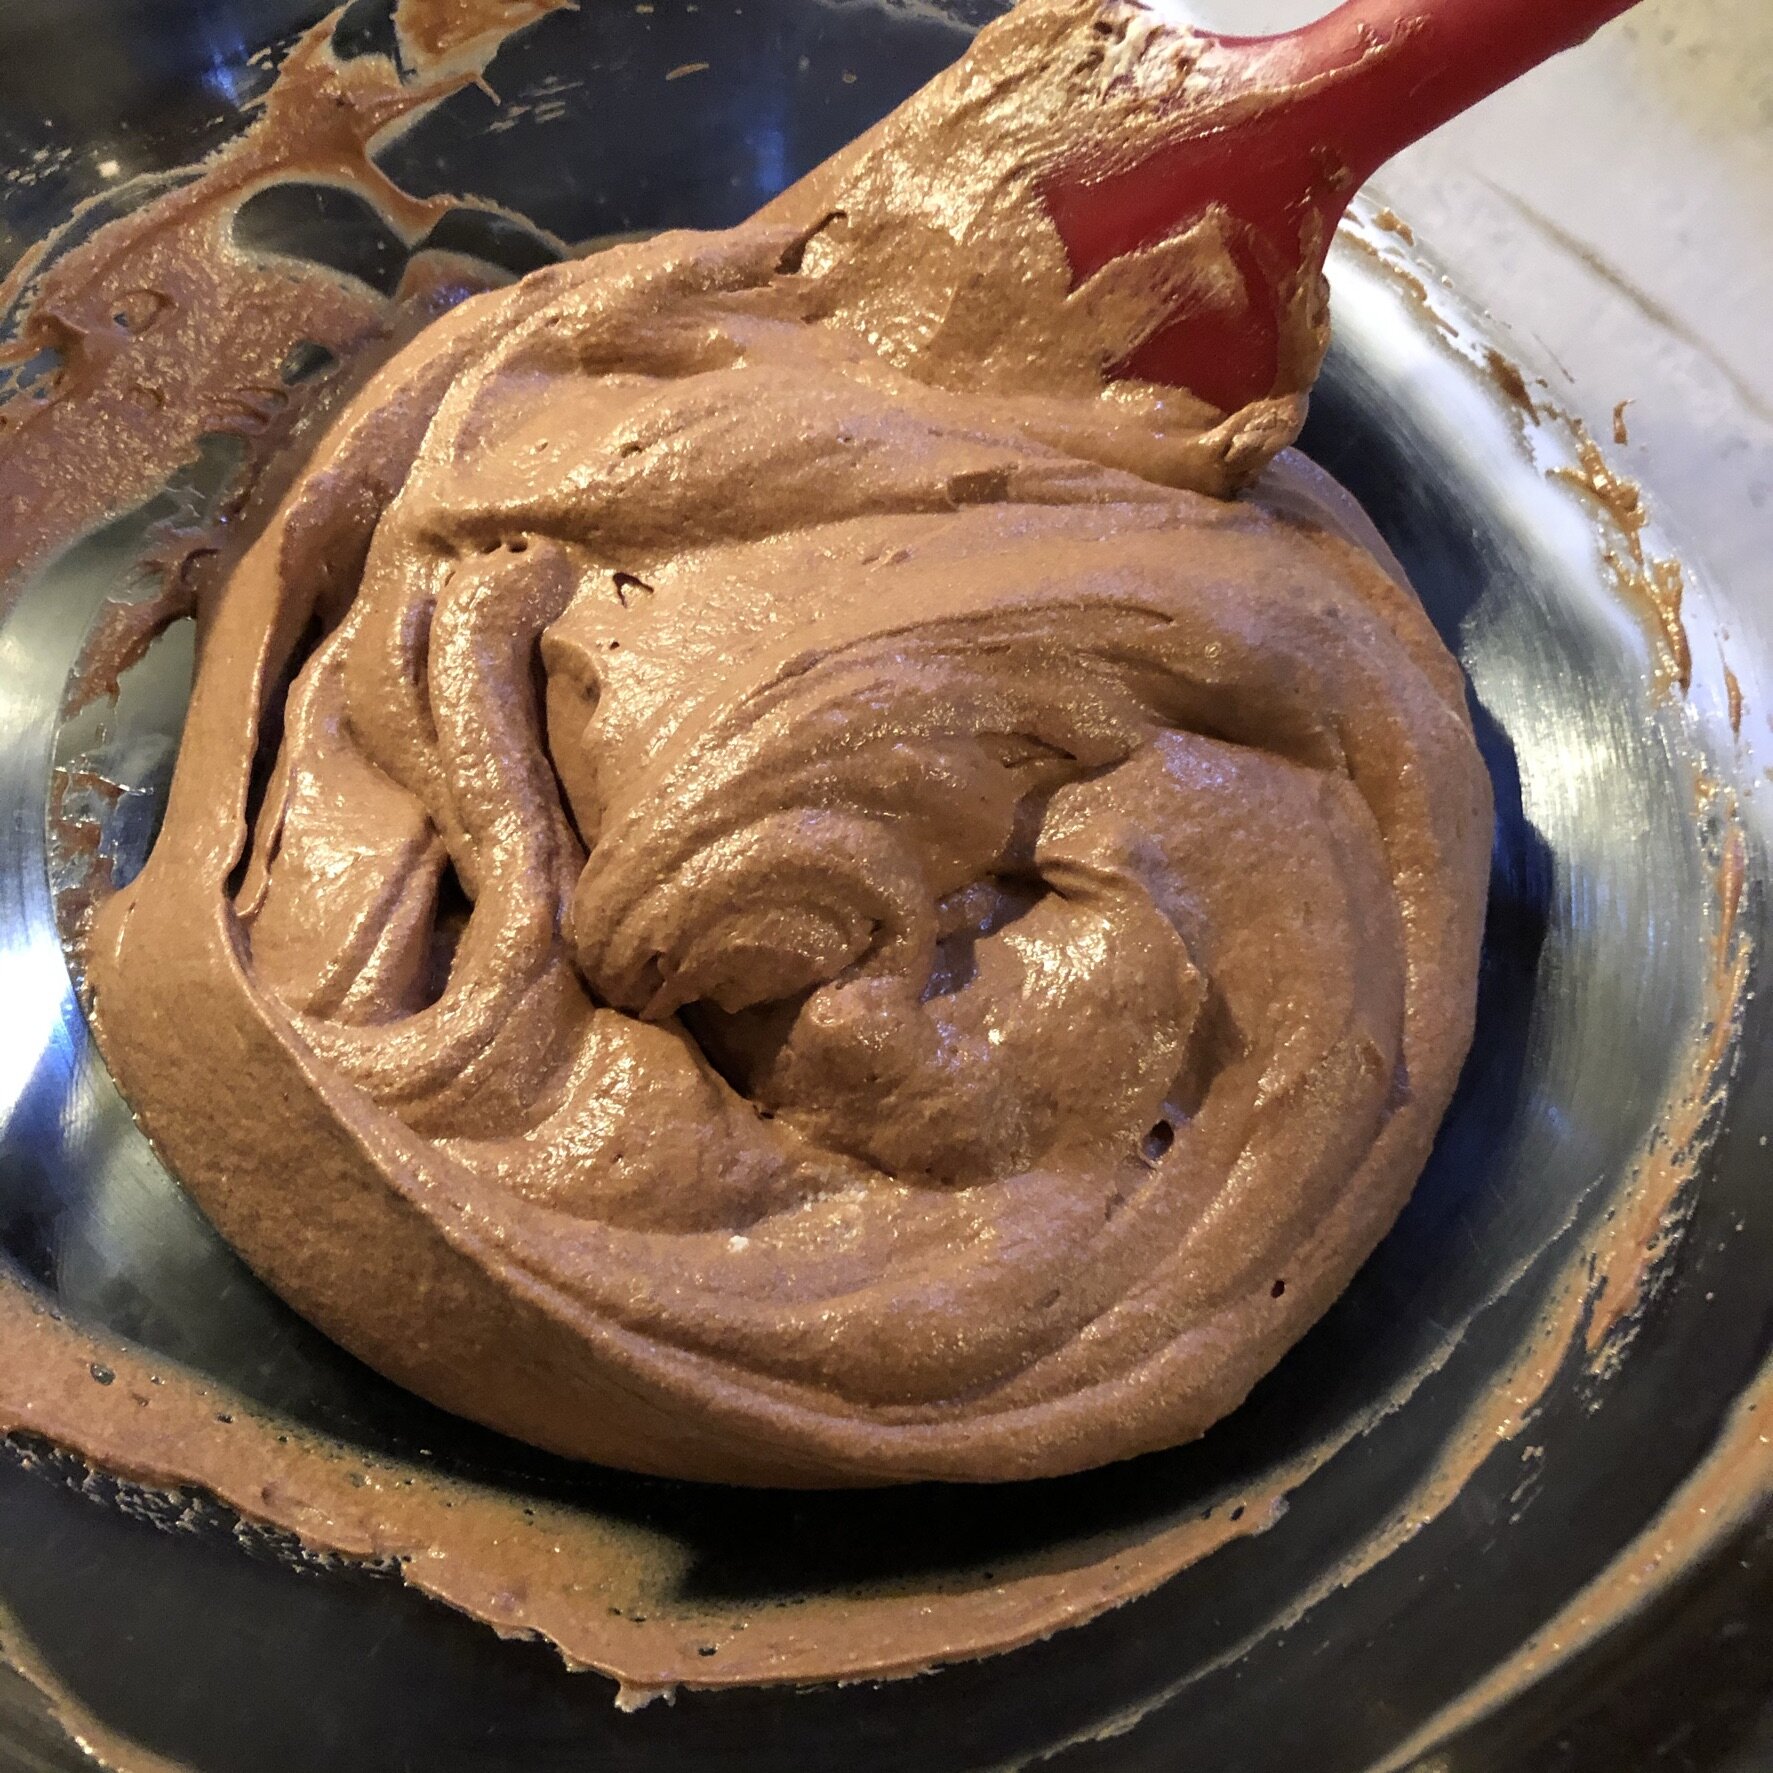
I did use my Kitchen Aid Stand Mixer for the egg whites, because why wouldn't you? I added the egg whites in three additions as the recipe recommended. I was a little nervous about deflating all of the air that I had worked into the whites, and it stayed light and fluffy. The finished mixture was smooth and shiny.
I spooned the mixture into the dishes and added the channel that the recipe recommended in the recipe. I'm not sure it helped because of my containers' shape, but at least it was practice. Then, I covered them all with plastic wrap and put them in the fridge until later. When it was time for dessert, I preheated the oven and placed two dishes on a baking sheet. I ended up baking the soufflés for about 16 minutes. Since I've never baked one before, I wasn't sure exactly how much jiggle it should have, so I erred on the side of less jiggle.
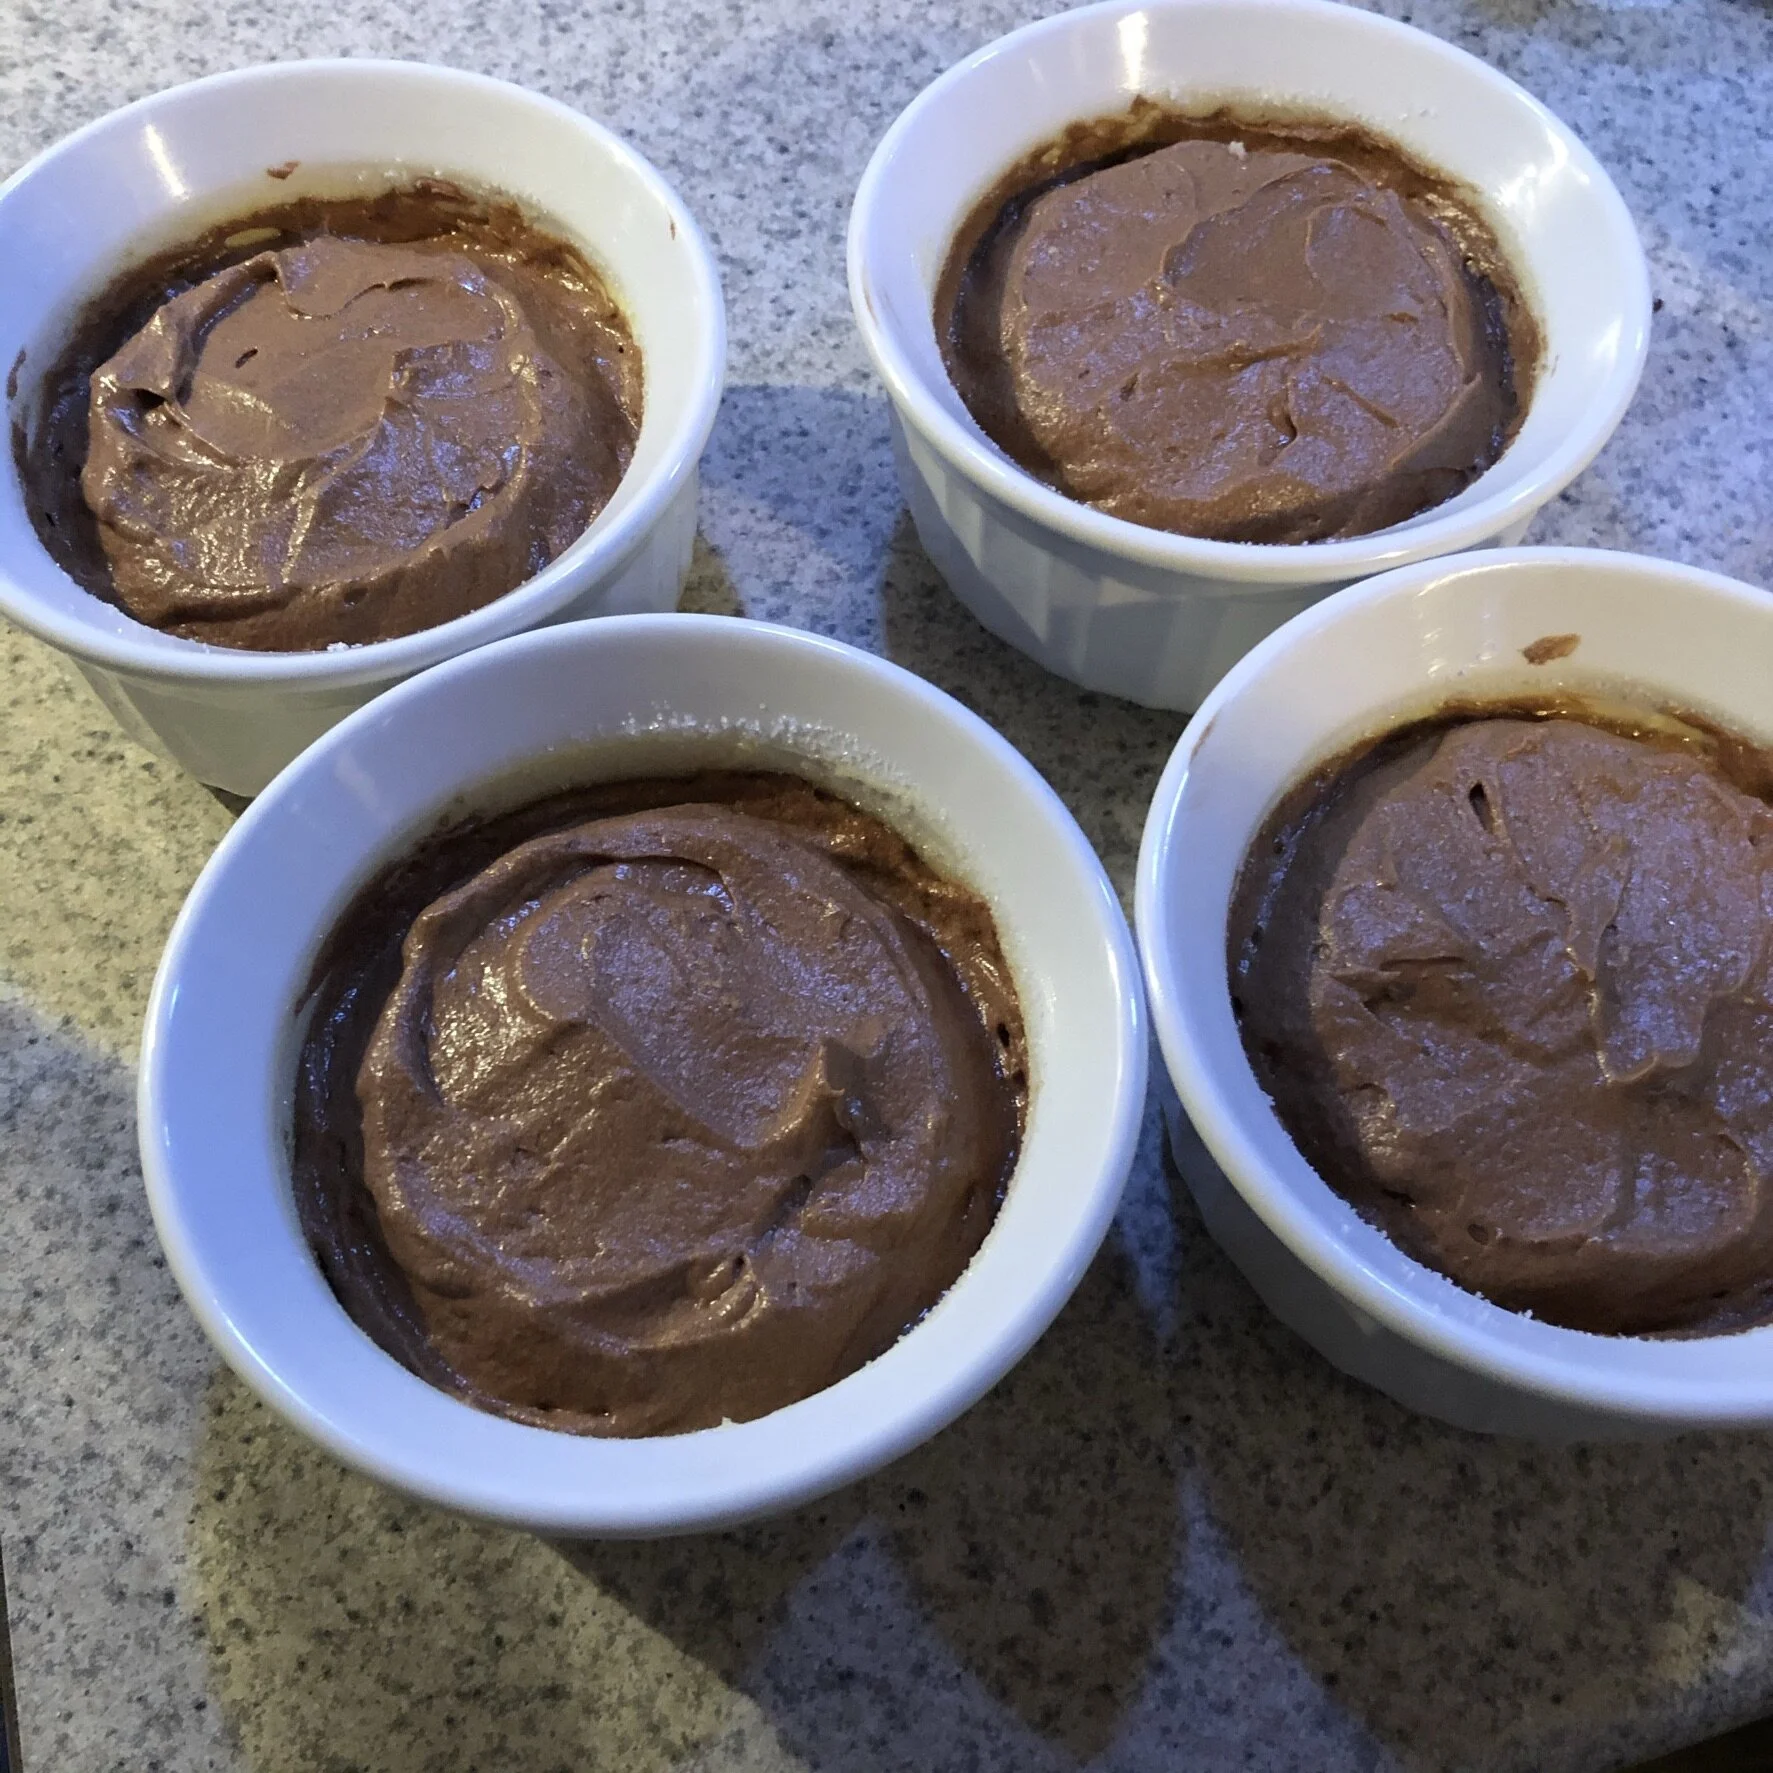
As you can see, the soufflés did mushroom just a little bit, but again, I think that's 100% a function of the dishes that I used. I'm confident that if my dishes only had straight sides all the way up, I would've had the straight sides that the recipe shows. I did sit in front of the oven and watch as they baked. It's just like tv, right? I was a little worried that it didn't seem to be doing much for most of the time, but in the end, it puffed right up.

We had the soufflés with homemade whipped cream (just heavy cream, a sprinkle of sugar, and a drop of vanilla extract) and raspberries. I felt like the raspberries were an excellent way to cut the intense chocolate flavor, but my partner wasn't too thrilled with the seeds in his teeth. The next day, he nixed the raspberries. We were both impressed with the finished dessert, and while there isn't much that I've made that he hasn't liked, he said several times how much he enjoyed these chocolate soufflés.

I would definitely make this Chocolate Soufflé again! If you're at all nervous about making them, just go for it. The directions are clear and easy to understand, and if you don't try and maybe make a mistake, how can you get better?


King Arthur Baking Perfectly Pillowy Cinnamon Rolls Review
I love cinnamon rolls! I don't usually make them because they're a lot of work, and there's a lot of waiting, which when you want cinnamon rolls, that's not something you want to do. King Arthur Baking announced their 2021 Recipe of the Year at the end of December. Last year, it was pizza, and this year, as I'm sure you can imagine, based on my introduction, is cinnamon rolls—Perfectly Pillowy Cinnamon Rolls to be precise.
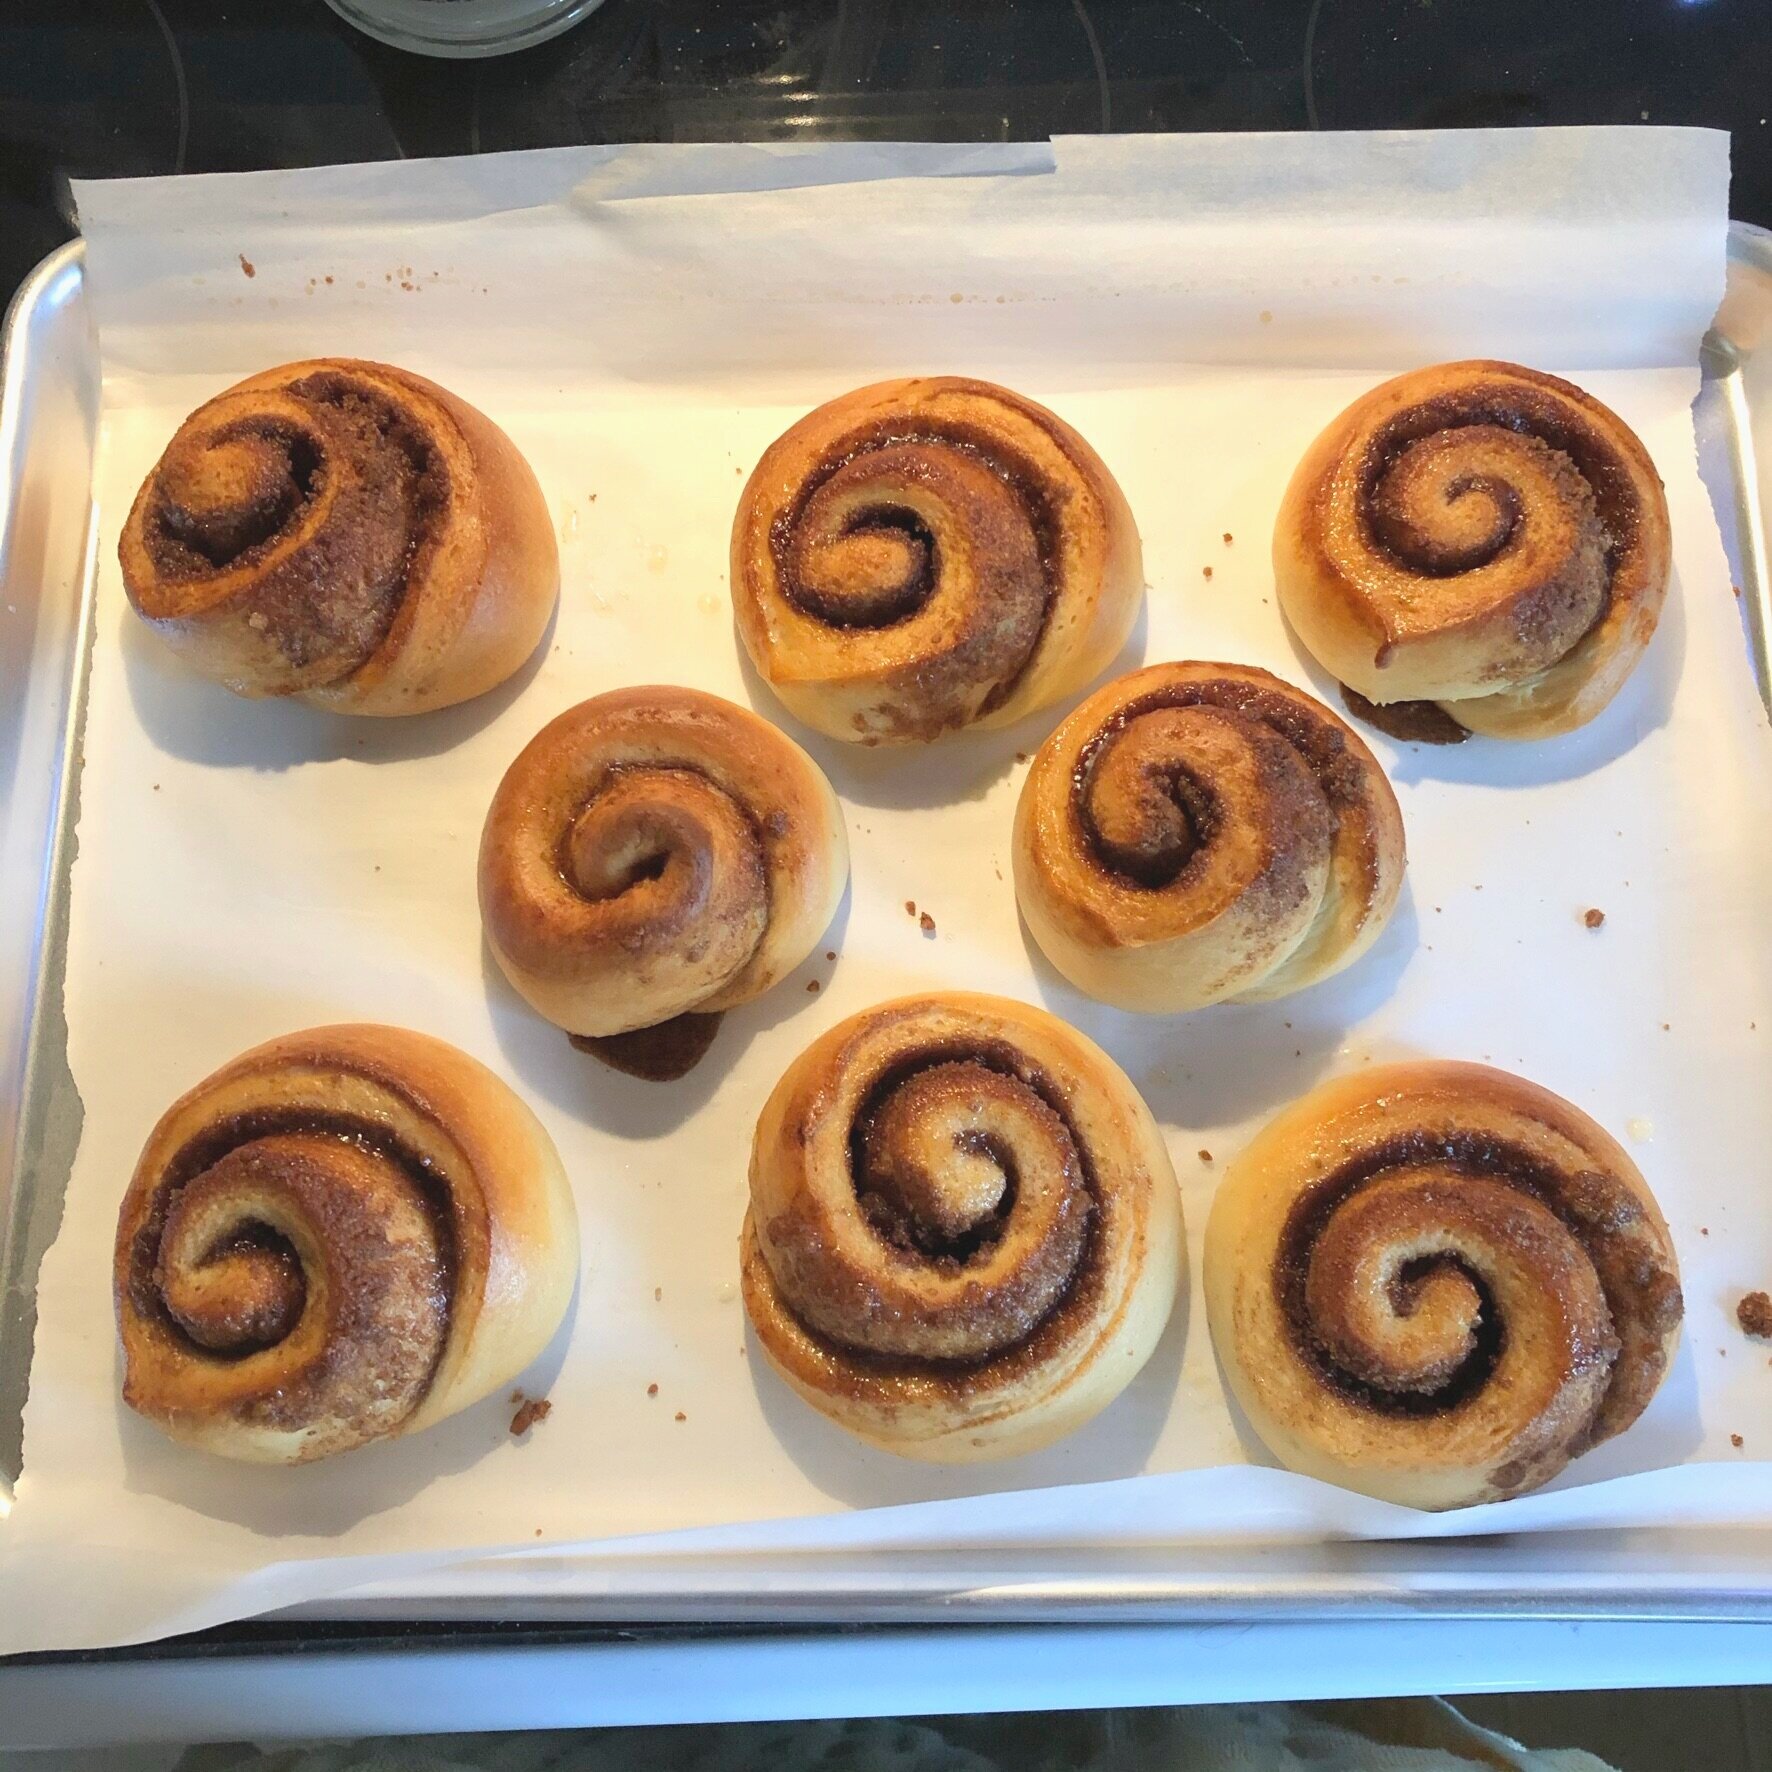
I gave these a try a couple of weekends ago. They are different than most of the cinnamon rolls I have made before because they're not all squished into a pan, making it harder to get an even bake. Don't get me wrong, I love a squishy center, but sometimes it's a little too much. You bake these cinnamon rolls on a sheet pan, so none of them are touching, which means you get a nice, lightly browned outside and a soft, not underbaked center.
The cinnamon rolls use the tangzhong technique. In this technique, you cook flour and water into a slurry and mix it into the rest of the dough. It does many things, including making the finished bread moister and stay softer longer, hence the pillowy title. I'm familiar with this technique because I started using it for my preferred dinner rolls that I make on holidays, Buttery Pull-Apart Buns. They stay soft for days after the holiday.
The dough came together quickly in my Kitchen Aid mixer. Sometimes I don't mix the dough long enough when using the mixer, but I've started going at least a minute longer than I think that I'm supposed to go, and that seems to have improved my dough.
After the first rise, I set to rolling out and rolling up the dough. The dough is incredibly soft, and I didn't even have to use a rolling pin to get the dough into a rectangle. It didn't snap back too much and stayed nice and relaxed. I added the filling and rolled up the dough. I always seem to have a little trouble with the rolling part, whether it's bread, stromboli, or something else. It usually ends up a bit of a mess. I did the best I could with these. The only floss I have is mint, so I just used a knife to cut the rolls. I picked my sharpest knife, and it worked out well.

I did lose a little filling transferring the rolls to the baking sheet. Not enough to make a difference, but it was just a little messy. I tucked the end under the roll as suggested in the recipe. After they were all on the baking sheet, I sprayed some plastic wrap with cooking spray, covered the rolls, and let them hang out for a second raise.

When they had puffed, I put them in the oven and waited for the timer to go off. I took their temperature to determine if they were done. As with cooking, I feel like this is the easiest way to know if they're done. They looked beautiful, and I'm super happy with how they came out.
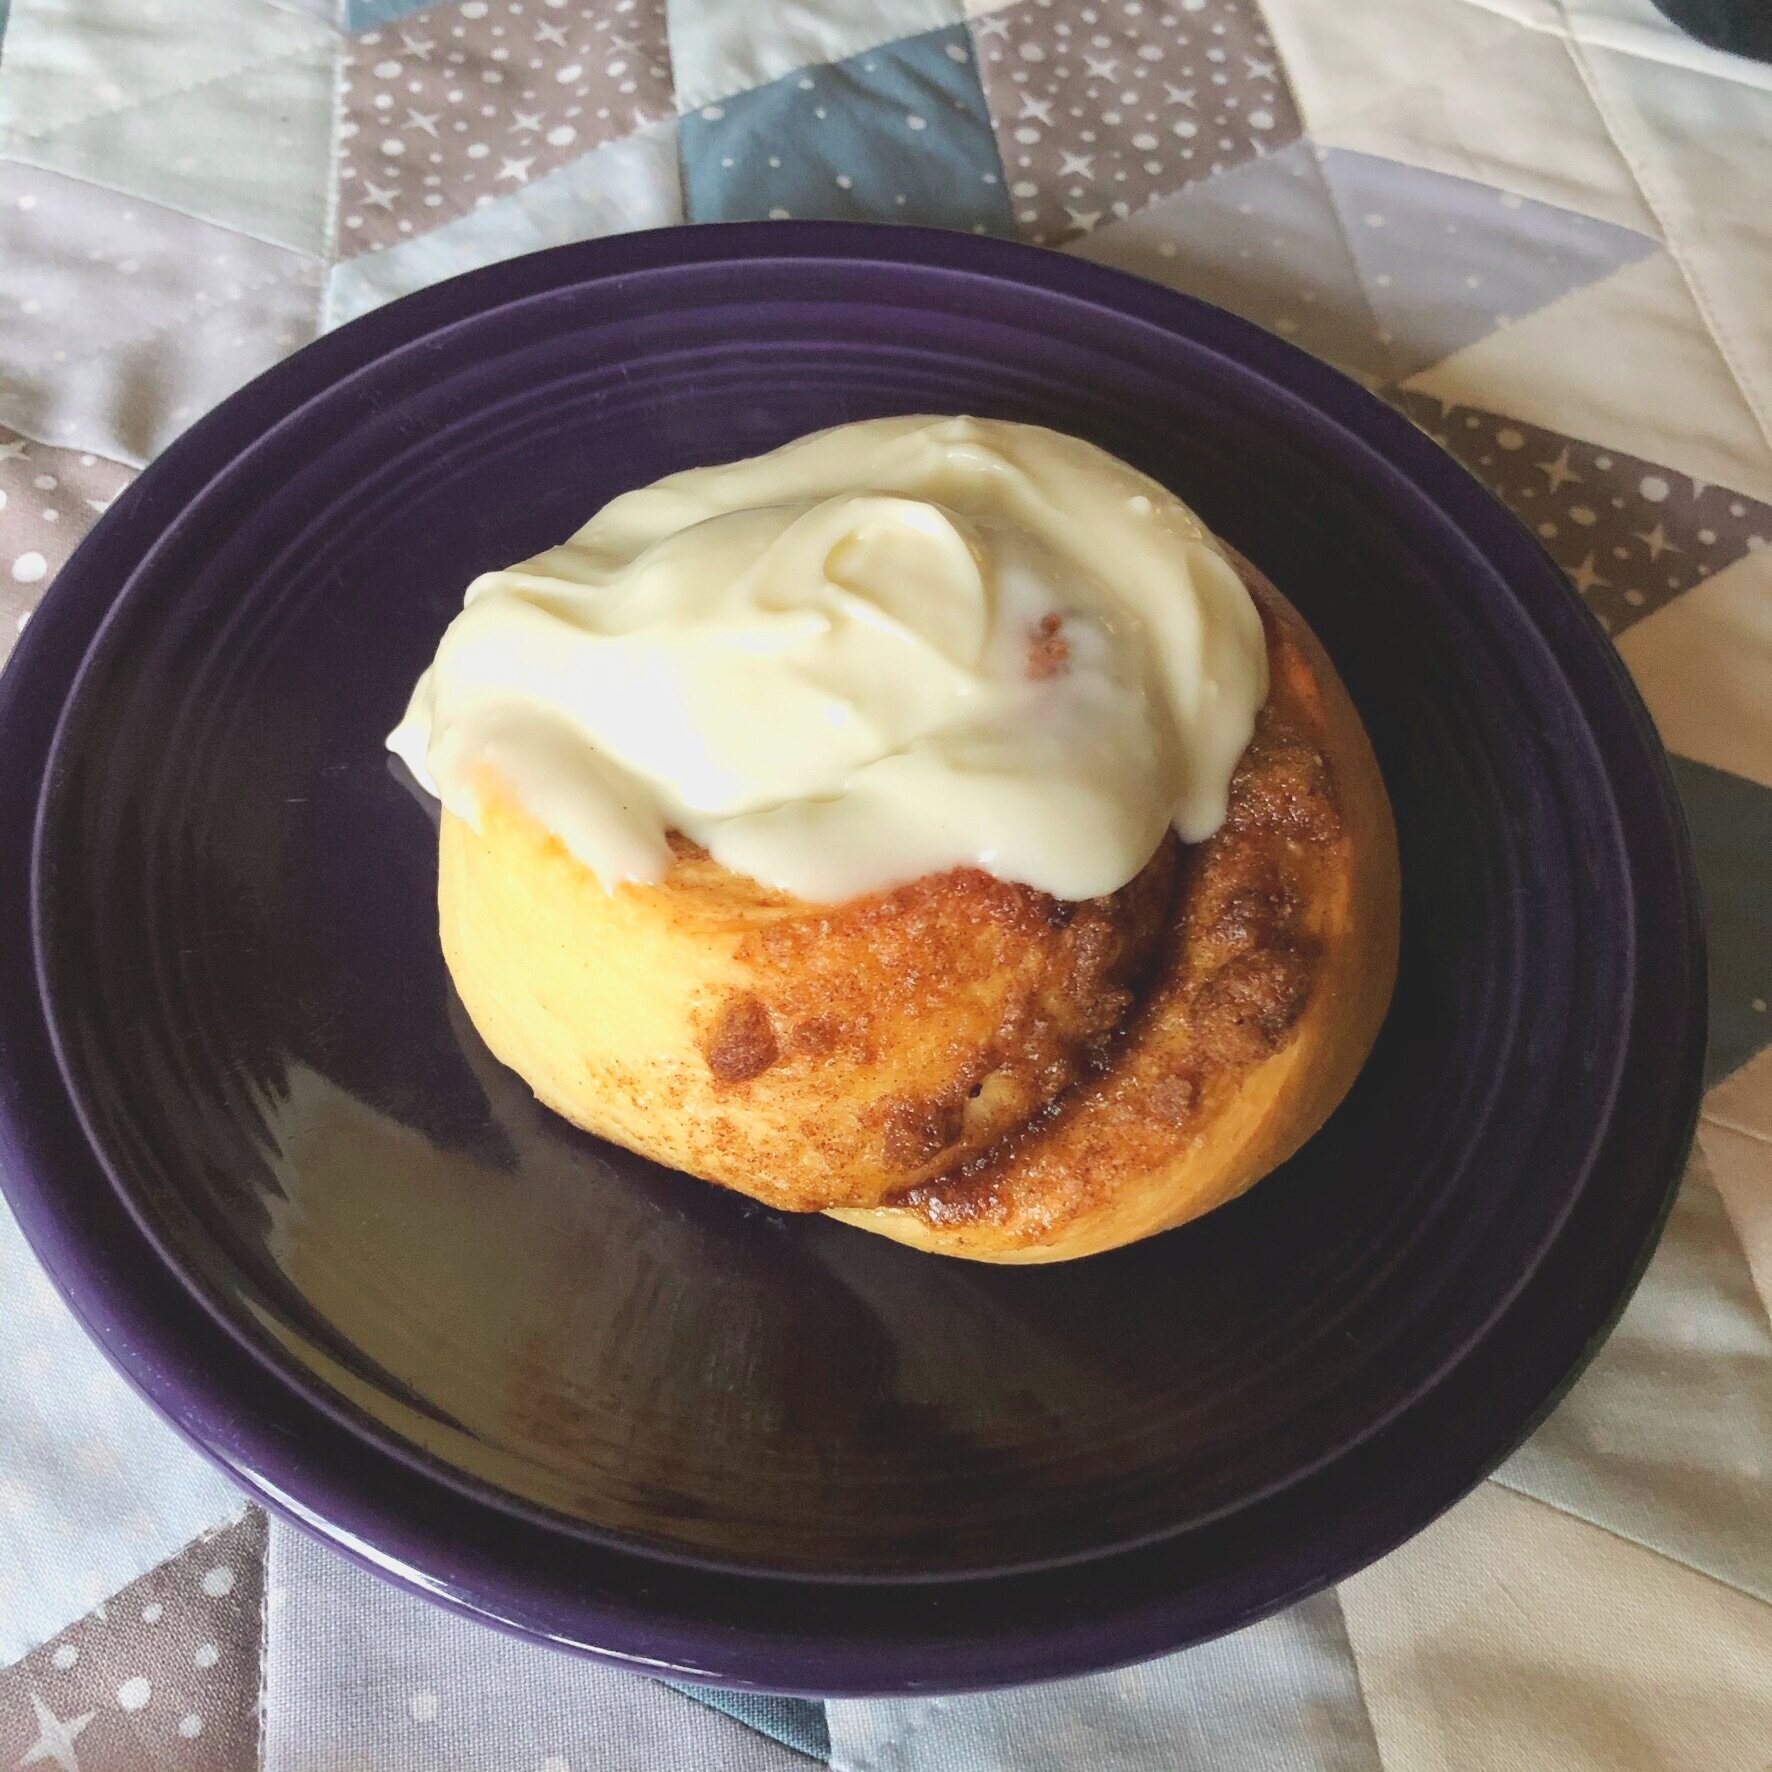
I firmly believe that cinnamon rolls should have cream cheese icing, so I went with the recipe noted at the bottom. It was delicious, though I think next time, I might add a hint of lemon to it, just to brighten it up a bit.
I did say next time, so yes, I'll be making these cinnamon rolls again. They were easy, fun, and of course, delicious. I ate them for the rest of the week, and they stayed soft the entire time.

Sew Sampler Box January 2021
The January 2021 Sew Sampler Box from Fat Quarter Shop was a little late thanks to supply issues (which are totally expected thanks to the pandemic), but the wait was 100% worth it! Every piece that I took out of the box, I said, "Oh, this is neat!" I can't wait to test out every item.
I know you're here to find out what's in the box, so let's get right to that, shall we?
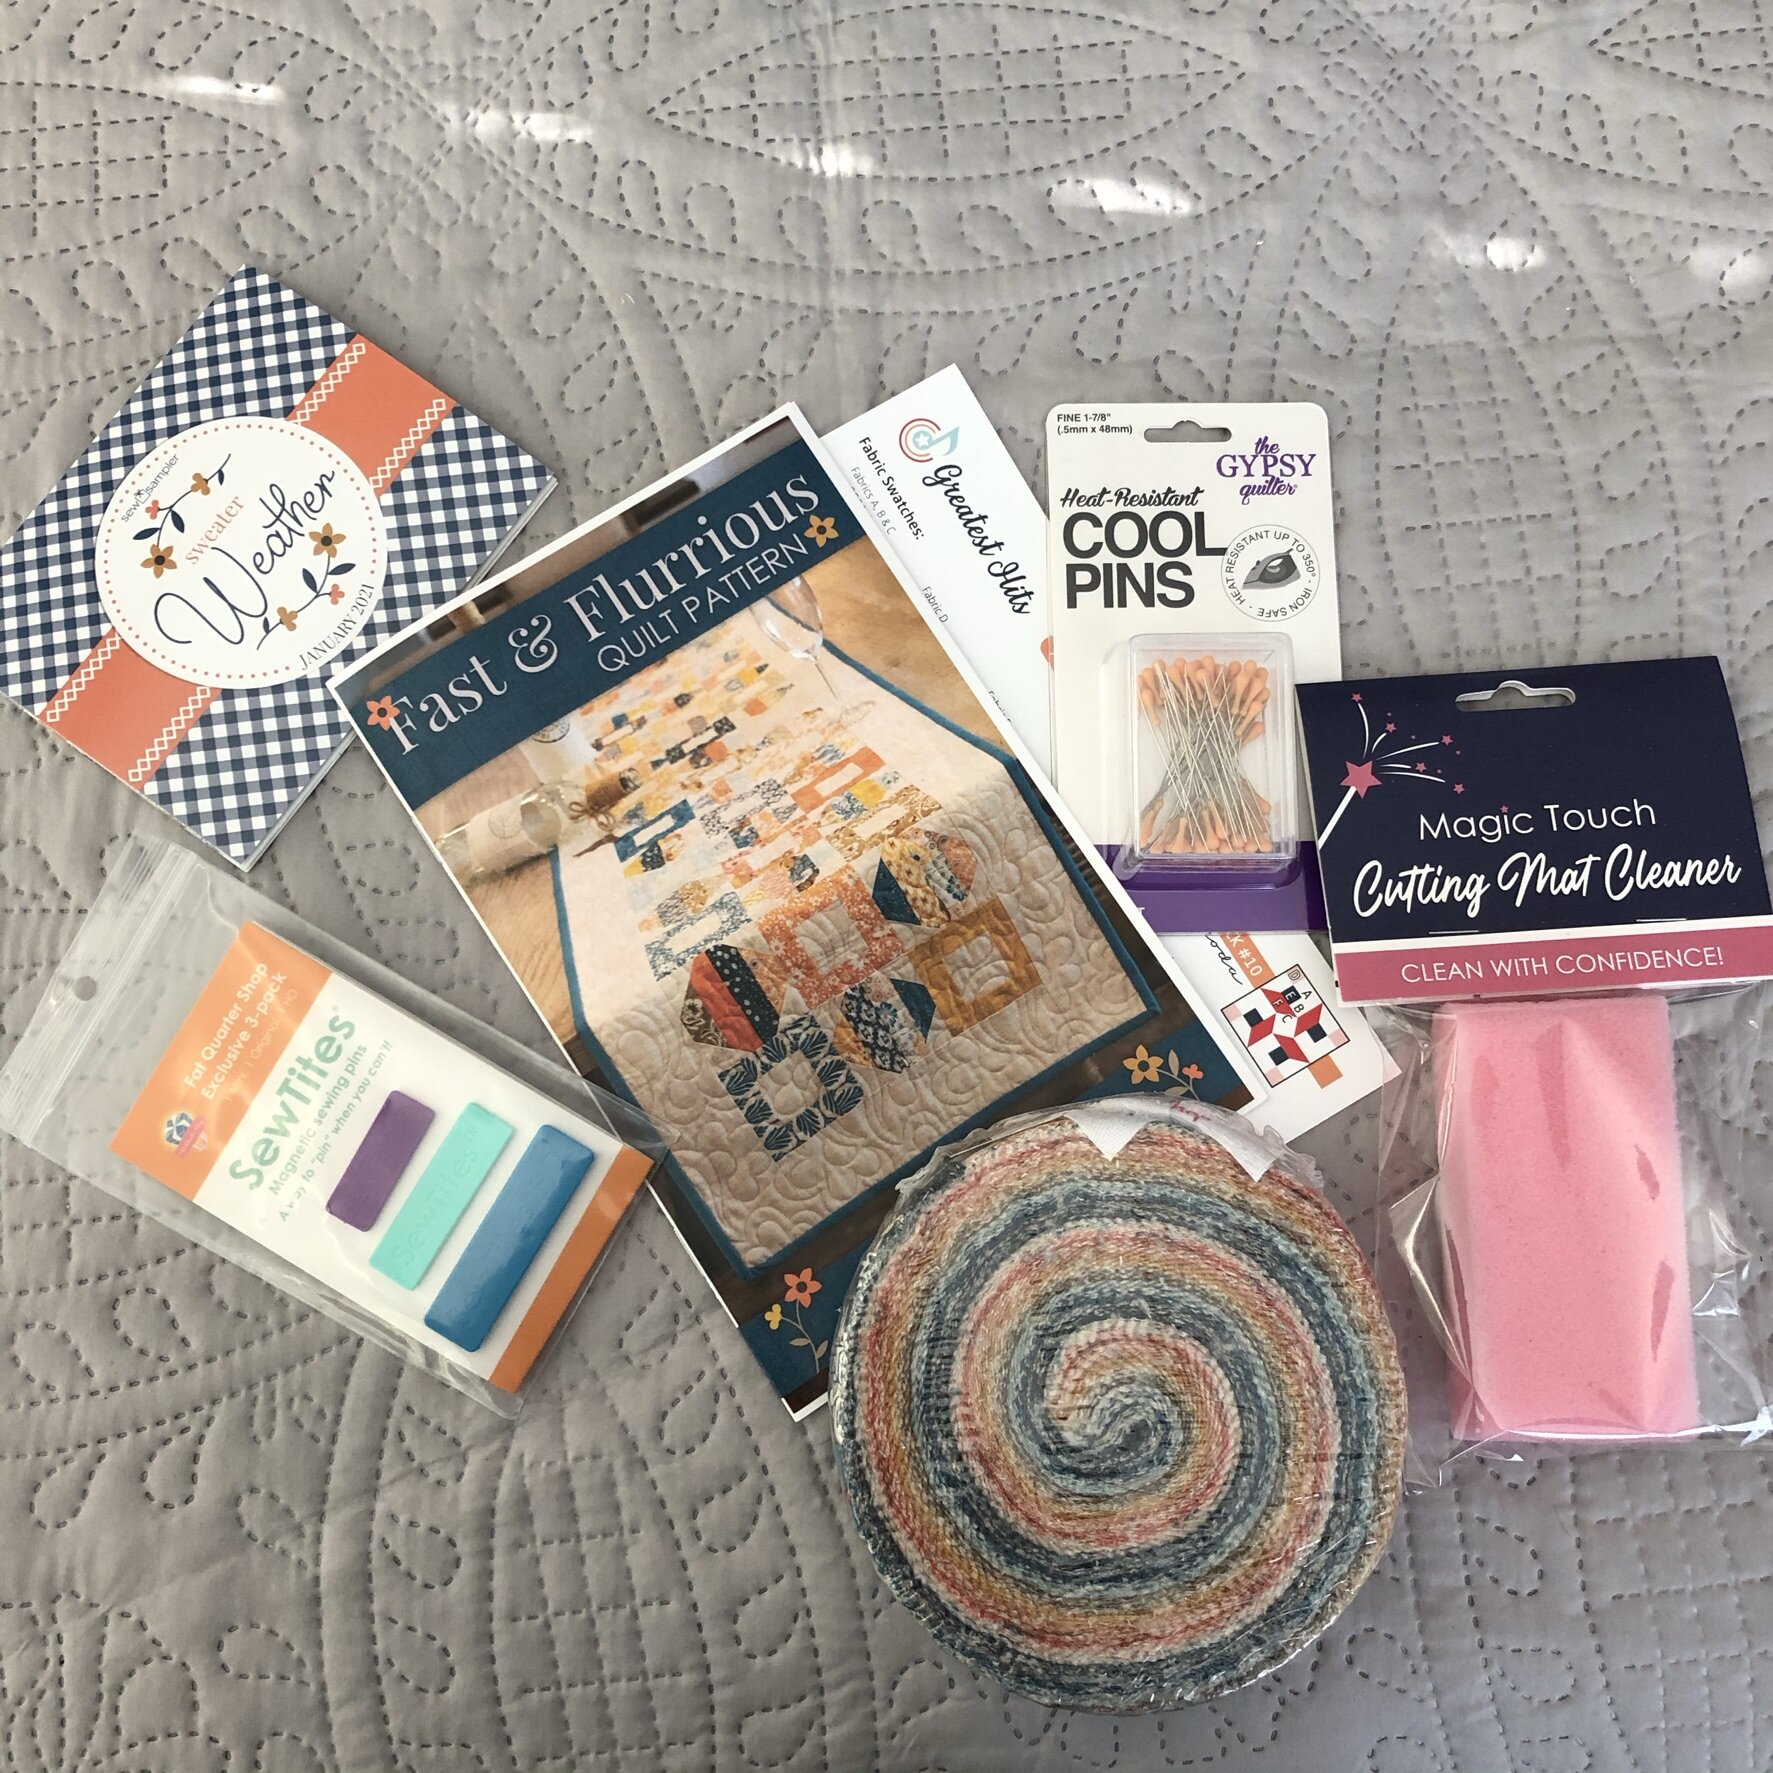
Cider Honey Bun - This month's fabric is Cider by BasicGrey for Moda. It's a gorgeous line with lovely brown and honey tones with blue and orange mixed it. It's not a combination that you see often or one that I'm usually drawn to, but this is a really nice line. Even though I'm not usually one for a jelly roll or honey bun, I'm excited that I get to see the whole line this way.
Count Aura Orange Cool Pins - These pins from The Gypsy Quilter have a heat-resistant top that won't burn or melt if touched with the iron. One can never have enough pins, and I've discovered I'm a fan of the heat-resistant pins, even if I don't use my iron with them. I like that they're a bit grippier at the top. I like super fine pins, but these seem about average, so I'm excited to give them a try.
SewTites Magnetic Sewing Pins - These magnetic "pins" are designed to hold together multiple, thick fabric layers. I'm excited to give them a try, especially with something like quilt-as-you-go, because I've had trouble getting pins where they need to go when sewing projects like that. I've been looking at these for a bit, so it's nice when the Sew Sampler Box makes my decision for me.
Magic Touch Cutting Mat Eraser - This little pink sponge is supposed to be used either dry or damp to help clean all of the bits of thread and trimmings from your mat. I'm not great at keeping my mat clean, so this is a welcome tool, and I'm excited to give it a try.
Fast & Flurrious Quilt Pattern - The exclusive pattern is a table runner with a small quilt option. I've already decided that I'll make the table runner, which is good because I ordered the finishing kit yesterday, unseen, with the feeling that I would like it. I'm glad I was right. It shows off the fabric collection really nicely, and I think the finished tablerunner could be season-spanning.
I am super pleased with the box this month. I know that I say that most months, or at least try to find the positive in each box, but it's always nice to try new things. I've subscribed to the box from the beginning, and while sometimes it can feel like a lot, I've been able to try out all kinds of tools and fabrics that I wouldn't necessarily pick up.

Journey 2 Nebula - Gazebo: Finished!
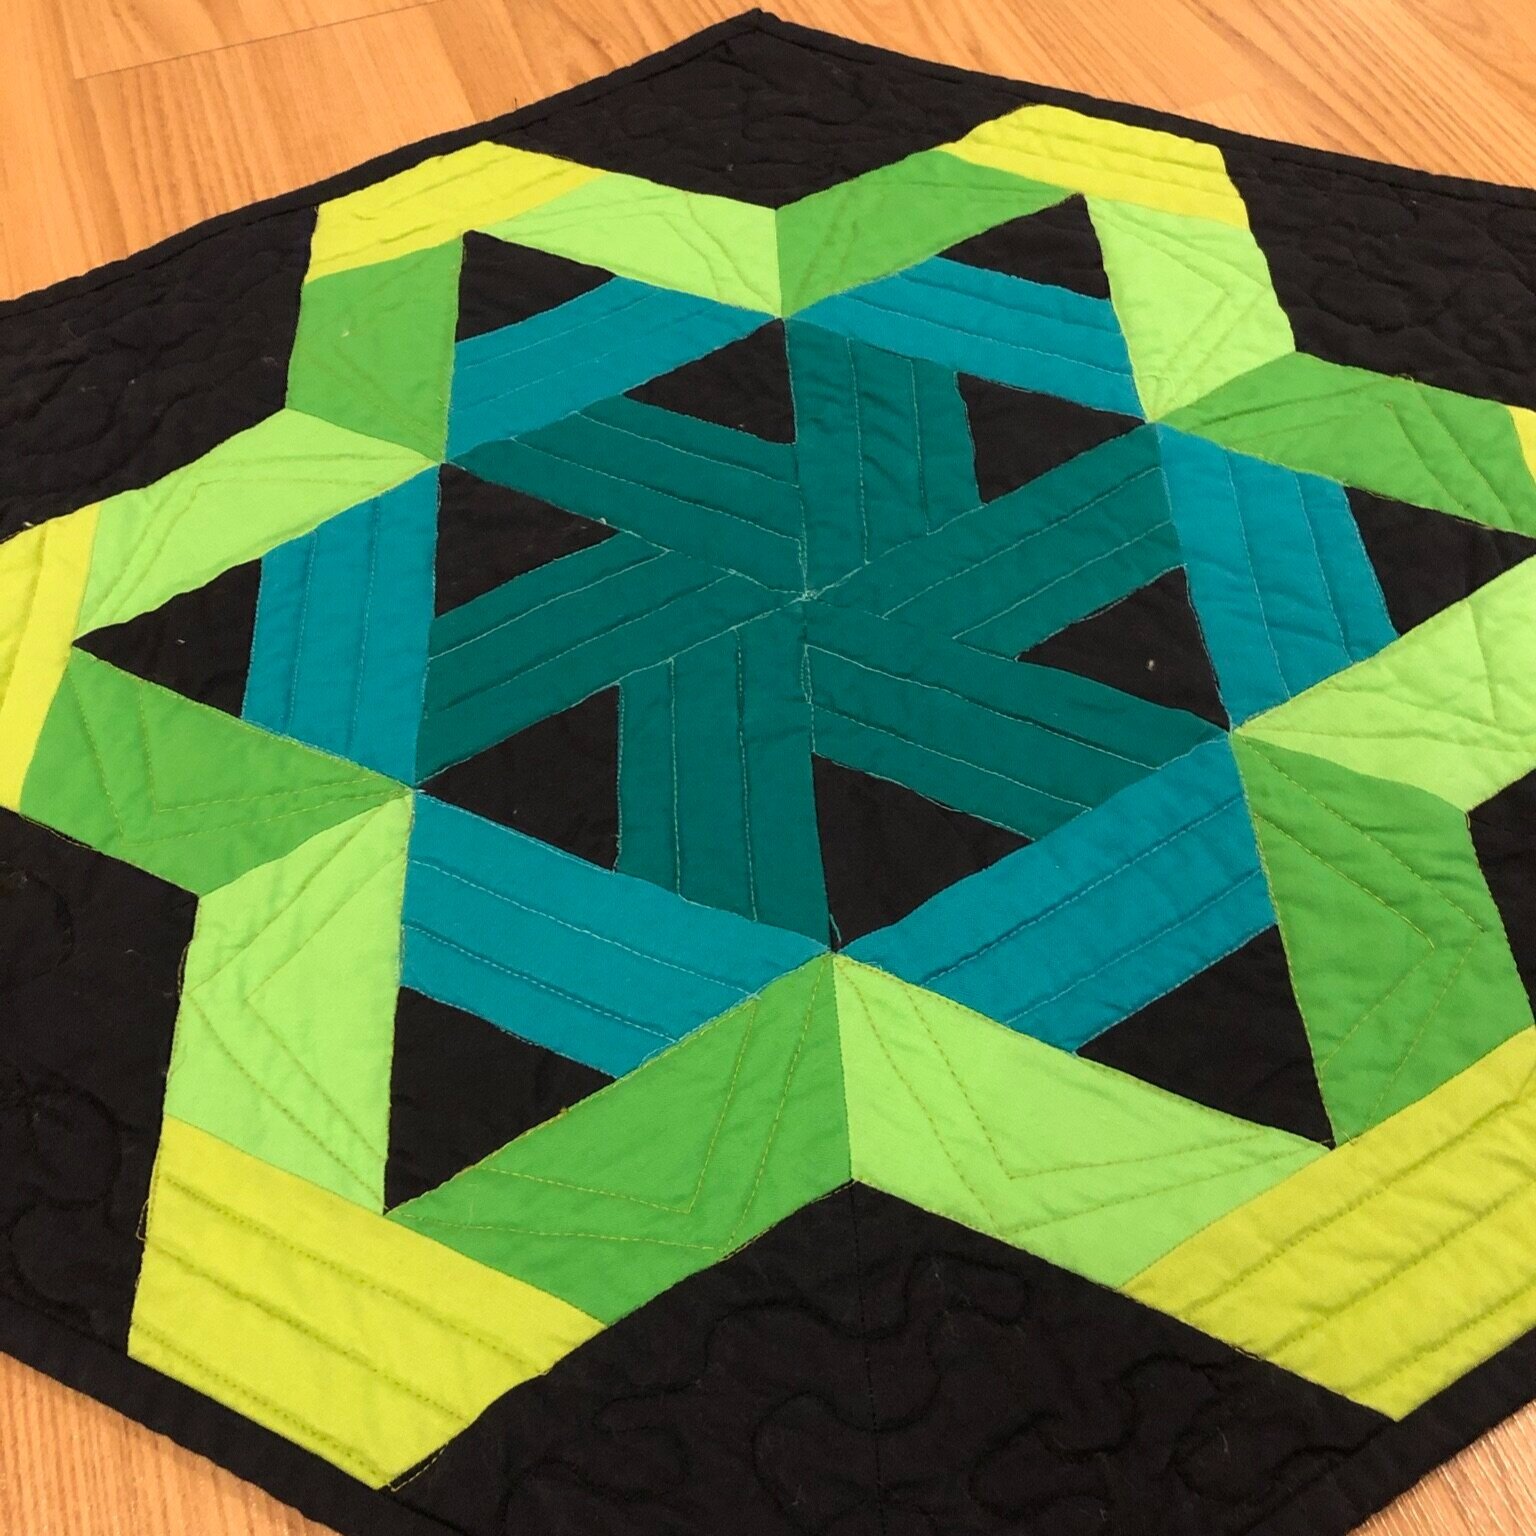
I had mostly finished this project back in November and only had the binding left in December. Life being what it is and Christmas happening, this got left to the bottom of the pile, but as of today, it is complete! I wrote most of this post as I finished the binding, thinking that I would have it finished the next day. Best laid plans, as they say. Anyway, it has some good information, so I'm not going to rewrite it, just include this little preface.
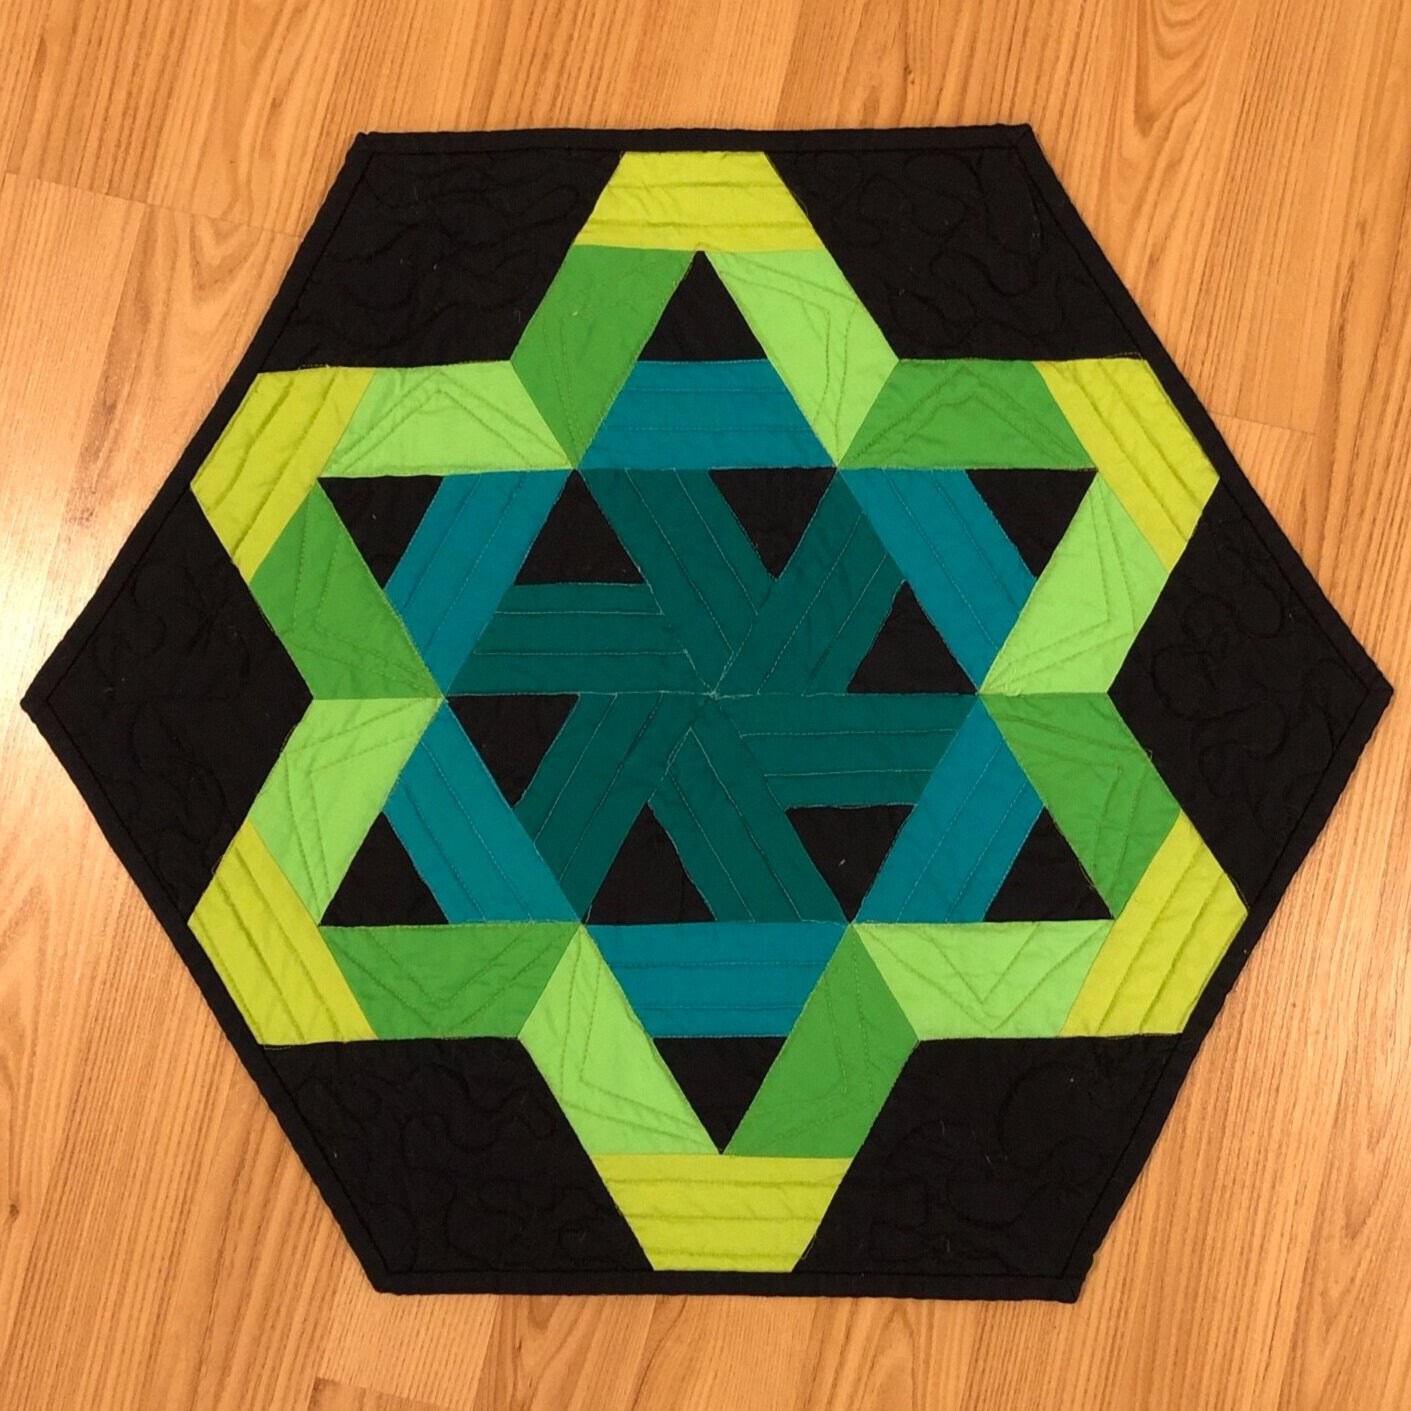
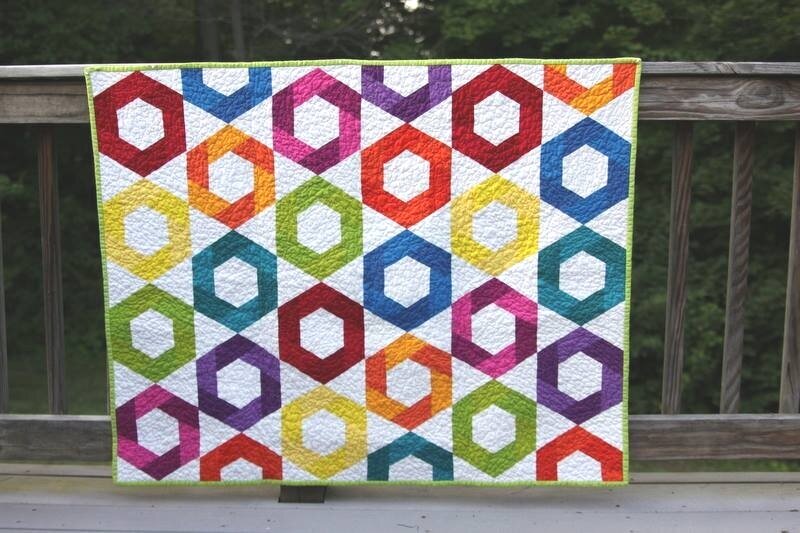
Jaybird Quilts Gazebo was the next stop on the Journey 2 Nebula. I laid it out several weeks ago and finally managed to piece it and quilt it. The piecing went swimmingly. Everything went together smoothly, and the finished project looks great. I've mentioned before I clap when I enjoy how a project has or is coming together, and I did that with this project.
It was also a surprisingly quick sew. I thought it would take me several hours to get through piecing all the half hexies and triangles, but to my surprise, it was less than an hour and a half. I did chain piece the different sections. I've found that chain piecing moves my projects along more quickly, if only in my head.
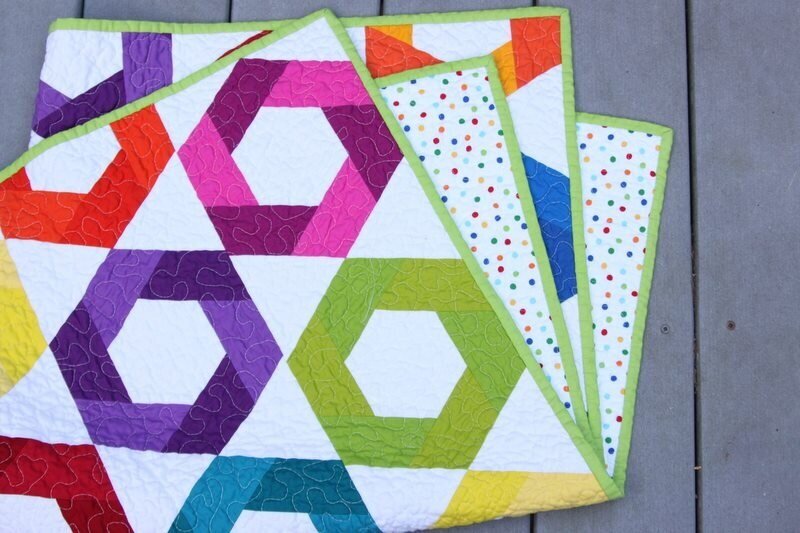
The quilting isn't my best work. I experimented with some free motion quilting and some ruler work. It's pretty impressive that I can quilt such a wobbly line with a straight edge. It's okay. It doesn't look terrible from a distance. I did use the black sections to try out some free motion meandering with stars that I'm thinking of trying when I finally finish my Jelly Snowflake Quilt. That went better than I thought it would go, so I'm excited to complete that project.

I debated between binding the project with black or the bright chartreuse color but decided black would be a nice finish to the whole thing. I used some random fat quarters I had in my stash for the backing. Gazebo was very much a practice piece and less of a project I'll actually put out or use regularly. It does seem wasteful to think of it that way, and I may use it for something at some point, but sometimes to get past being stuck on a project, I have to put away my perfectionist tendencies and just do it.
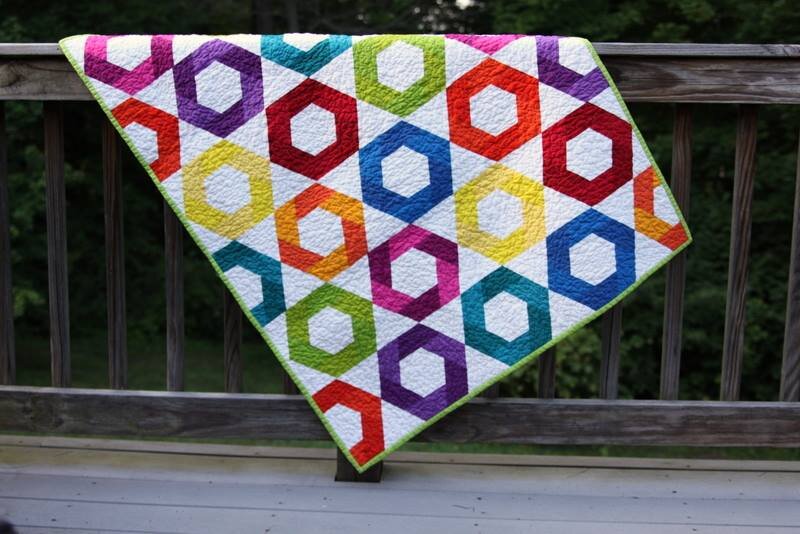
Now that I've finished binding it (a task that also went faster than I thought once I just sat down and did it) and washed it, I'm happier with the finished product. My quilting is still not the best, but it looks better than before I threw it in the washer and dryer because of the crinkly-washed-fabric look. I'm still not sure that I'm going to do anything with it besides check it off the list, but I'm happy that it's done.
I received the fabric for my first four blocks of the Nebula quilt. I'm debating if I want to finish the last of the Journey projects first or if I want to just jump right in.
Details
Fabric: Assorted solids
Thread: Aurafil 50wt, 2600
Batting: Unknown from the leftover pile, likely 100% cotton
Pattern: Jaybird Quilts Gazebo
Total Hours Spent: 5 hours, 34 minutes

2021 Cupid Box from Fat Quarter Shop
While I don't need more fabric, whenever Fat Quarter Shop releases a special box, I go through an internal struggle debating whether or not I want to get it. I have purchased all of the previous Cupid Boxes, so I clicked purchase when this year's was announced.

Valentine's Day has never been one of my favorite holidays. I don't know why. Maybe because it always felt so stressful in elementary school passing out Valentine's to the class. I wouldn't want someone to read into the pre-printed, cheap valentine that I selected for them. I'm sure I am the only one who put that much fret into deciding who gets what valentine. Anyway, I suppose it seems silly to wait for a specific day to tell the people I love that I love them. Life is short. I don't want to wait around until February to tell someone I care about them.
Despite my feelings about Valentine's Day, I can get behind red and pink hearts and a stash of valentine's candy. I was a little disappointed when all of the Christmas candy was gone from the grocery store, but it didn't take long for the pink and red packages containing the same candies with different wrappers to appear on sale.
My Cupid Box arrived today, and I ran out to the mailbox as soon as the truck drove away. Life has been extra hard lately for many reasons, so it was nice to have something to look forward to. My box was a little mangled, so I was worried that something was missing, but everything was in the box when I opened it.
So, what was in the box?

The fabric included in the box is the From the Heart Fat Eight Bundle + Panel by Sandy Gervais for Riley Blake Designs. It has an adorable selection of red and white fabric plus a panel with various Valentine prints. (Link to the fat quarter bundle so you can get the general idea of the line.)
Stuck On You No-Slip Grip Hearts by The Gypsy Quilter. These grips for rulers, templates, and more fit the Valentine theme and are heart-shaped. I appreciate no-slip grips, especially for the few rulers I have that are not from Creative Grids. I get spoiled by how grippy they are, so when I switch to a ruler that isn't from them, it slips around if I'm not careful. (Here is the dot version.)
Pack of 8 Cute Heart Clips by Fat Quarter Shop. I love Wonder Clips for sewing. I've also used them to secure papers for work or personal use if I didn't have a binder clip handy. I can't wait to clip everything together with these clips. I was a little worried the clip part would be sharp on the inside, but the piece that does the clipping is nice and smooth.
Silber Tape Measure Heart Key Chain by Moda. This heart-shaped key chain has an easy clip on it, so I might end up using it as a zipper pull on one of my many project bags. I try not to use too many key chains on my actual keys since, at this point, both of the vehicles we have, you still have to insert the key into the ignition. Lol! No push-button starts for us!
Love Beyond Measure(ing) Tape by Fat Quarter Shop. Having started my "serious" craft life (I've done crafts for my entire life, but as a kid, I bounced around) as a knitter, I can never have enough tape measures. I like to have one in most project bags, even for cross stitch. I don't necessarily need it as much as I do when knitting, but you never know when you'll need one!
Cupid's Bow Quilt Pattern by Fat Quarter Shop. This pattern uses the included fabric and panel to create a cute 26 12" x 39 1/2" piece. I appreciate that the additional fabrics the pattern calls for are simple solids. I know from experience with the Sew Sampler Box that if you want to make the pattern exactly as shown, you have to grab the finishing fabrics right away since they're usually part of the collection. Still, now, I don't have to decide instantly to grab the fabric.

I do hope to complete this project sooner rather than later. I haven't finished the other two Cupid Boxes yet, but I'm SO CLOSE on the 2019 version. I just have to quilt and bind it! Maybe I'll get it done before Valentine's Day 2021.
FFO: Country Cottage Needleworks January Sampler
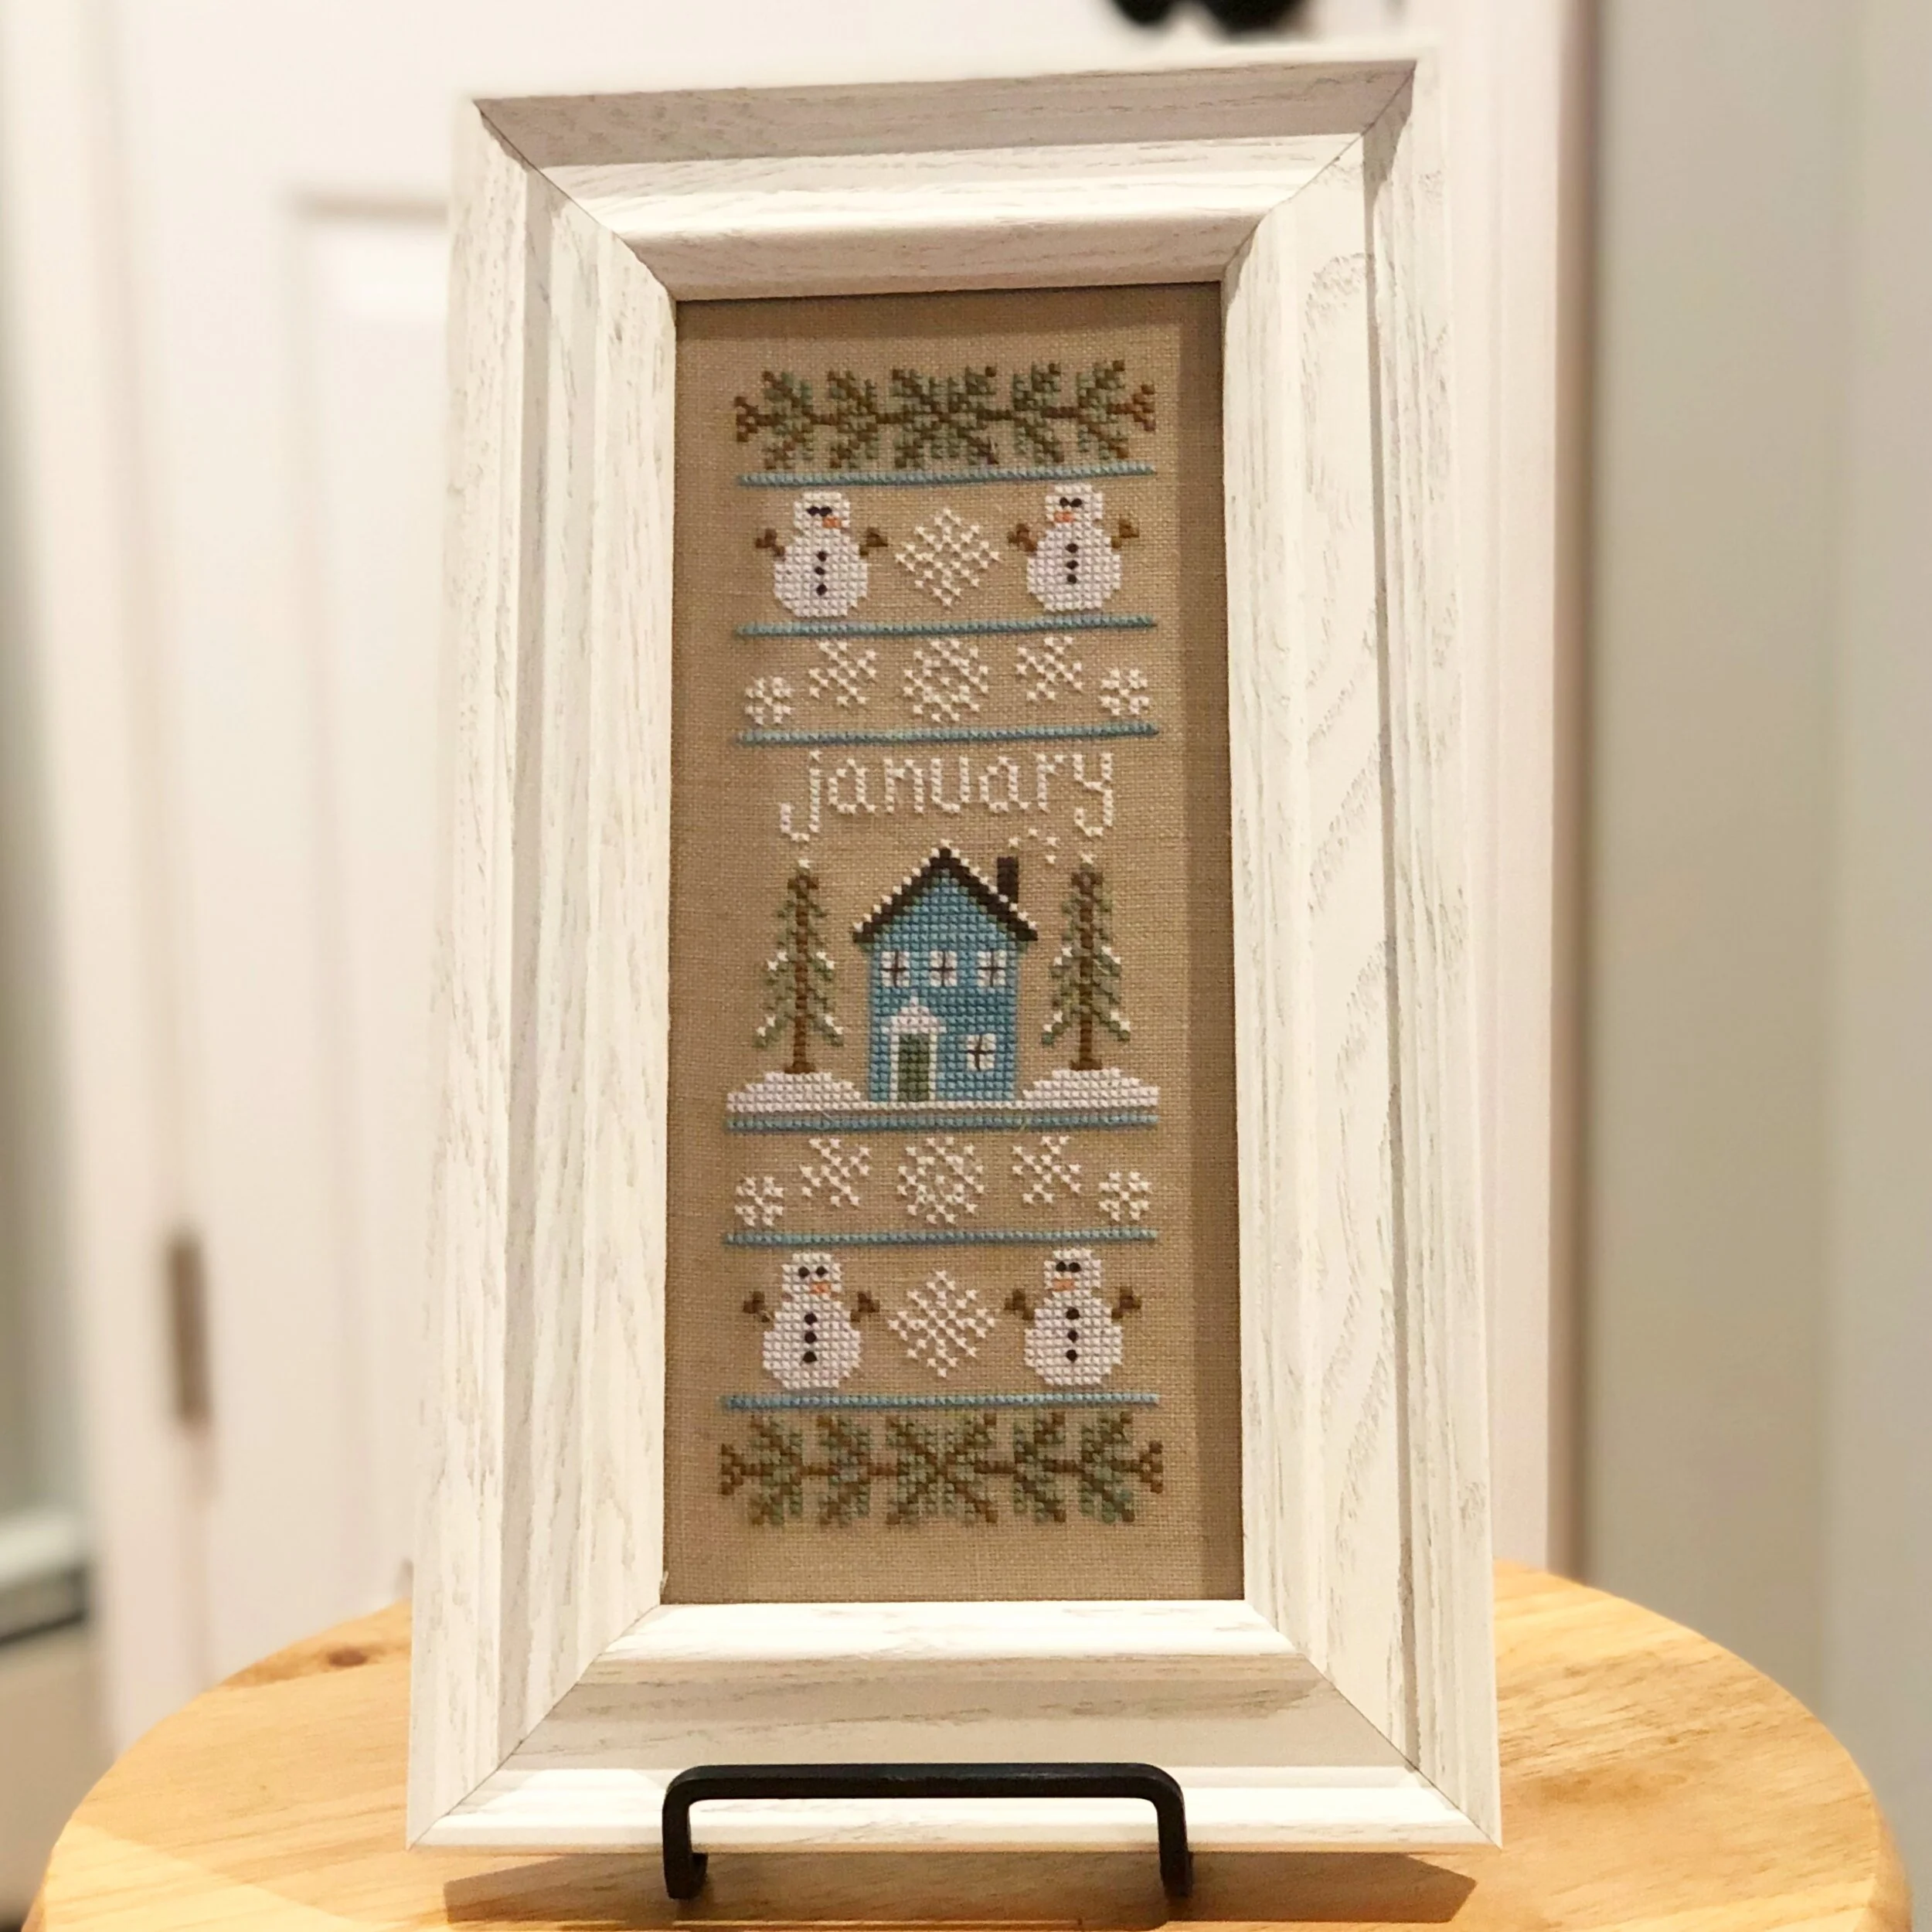
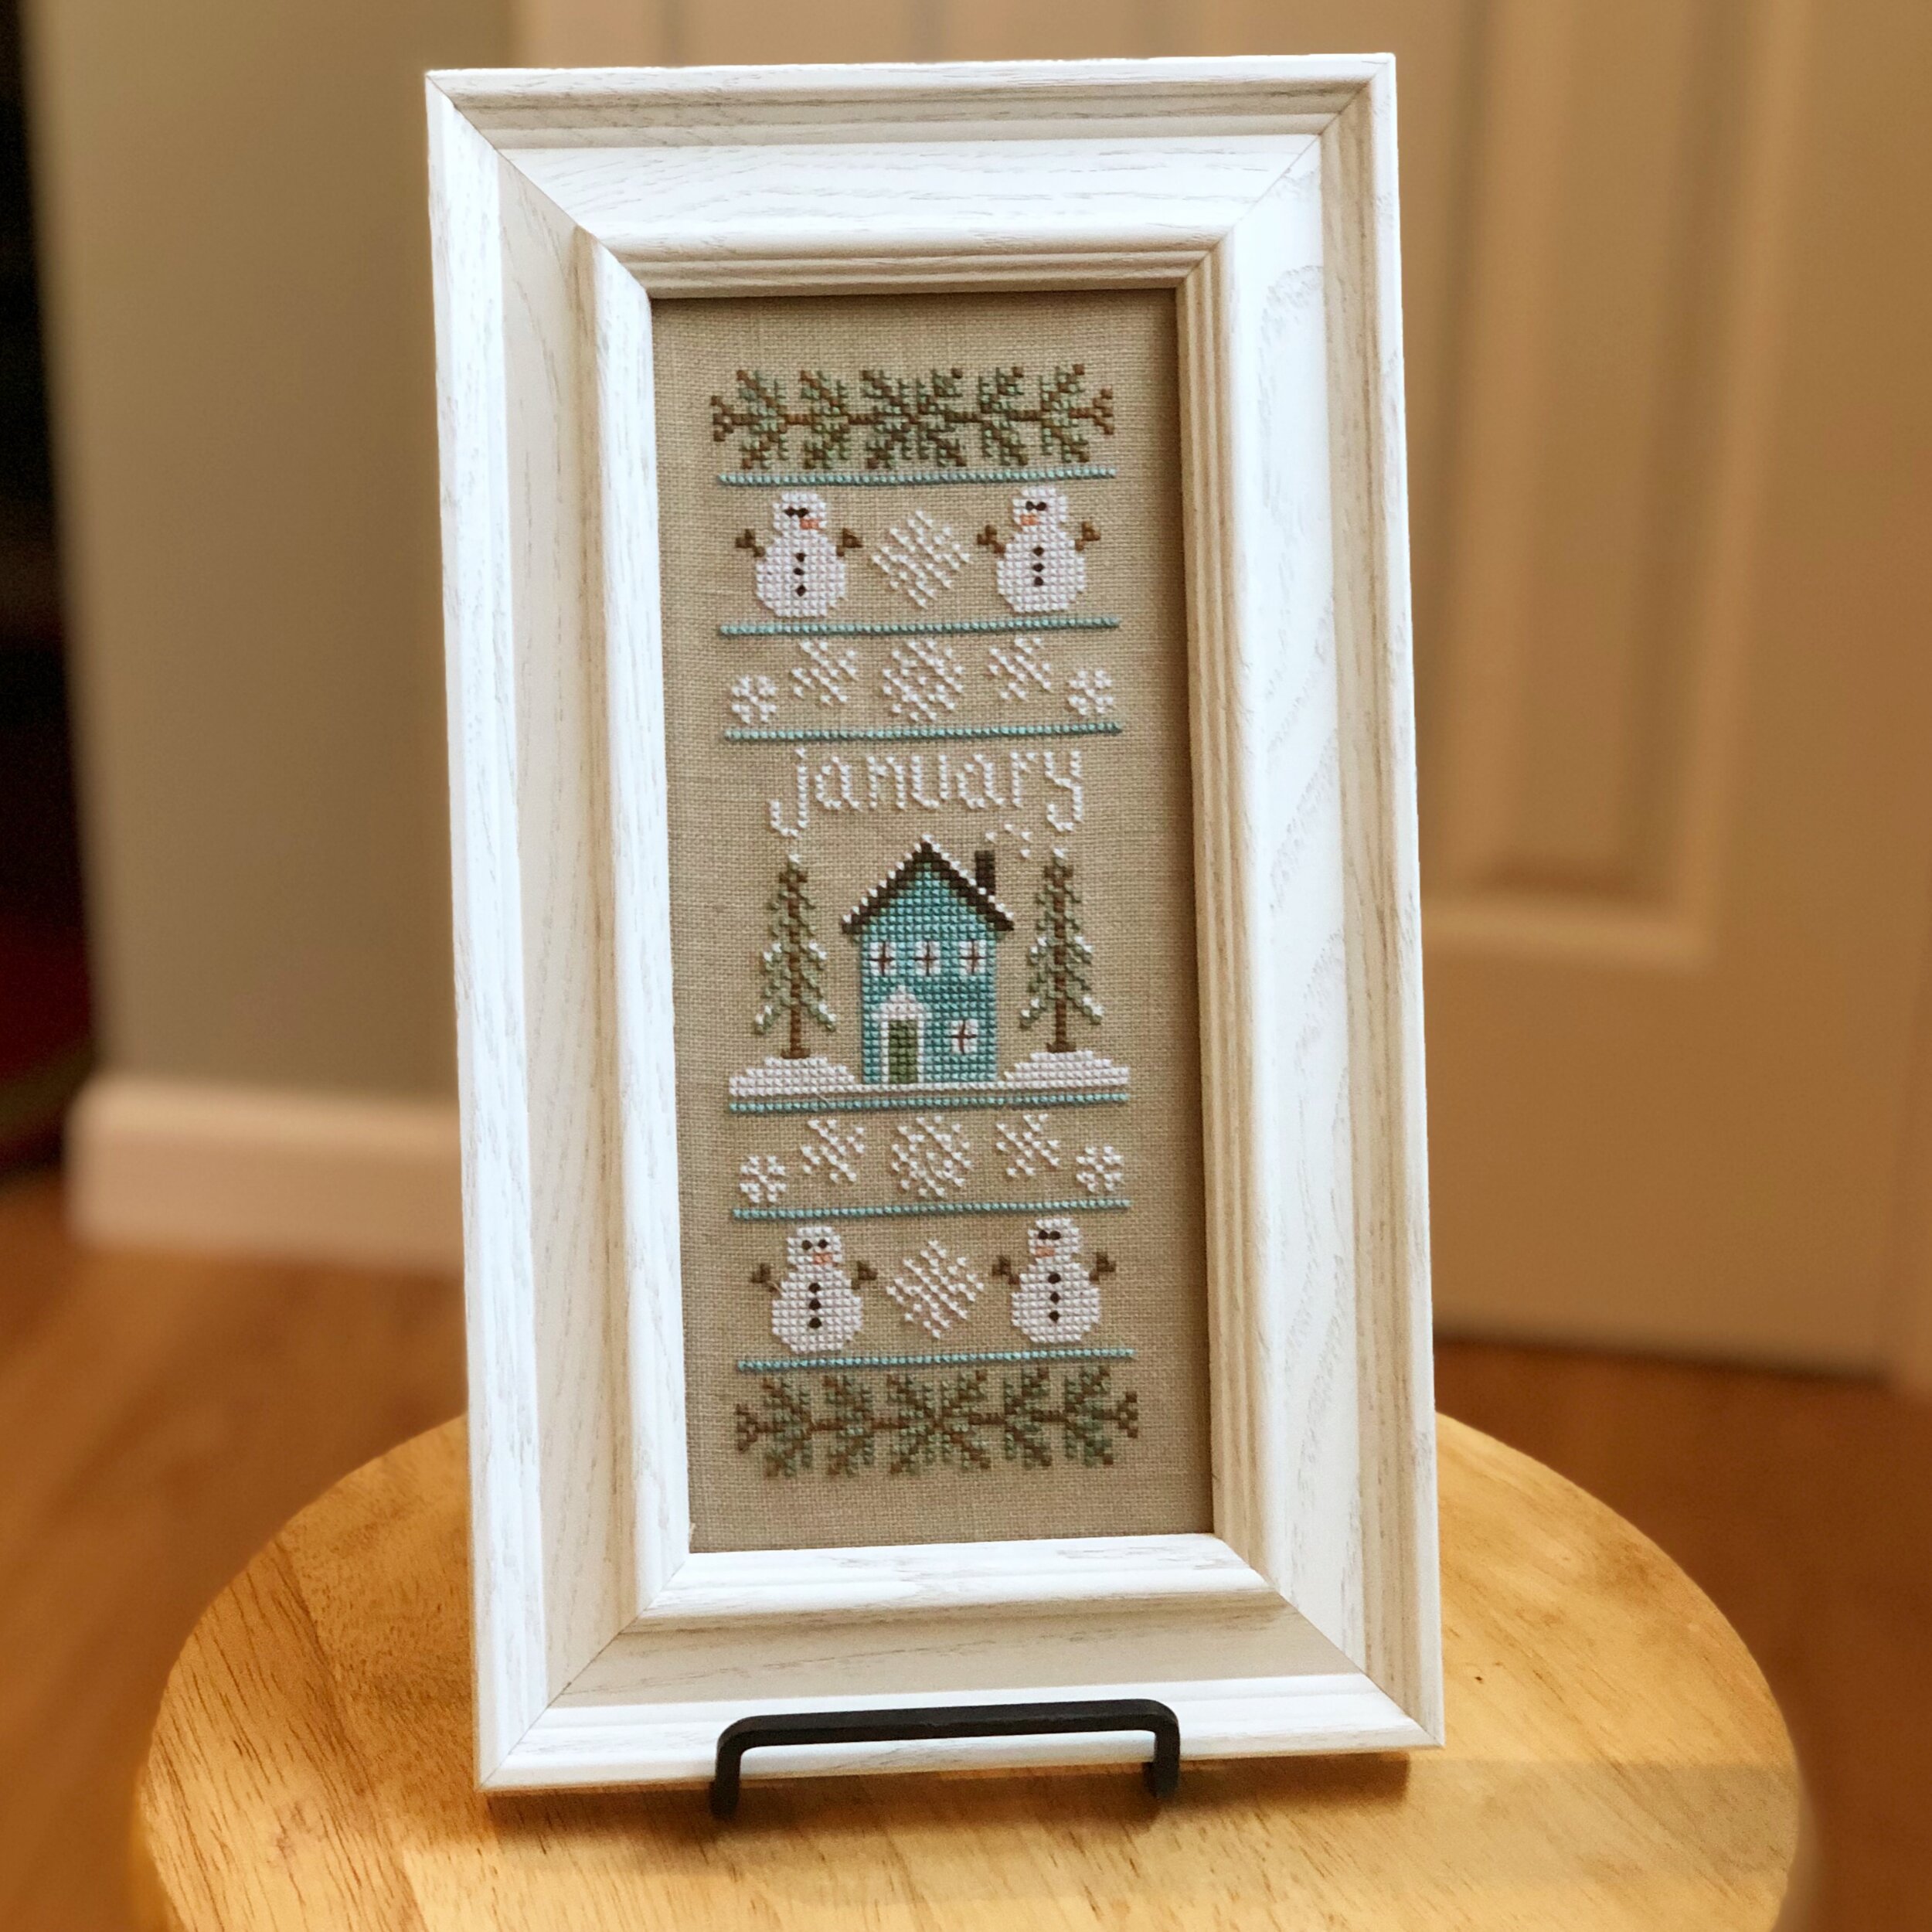
When I saw the preview of the Country Cottage Needleworks Sampler of the Month posted on Instagram, I knew that there would be another new year-long project on my list. There was something so appealing about the size, shape, and colors of the January pattern that I couldn't resist. When Fat Quarter Shop announced a monthly club, I signed up right away. I chose the 32 count linen club since I prefer linen or evenweave to Aida.
The pattern calls for (and the club comes with) Wichelt 32 count linen in beautiful beige and floss by Classic Colorworks. I have completed or have in progress a few patterns from Country Cottage Needleworks, so I'm familiar with their pattern layout. The patterns are in black and white. Sometimes if my eyes are feeling a little tired, I will take some colored pencils and color in black and white patterns for easier stitching, but this time, I left it as is and didn't have too much trouble keeping track of the colors and stitches as needed.

I love the way the Really Tealy Classic Colorworks gives the house an icy vibe. I had recently completed a different Country Cottage Needleworks pattern that was winter-themed (which I'll show on another day), so it was nice to have the snowflakes be the same. I didn't have to re-learn how to do them.
It was a pretty quick stitch. It only took me about 18 hours to finish, and I enjoyed every stitch. The linen is imperfect, so some Xs are a little larger than others, but that's the way it is when working with linen. I mostly stitched one X at a time, even though it's faster to go across in one direction and back in the other.
I wasn't sure what I was going to do about a frame for this piece. It is finished on the pattern cover with a 4" x 9" frame from Family Tree Frame Co. It is a lovely frame, but it's not quite my style. It has a little too much going on for my taste, so I did some searching, first on Amazon, and came up with nothing. I then went to Google and stumbled across ArtToFrame.com. They seem to have a huge selection of items that I've only scratched the surface of, but most importantly, for this project, you can order any frame size.
Since I had not heard of them before, I was a little leery about ordering but decided the worst that would happen is that I'd be out a little bit of money. I typed in my inner frame dimensions and was shown a variety of frame options. I think there was a color or style that would work for anyone. I was pretty excited that they were affordable too. The base price of the one I selected, an off-white stain on solid wood, was just over $20. You can then choose the type of glass you want, from a basic plain glass up to museum glass. I selected something in the middle for this, TruVue Conservation Reflection Control, which reduces glare and protects from UV light. You also get your hardware choice, a simple sawtooth, easel back, a wire option, or easy hang. I went with the simple sawtooth since I was planning on using an easel from Amazon to rest this on.
It took about three from ordering to shipping, though I did order on a Sunday, so I wouldn't count that as a day. The shipping step of the way is where we ran into a delay. ArtToFrames ships from Brooklyn, NY. I live in western Massachusetts, so that's only about three hours away. Well, the frame went on quite the adventure with USPS. Instead of traveling directly to the closest hub to me, like I've noticed most of my packages do, this one took a trip to Nashua, NY. After hanging out there for a day or so, it headed to Boston, MA. And, there it sat for five days. It didn't move. I know that USPS is experiencing a crazy amount of volume, so I tried not to stress. After a week of waiting, I eventually submitted a missing mail request, and suddenly, the package was at the hub closest to me and was delivered the next day.
After its adventure, I was worried that the frame was going to be in pieces. I was pleasantly surprised when I opened the securely stapled box and saw that the frame was nestled into a unique cardboard holder. I didn't take any pictures of this before sending it to the recycling pile, but I was super happy not to have to deal with all kinds of packing materials. The best way I can describe it is that the cardboard holder allowed the frame to be suspended in the middle of the box, safe from crushing. Overall, I'm very impressed and will certainly be back again for other projects!
To finish the stitched piece, I cut some Sticky Board down to size and spent more time than seems to look like centering the piece on the Sticky Board. I used straight Sticky Board with no batting since it's going into the frame, and for now, I'm keeping it behind glass. I might decide later I don't want it, but I'm pleased with it for now.
I'm happy that I finished this with a couple of weeks left to January. I wonder if I'll be able to complete the February one before February starts?
Details
Pattern: Country Cottage Needleworks Sampler of the Month - January Sampler
Floss: Classic Colorworks in called for colors
Fabric: 32ct Wichelt Linen in Beautiful Beige
Frame: 4" x 9" off-white on solid wood from ArtToFrame.com
Total Hours Spent on Project: 18 hours, 3 minutes

Almond Poppyseed Cake from Claire Saffitz Review
Perhaps it's time for a little "flour" content in with all this fabric. When Claire Saffitz announced she had a book coming out, I hopped right over to Amazon and pre-ordered it. I love cookbooks. I try not to buy too many because I don't have the time to make everything, nor do I have the shelf space, but I love cookbooks. I love flipping through them, I love the photography, and I love just reading the content and recipes. I did decide Dessert Person needed to be on my shelf, though. I love Claire, and I love dessert.

When I received it, I flipped through it many times. I wanted to make everything. As often happens with me, the book offered me too many choices, and I didn't know where to start. So I set it aside for a while. Shortly after that, I discovered that Claire has a new YouTube channel. She's showing off tips and tricks for the recipes from the book. Not only that, but her cat Felix makes several appearances, and I'm here for it!
Last week's episode was Claire's Almond Poppyseed Cake. Over Christmas, I attempted to make my grandmother's poppyseed bread and failed miserably. I have a recipe, but it's not directly from her, so I'm not sure how accurate it is. I do have some ideas to edit this recipe to make it more like hers, but I've moved on to other poppyseed items for now. I was a little anxious about this cake since it you bake it in a Bundt pan, and I can count the number of times I've had a Bundt come out cleanly on zero hands. It always ends up falling apart no matter how I grease, flour, pray to the Bundt gods, and it always makes a mess. Claire did note in the video and in the recipe that you can bake this in two loaf pans, but where's the fun in that?
To do everything I could to prevent the dreaded sticking, I did what Claire did in the video. I used a neutral oil (vegetable), brushed it all over the pan, and then coated it in flour, gently tapping out the excess. I've done the shortening/flour technique for years before baking spray was a thing, it is how my mom taught me to handle pans, specifically for cakes, so I have experience with it. As I finished and set the pan aside, I stared at it skeptically and said, "Please release the cake when the time comes." Then I moved on to gathering my ingredients.

I've gotten better over the years at the mise en place thing. Everything progresses more smoothly with baking and cooking when I have everything already set out and ready to go. Sometimes it feels like I'm wasting dishes, but I have a dishwasher, and if the Finish commercials are correct, it takes less water to run the dishwasher than washing the dishes by hand. It's probably reasonably accurate given how I wash dishes when I do it by hand, so if I use a couple of tiny bowls in exchange for sanity and ease, I guess that's okay.
This is a beautifully simple cake. I knew from watching Claire's video that it's not the most complicated recipe that she has, and the book has difficulty levels assigned to each recipe, and this one is labeled "very easy." Dessert Person also features a unique recipe matrix that compares time to difficulty. I probably shouldn't admit this, but I have hugged this book several times because I love it so much.
There is no creaming, no sifting, no whisking all the dry ingredients together, unlike many cakes. You just put the dry, turn on the mixer a couple of spins, turn it off, and add the wet ingredients all at once. You then beat it for a couple of minutes, and it makes a beautiful, soft, silky batter. I've mentioned before that recipes that call for softened butter aren't always my favorite. This is mostly because I don't like waiting for butter to soften, and if I try to speed it up, I make a mess of it.

I poured the batter into the prepared pan, and it looked a bit more full than it should be, but I went ahead with it anyway. As I watched it bake (I didn't have an oven with a window growing up until I was closer to a teenager, so it still thrills me to turn the oven light on and watch things bake.), I realized that perhaps I should've double-checked the capacity on my pan. I'm pretty sure it was a 10-cup Bundt, and the recipe calls for a 12-cup Bundt. I didn't have any spill-over. My Bundt just ended up having a domed bottom, not a big deal in the long run. The cake finished in the amount of time given in the recipe, which surprised me since there is a lot of batter here. I took it out of the oven, gave it another look, and asked it to please come out of the pan in 15 minutes.

After 15 minutes passed, I took my offset spatula, stabbed around the edge of the pan, put my cooling rack on top, flipped it over, lifted the pan, and....cake still in the pan. I flipped it back over and more aggressively dug around the outside with the offset spatula in hopes that it would separate from the pan. I went through the process again, flipped it over, and the cake came out! In one piece! I stabbed the cake all over with a bamboo skewer and brushed on the glaze.

Then, I had to wait until it cooled to try it. This was hard, but luckily it came out around the time I needed to start making dinner, so I had enough to distract me from the delightful smelling cake. When it was finally time to taste the cake, I was thrilled! This cake is delightfully light and fluffy. It has a delicious flavor, and the bites that had the edges with the glaze were my favorite. The soft inside balanced so well with the flavorful edge. Since there was a lot of cake here, I shared it with my parents and sister, and they all agreed they would happily eat it again. And, I would happily bake this one again!

Since I've had the book, I've made one other recipe from it. I'll come back and chat about that one soon. If you love desserts and/or baking, I highly recommend Dessert Person by Claire Saffitz.

Sew Sampler Box December 2020
2020 was a challenging year, and 2021 hasn't started much better, but getting the December 2020 Sew Sampler Box from Fat Quarter Shop feels like a bonus treat. I know that some people aren't thrilled with the idea of receiving two boxes in one month, though I understand that January will also be late. If the last almost year has taught us anything, we need to roll with the punches.
I was fortunate to receive all of the items I ordered online for Christmas before Christmas. Things I've ordered recently haven't been so speedy, but we're also dealing with a global pandemic, among other things, so if things come a little slower, so be it. I can still remember the days before Amazon, or even the internet, when I'd pick items from a catalog, my mom would order them, and it would feel like they would never arrive. And we didn't get email tracking as soon as it shipped either. I currently have one package that is coming from Brooklyn. It has taken a detour to Boston for several days. I hope it's having a good time. I know it stinks to have to wait for the items we want, but I don't blame the company I've ordered from. It does neither of us any good for me to get upset or complain to them until a decent amount of time has passed.

Anyway, after all of that, I received my Sew Sampler Box a day before I was expecting it. So, that was a nice treat today. Want to know what came inside the December 2020 box? Let's get into it.
The box is Lori Holt-themed with fabric, pattern, and an additional item designed by Lori. Her aesthetic is not always my aesthetic, and that's okay. I certainly appreciate her creative genius! And, this fabric line is definitely my favorite Lori Holt line yet.

The fabric included in this month's box is a Petite Flea Market 10" Stacker by Lori Holt for Riley Blake Designs. I do like this fabric a lot. I like the vibrant colors paired with the fabric design inspired by vintage linens, old wallpaper, and dinnerwear.
A new item included in the box is 6" Sparkle Star Quilt Block Foundation Paper by Lori Holt of Bee in my Bonnet from It's Sew Emma. It's Sew Emma has been knocking it out of the park with foundation papers lately, and this one looks fun. It's shown with the solid as the stars, but it might be fun to play with that and have a quilt with many tiny, colorful stars on a solid, neutral background.
Designed by Lori Holt, the exclusive pattern uses both the 10" Stacker and the 6" Sparkle Star Quilt Block Foundation Paper. It is called the Twinkle Toes Table Runner Pattern. It's a scrappy pattern that has a bright, fun look, and it would be great to use not only with Flea Market fabric but also stash!
Another new item that Sew Sampler subscribers received first is the Stay Sharp Navy Magnetic Needle Case. This feels like one of those things you didn't know you needed until you have it. I have A LOT of needles. Being a Sew Sampler subscriber, a quilter/sewer for many years, and a cross stitcher, I have many different needles hanging around, and sticking out of projects, spools of thread, and hanging in packages on my pegboard. I know what I'm going to use this one for. My favorite cross stitch needles are Pat's Favorite Needle, and they come in a tiny envelope. Every time I open the package to grab a new one, I'm afraid I'm going to re-enact the tire change scene from A Christmas Story, and needles will fly across the room. Since there is a magnet inside this case, I won't have to worry about the needles having a mind of their own.
The final product included in the box is a duo of small 50wt Aurafil spools. The colors are 2220 and 2134, and they coordinate well with Flea Market. I'm never going to turn my nose up at Aurafil thread. It is my preferred brand. My aunt introduced Aurafil to me when I was trying to finish my first quilt back in 2011, and the sewing machine I had then died. She is a fantastic quilter and has several machines and kindly allowed me to borrow hers. I can't remember the model, but it was a Janome. It helped me solidify my decision to go with Janome when I replaced the no-name machine I was working with.
Overall, this is a nice, bright box that is very welcome here in January in New England. We're not quite utterly devoid of color since the foot of snow we received in mid-December was washed away by rain at Christmas, but I'm already ready for spring!

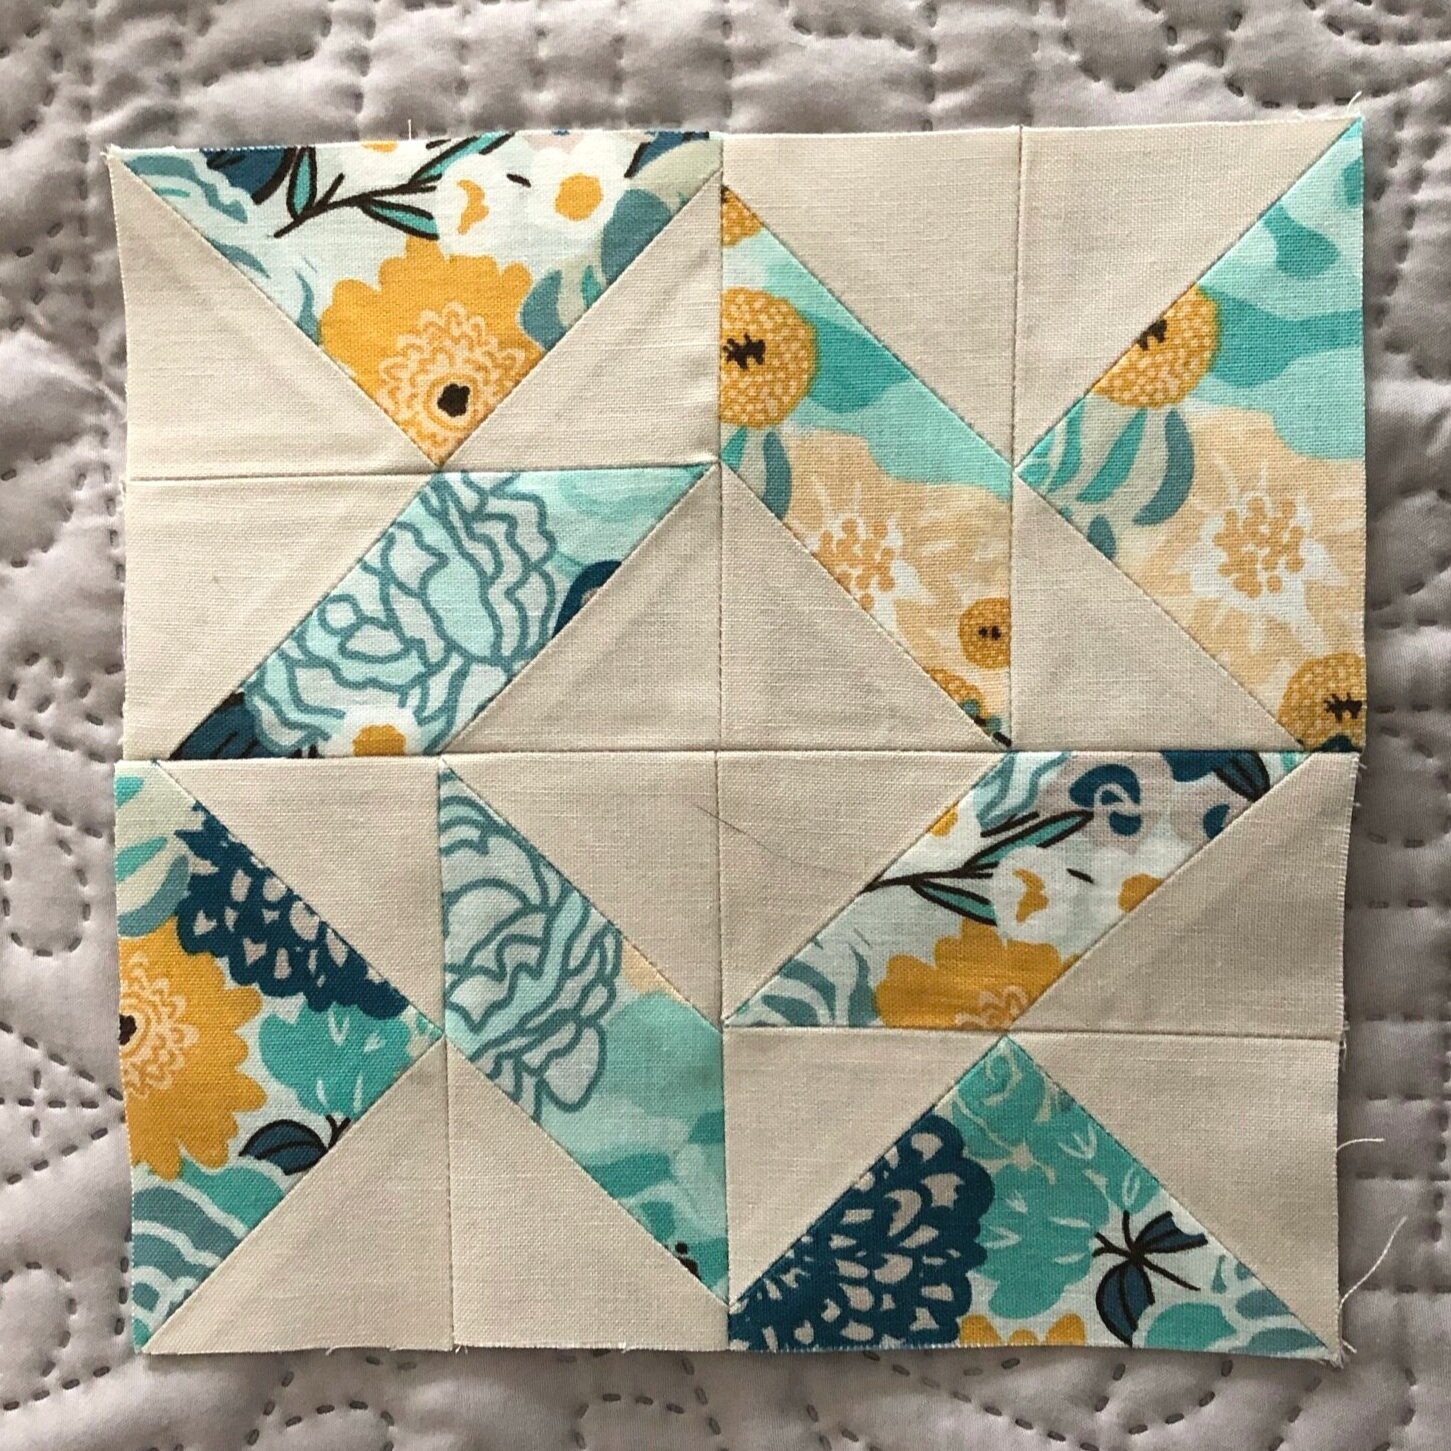
Sewcialites: Block 10
Trying to get everything caught up, it was handy that my block nine and block 10 of Sewcialites both ended up using the same print fabric because I worked on them simultaneously. I figured out how many of each size/print/solid I needed between the two patterns, did all the cutting at once, and then sewed them individually.
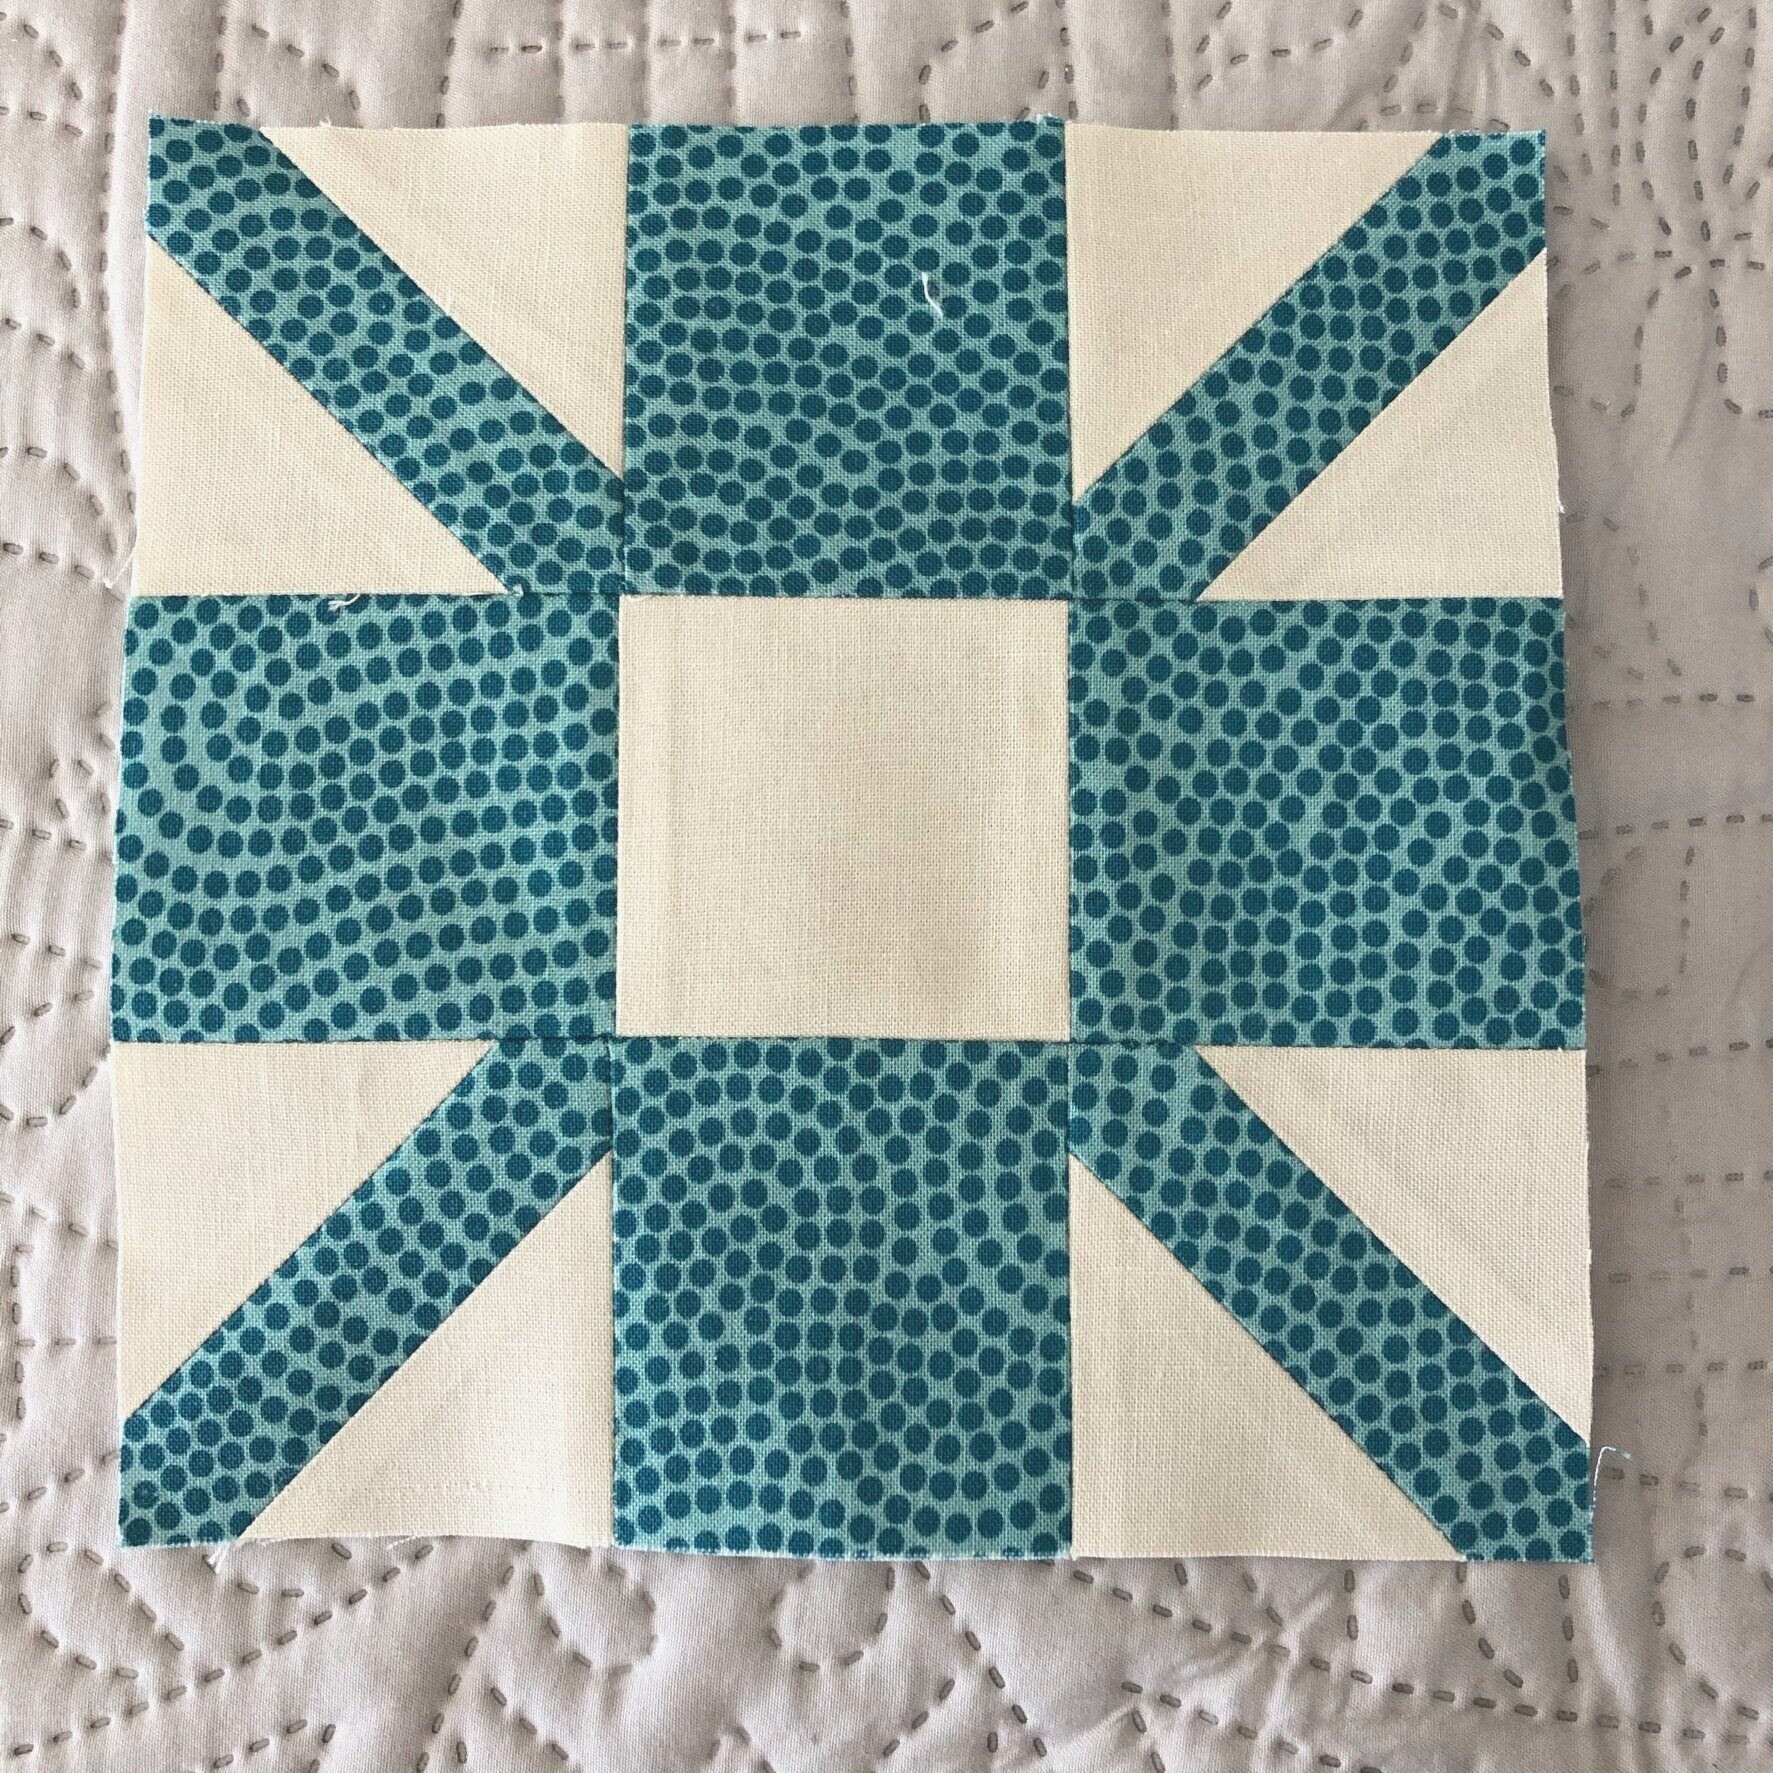
Sincere by April Rosenthal was a simple-to-sew block that was refreshing after trying to match the seams on block nine. This block was delightful, and looking at it finished, and it's the kind of block that makes me clap my hands happily (which is something I do when a finished project or piece of a project makes me happy).
The finished block reminds me of a flower, and I'm wondering what it would look like if you made several and turned them into a table runner. That's a project for the future though, I have got to catch up on everything I want to finish.

Sewcialites: Block 9
While I love this time of year, it's been especially hard during this pandemic. Being stuck home all the time, not seeing extended family, and losing daylight hours is tough on me and my ability to complete projects.
I didn't get to block 9 of Sewcialites until a week after its release. Gracious by Vanessa Christenson is an exciting block that uses corner squares. Instead of drawing the line, I did use my Mini Folded Corners Ruler for this one.
When I put the four pieces together, I had a little bit of trouble matching up all of the seams. It was a little more challenging than I was expecting, but I got it done!


Sewcialites: Block 8
Slowly trying to get myself back caught up on my imaginary list that doesn't matter since I don't have any actual deadlines on the current projects, I sewed block eight of Sewcialites last night. Soulful by Joanna Figueroa is labeled beginner but contains (one of) my quilting nemesis(es), flying geese.
I feel like every time I have to make flying geese, I end up with super wobbly squares that then get sewn into even more wobbly blocks, so you can understand why I was a bit anxious about this one. I can't be sure, but I think part of the issue is drawing the line and then sewing on the line. I suspect my errors come somewhere in this step. Yes, it should be easy to draw a diagonal line and then sew it, especially since the line is right there for me, I don't have to imagine it, but I inevitably end up too large or too small.
As I sat in my sewing space, pondering this relatively easy block, I looked up at my pegboard. I saw Doug Leko's Antler Quilt Design Mini Simple Folded Corner Ruler (that I received in a past Sew Sampler Box). I had used it successfully on a previous project instead of the draw line/sew line technique, so I decided to give it a go for this block.
For matching points, I used Kimberly's tip from the Livestream and drew a line 1/4" in, and matched that to the point on the flying geese square using a pin.
My final block is still a little on the wobbly side, but overall, if I step back and look at the block, I'm happy with it.

Journey 2 Nebula - Gazebo: Cutting & Layout
My slow-moving-projects continue this past week. I finally managed to get the cutting done on my Journey 2 Nebula project, Gazebo. For this project, I dug deep into the stash/scrap bin. These 2.5" strips were leftovers from a previous Jaybird Quilts project that I made, Snack Time. Since I don't have many pictures of this week's layout, I'm happy to show Snack Time. I made this over seven years ago, so I don't remember all of the fabric that I used, but I believe that the strips were a Robert Kaufman jelly roll.
Gazebo was early to cut using just half hexies and two sizes of triangles. The colors remind me of a Lite Brite, so I've had the commercial's song from the 80s/90s in my head. I adored my Lite Brite. I wouldn't turn my nose up at a new version either. :)
I placed the teal in the center of the layout and worked my way out to the brightest lime color. Since the fabric is older and has been around the scrap bin for a while, there are many frayed edges, but I'll trim those when I go to sew it. I might try some fancy free motion quilting when I get to that point, but we'll see!


FFO: Let's Talk Autumn from Hands On Design
Well, I managed to get this finished before autumn bids us adieu! I didn't think I would, and I wasn't even sure if I would make it to display before I started busting out the Christmas decorations, but I did.
I love this series from Hands On Design, even though we just have autumn (and I know winter is coming soon, and it'll be hopping into my cart as soon as it shows up at FQS). Something is satisfying about stitching words, even if they take me just as long as a project that's not mostly text.
I know they say you're not supposed to point out your mistakes, but I'm going to because I hope it will benefit someone someday. I think my fix was acceptable, and in the grand scheme, this is a minuscule error. I stitched this on 32-count chalkboard black linen. It's not the easiest to see, and sometimes I don't pay as close attention as I should. It happens to the best of us. You get distracted by something, and the next thing you know, you're off by a hair. And, I really do mean a hair. I ended up being off horizontally by one hole, not even a whole stitch. And it was towards the top, but after I had enough of the project stitched, taking it out just felt devastating. So, I set it aside for a bit and pondered.

As I looked at the chart, I realized I could add that half stitch space between the horizontal sections, and I could make it work, as long as I remembered to do that. The only place it got a little tricky is at the bottom where the leaves are overlapping, so the word pumpkin has a stitch and a half instead of one stitch between one of the letters. Feel free to zoom in and find it if you must. I think I did a decent job masking it, so certainly someone who doesn't know a thing about cross stitch won't see it. I also had several places where I had to unpick my stitches, which added at least two hours to my time, probably more.
I used the called-for DMC. It was a nice switch from using the fancy floss. I don't really keep any hard and fast rules about how I stitch with my fancy floss. Sometimes I do one half of the stitch across the row and then come back and cross the other way, and sometimes I do each stitch alone. Lately, I've been doing single stitches, which feels like it takes longer, but it's probably just in my head.

I went very simple on finishing this, and I can easily swap out the finishing as the seasons change, and I complete the other versions. I stuck this on an 8" x 10" piece of sticky board and put it in a frame that I purchased from Michael's. I don't have the glass in front, but do have it behind the stitched piece if I decide I want to change that in the future.
Details
Fabric: Wichelt 32ct linen in chalkboard black
Floss: Called-for DMC
Pattern: Hands On Design Let's Talk Autumn (Chalk Talk)
Other: Sticky Board, 8" x 10"
Frame: Gray 5" x 7" Frame with Double Mat, Expressions™ by Studio Décor from Michael's
Total Hours Spent: 60 hours, 28 minutes (I think I'm a slow stitcher)
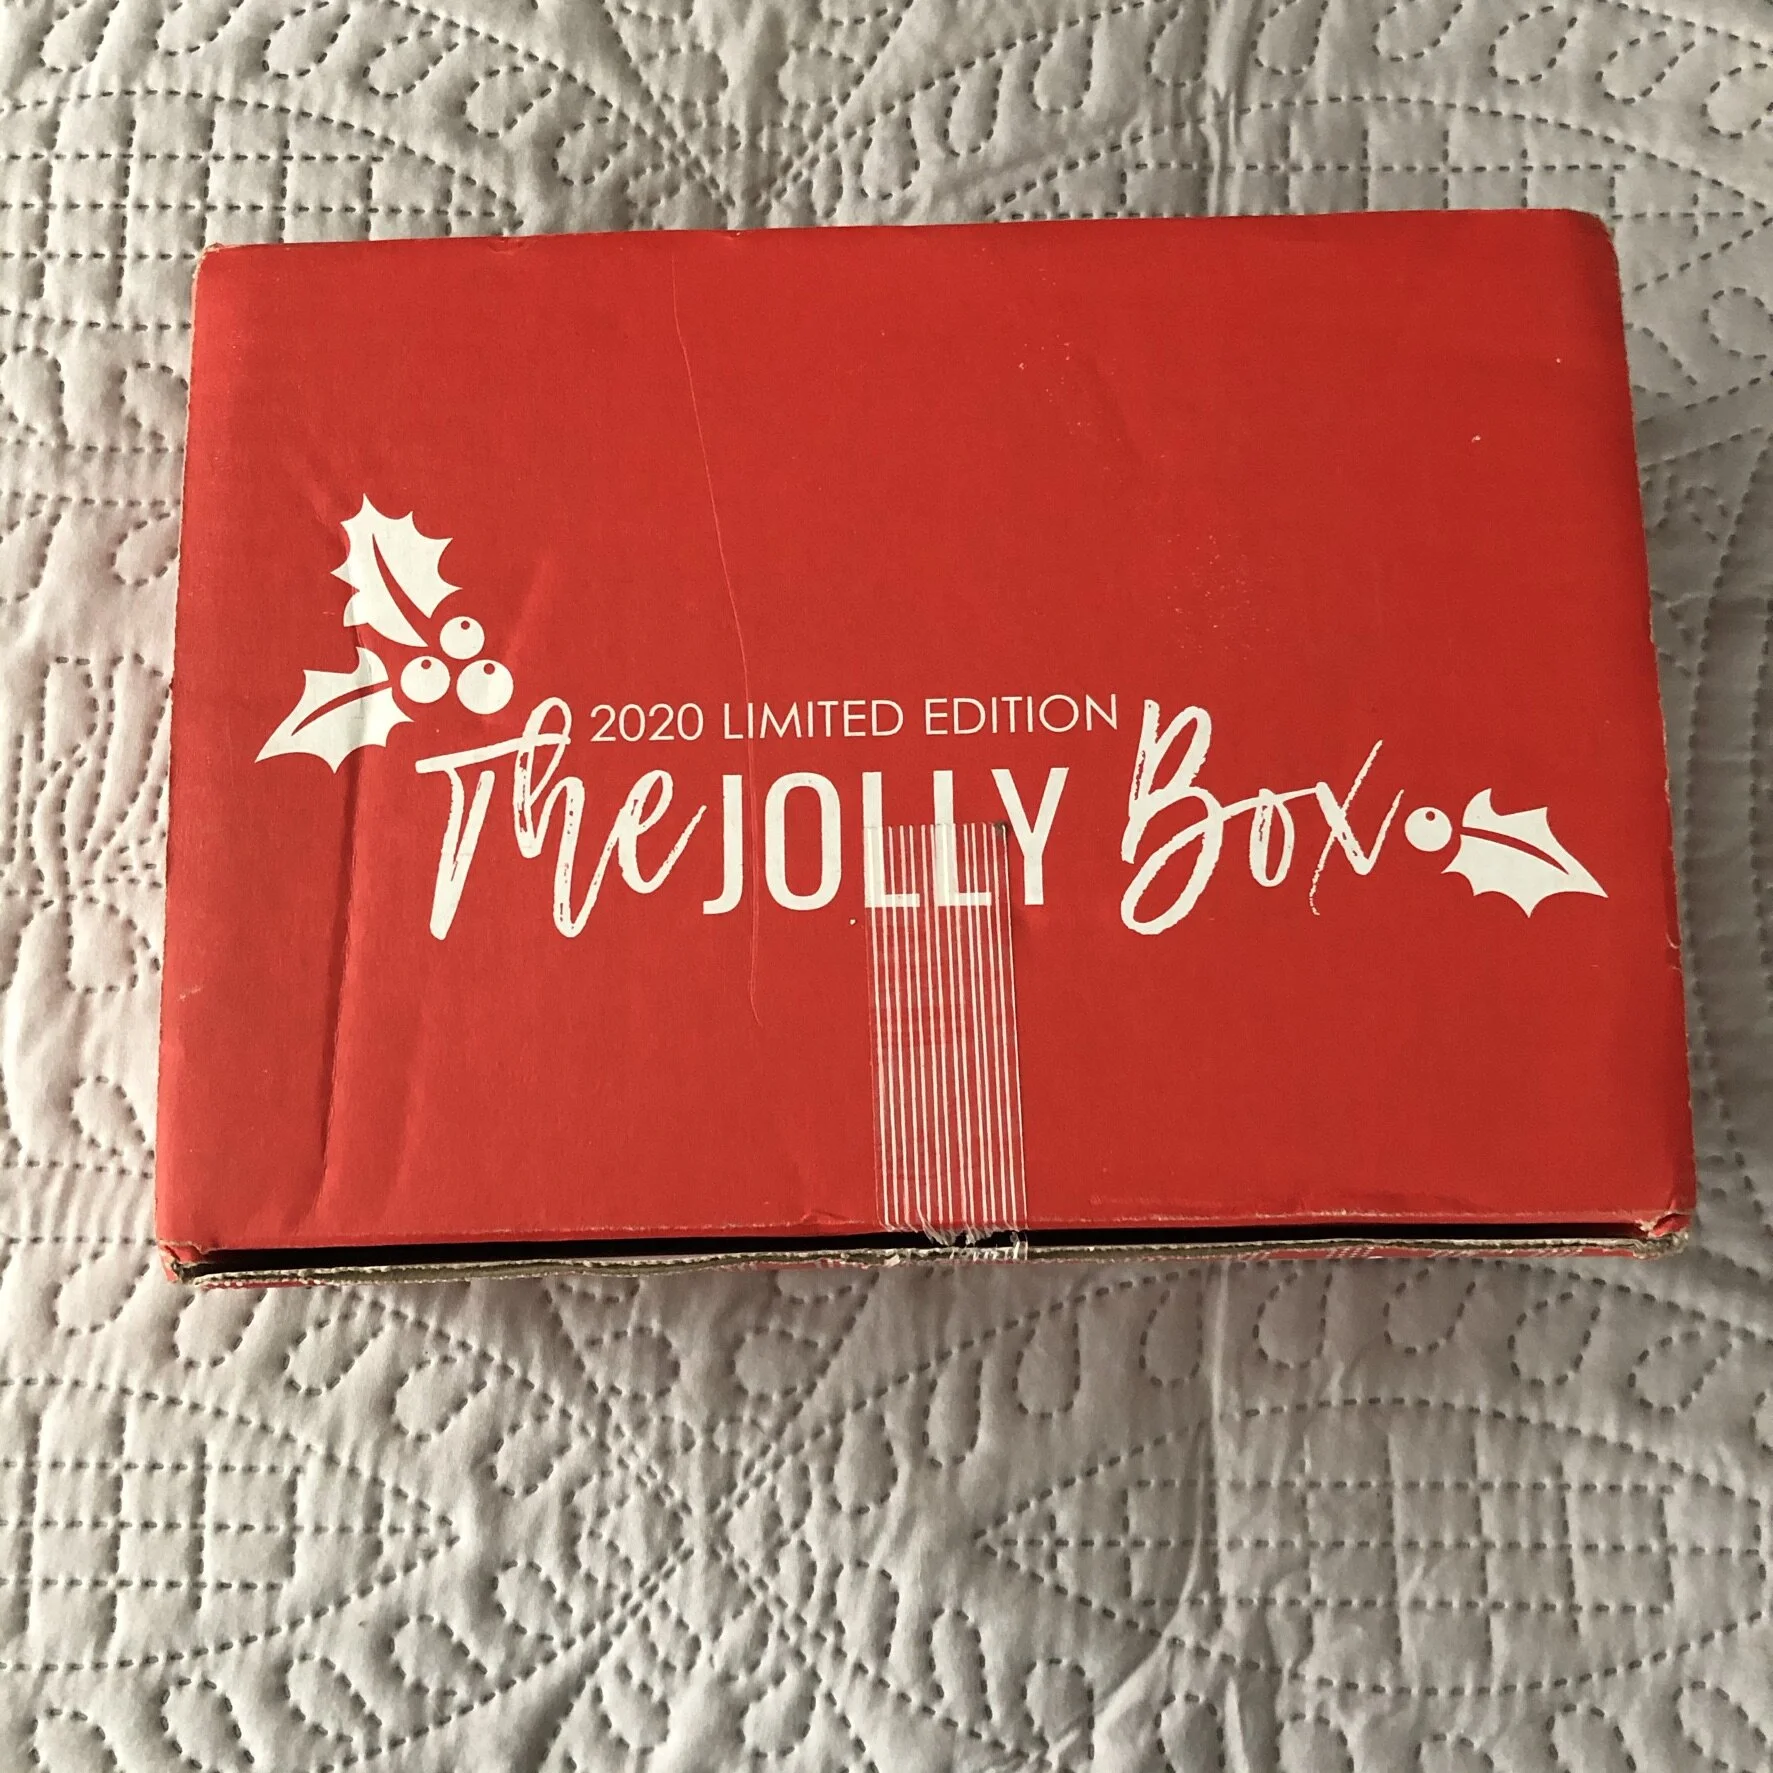
Jolly Box 2020
I feel like I haven't been getting much done; lately, it's been a bit tough, but today is my birthday, and a birthday surprise arrived! The Fat Quarter Shop 2020 Jolly Box! I wasn't expecting it to come for a few more days, so it was a pleasant surprise. I'm sure you're wondering what was in it, so I'll stop babbling and get to sharing.

I didn't have any clues about what would be in the Jolly Box this year since fabric has been selling so quickly in the last seven or so months, and there's not much Christmas fabric left to be had. I was quite surprised when I opened it at Deer Christmas by Urban Chiks for Moda was staring back at me.
Here's what was in the box:
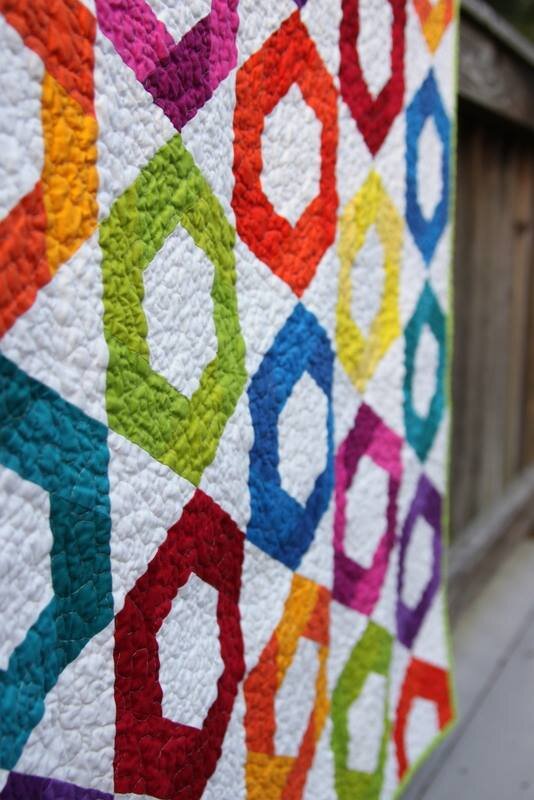
Fat Quarter Shop Exclusive Deer Christmas Multi Deer Quilt Panel - at 23" x 42" it's smaller than the original panel, but a great size for a wall hanging.
Deer Christmas Charm Pack - charm packs, need no description, do they? 5" squares of this adorable fabric collection ready to go!
North Pole Quilt Pattern - The finished size of this project is 27 1/2" x 36 1/2", so it's an excellent option for a wall hanging. It uses the panel and charm pack for a simple, quick project that can quickly be done in time to celebrate this year.

Oh Deer! Socks - One cannot have enough socks, especially up here in Massachusetts! These cute socks feature the deer from the Deer Christmas fabric line and polka dots. And, I, for one, cannot get enough polka dots.
Two Spools of Aurafil 50wt - Pretty self-explanatory, two small spools in two colors I often use, 2600 and 2024.
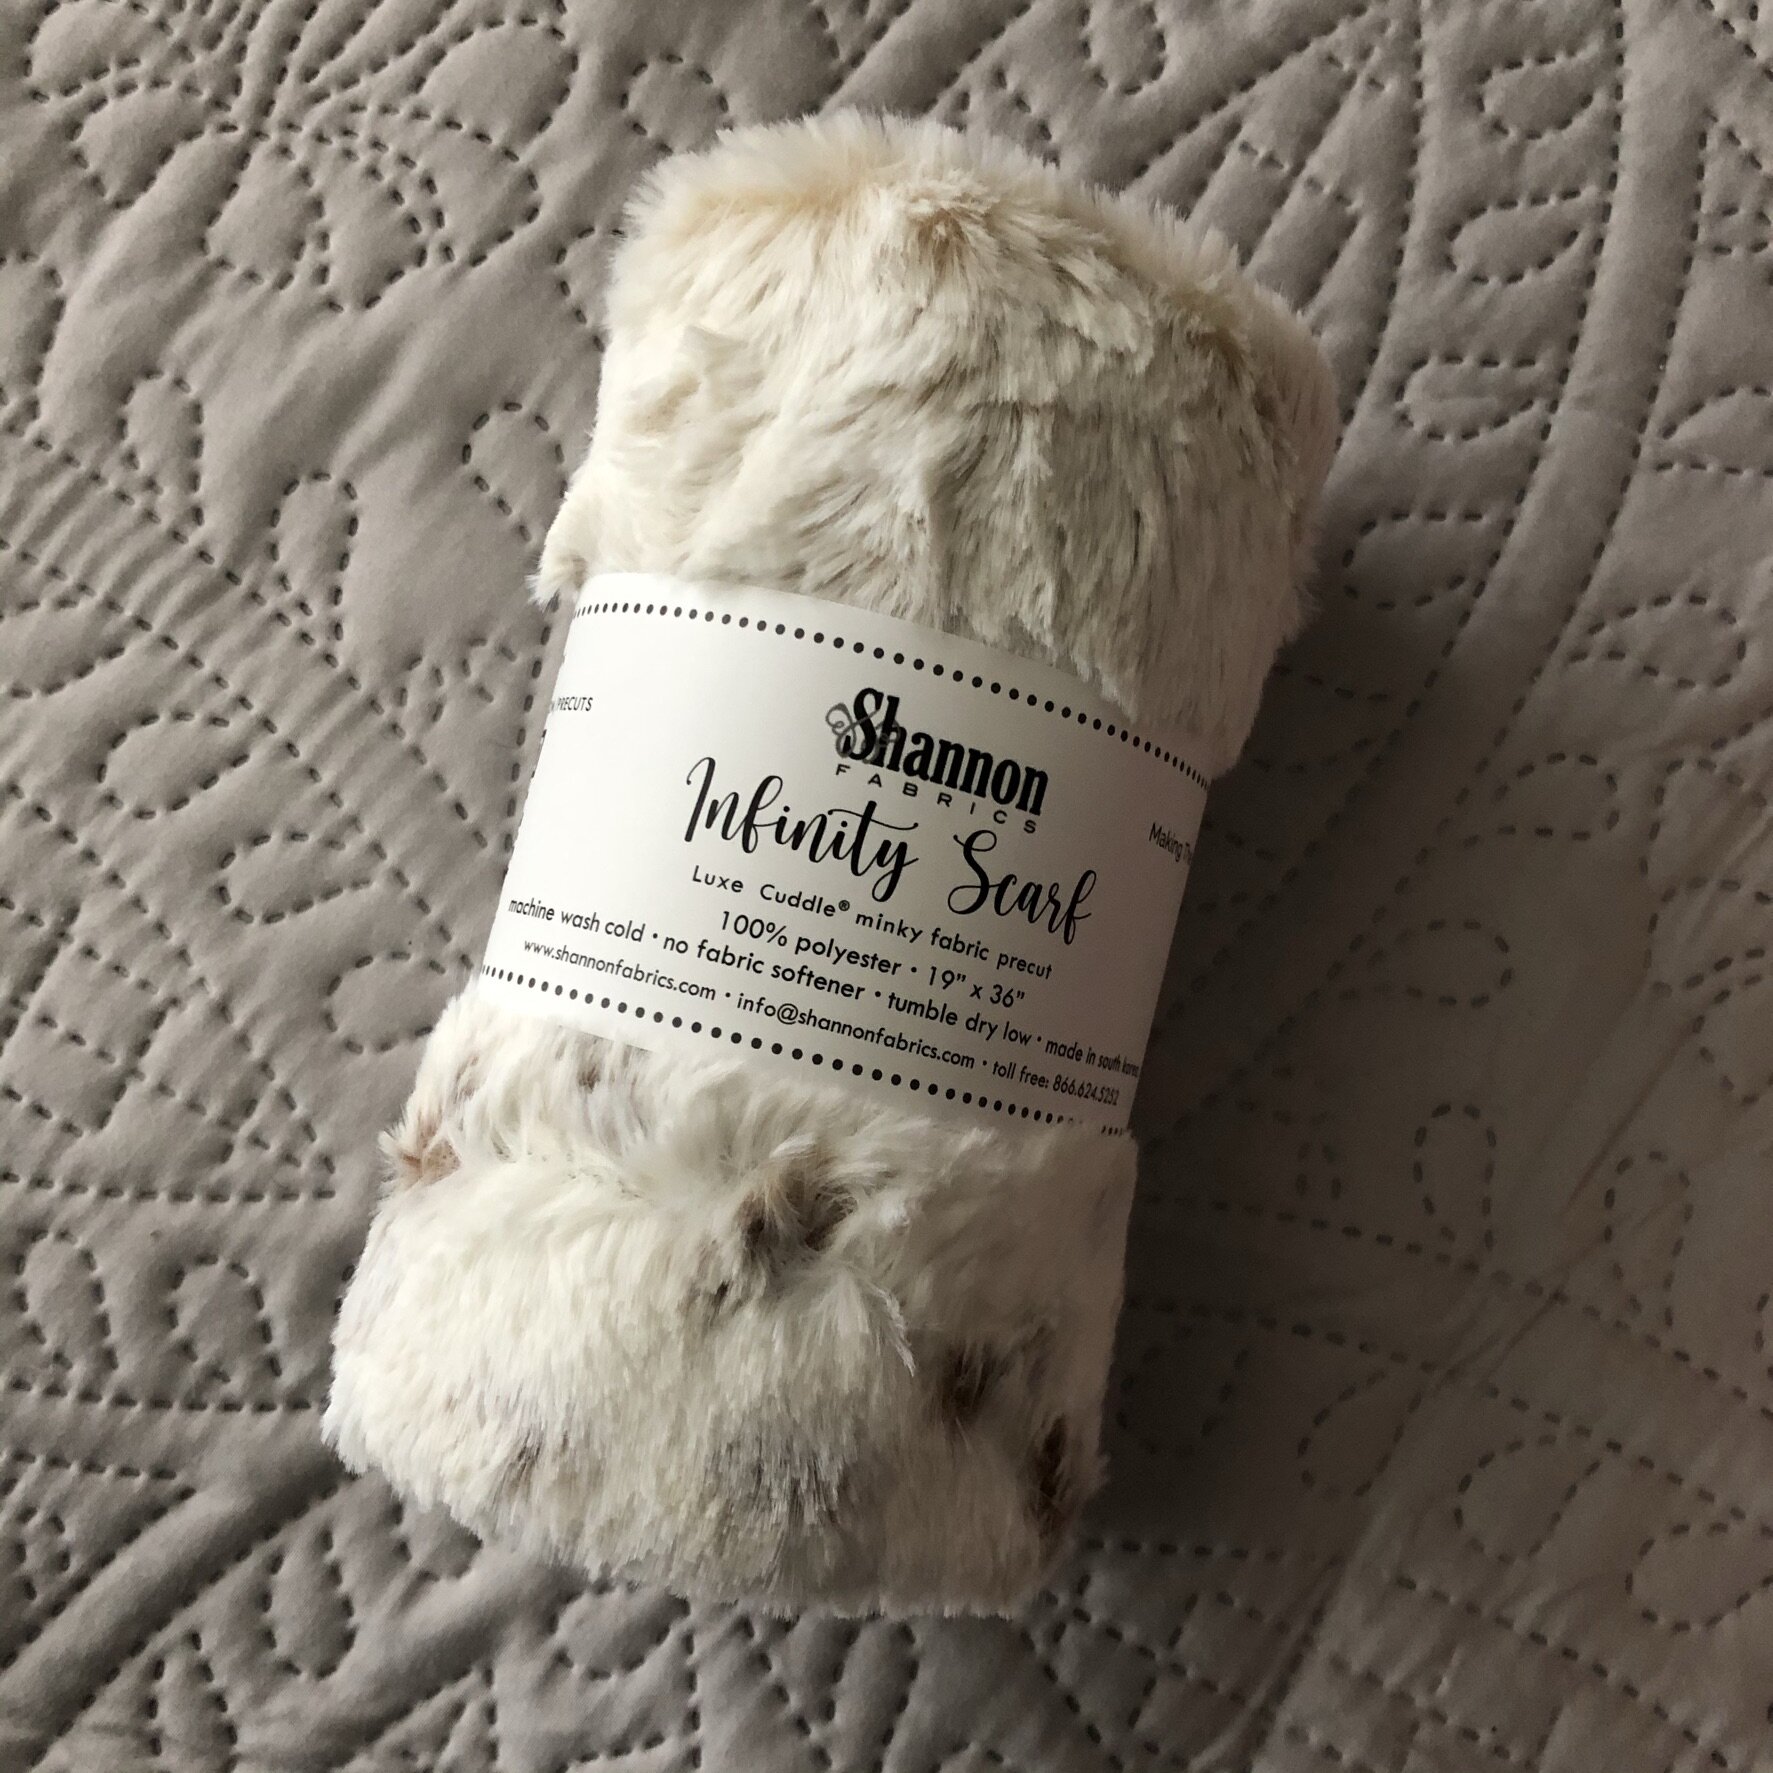
Frost Lynx Infinity Scarf Kit - I'm certainly intrigued by this. I've wanted to give Minky a go for a while, but I just haven't leaped. I guess I will now with this infinity scarf kit! I'm looking forward to having something soft and warm, especially as the daylight hours quickly get shorter; something soft and comforting is just what you need. There are some similar ones here.
Homegrown Holidays Pocket Notepad - From Moda, this cute notepad has a magnetic closure and smooth paper (I'm a paper-snob sometimes) with a linen-print and snow-covered trees.
This box is pretty different from the previous two Jolly Boxes, but I'm pleased with the variety in this one. We get to try a little of everything with this one.

Journey 2 Nebula - Candy Dish: Finished!
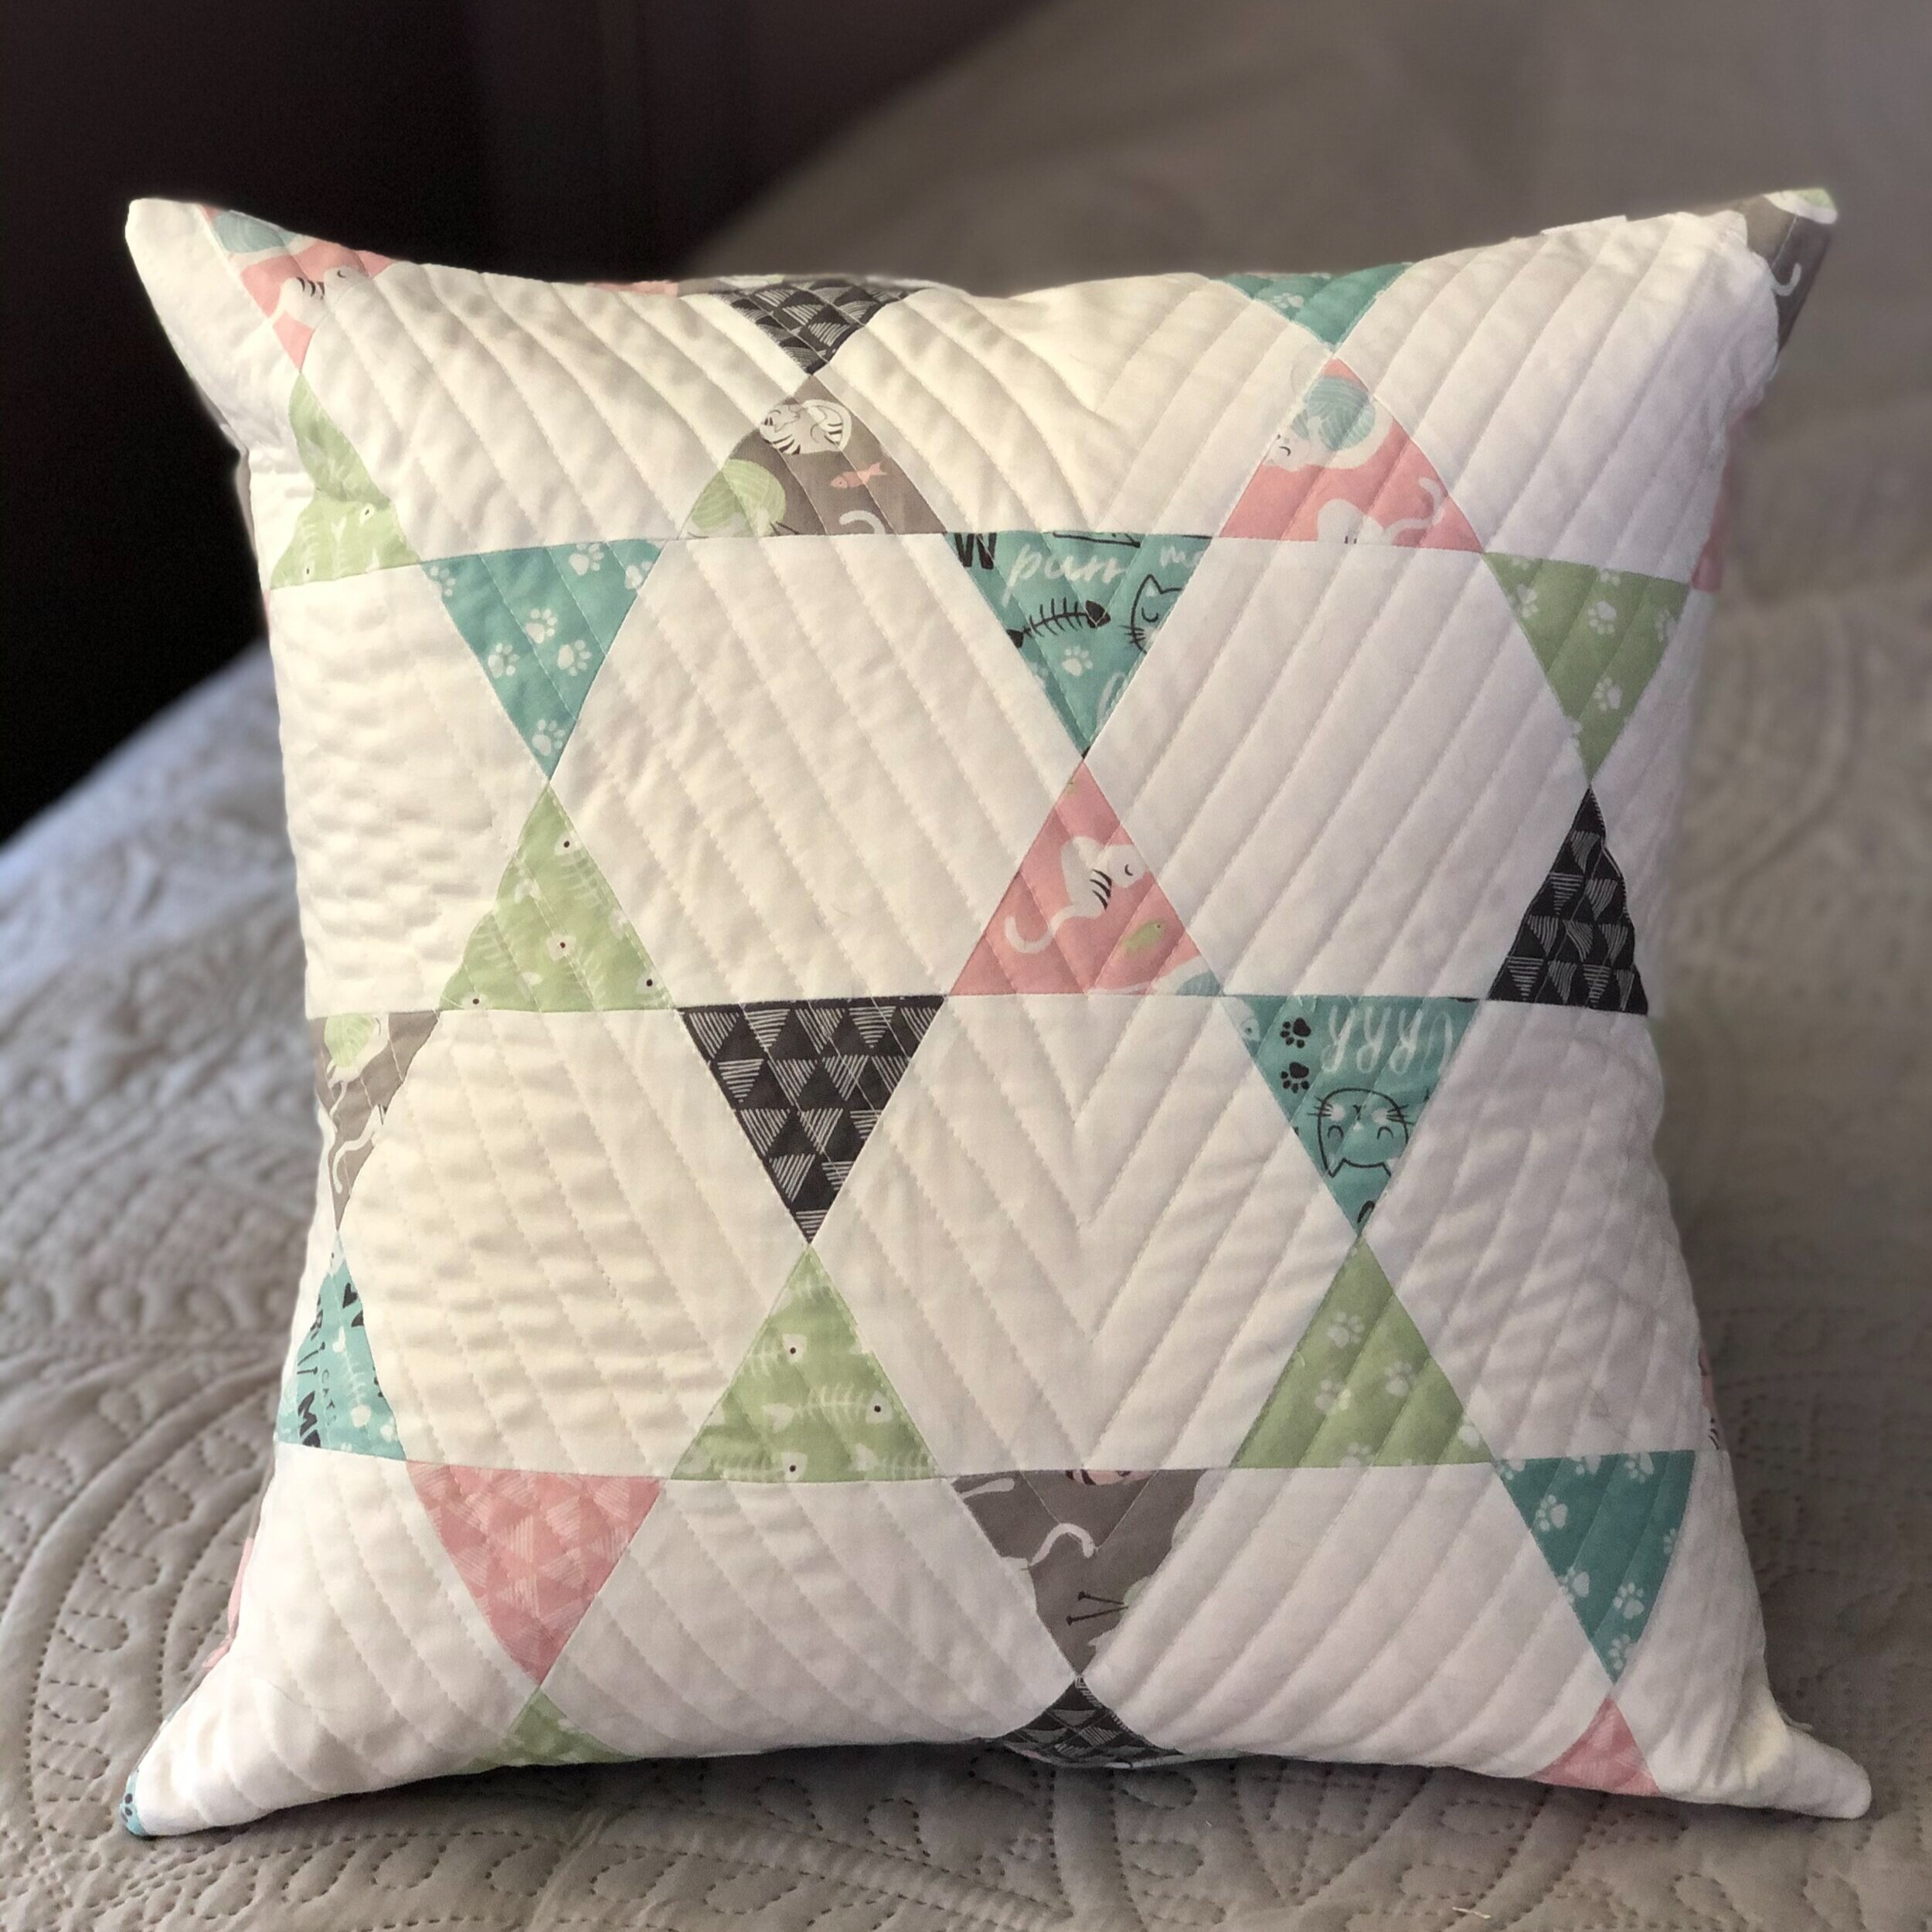
I finished my pair of Jaybird Quilts Candy Dish pillows! For the most part, the piecing on these went reasonably smoothly. There are a few points that don't match perfectly, but you can't see the slight misses when you look at it as a whole.
I love the fabric. The little kitties make me so happy. I'm glad that these pillows are a bit on the smaller side. We recently bought a new living room set for our newly finished basement, and the couches came with pillows. I have so many pillows, but at least these smaller sizes are a bit more unobtrusive.
I wasn't sure how I wanted to quilt them. I thought about doing something fancier, but I also wanted to get the project done since there are currently so many things on my to-do list. I had a long list this weekend, and while I finished a good chunk, it wasn't quite as much as I was hoping for. I expected to cross off one more thing, but alas, I did also have to take some time to relax. I didn't want to cover up the cute 'lil kitties on the hexagon focus quilt, so I just did some stitch in the ditch-ish on the diagonals and horizontal lines.

For the more background focused pillow, I did some straight-ish line quilting. I like the texture of straight line quilting on pillows. It feels nice when you run your hand across it in an almost calming way.
I can't believe there's only one more project in the Journey (except for the exclusive patterns that Julie mentioned when signing up). I'm not usually great at keeping up with "alongs," but I'm pretty proud I've been able to keep up with this one. I do have to spend some time tonight, deciding which fabric I have will be used for the next project.

Details
Fabric: Purrfect Day by My Mind’s Eye for Riley Blake Designs
Thread: Aurafil 50wt, 2021
Batting: Unknown from the leftover pile, likely 100% cotton
Pattern: Jaybird Quilts Candy Dish
Pillows: Foamily 16” x 6” Pillows from Amazon
Total Hours Spent: 6 hours, 44 minutes

Sewcialites: Block 7
What a week, huh? I've been pretty off and on this week crafting with everything going on, but I did take some time today to work on block 7 of Sewcialites. Named Kindred, it is designed by Bonnie Olaveson and is considered intermediate. I think that if I hadn't watched Kimberly's Livestream demonstration of this one, I would've been a little lost. Kimberly detailed how to make the pieces a little larger than called for and then trimming down. This was a lifesaver for me.
With all of the tips from the Livestream, this intermediate block came out beautifully for me. The size is just about dead-on, the points are looking good, and it's a pleasing design. Since I've been working on the Journey 2 Nebula, I have a lot of experience with the bias edges, but I was a bit anxious to work on this block even with that.
Overall, I'm happy with this block. I don't think I would have been able to figure out on my own how to increase the size and then trim, so I'm glad Kimberly showed how to do that. Now that I've worked through it with this block, I might have the skills to figure it out for another similar block.
