Jelly Snowflake Mystery Quilt Finishing

I finished assembling the top of the Jelly Snowflake Mystery Quilt on July 31, so I finished the assembly before July was over, and I’m super excited about it. It’s not often I manage to keep myself caught up, especially this time of year, when I’m spending time outside on the boat. I thought about making it a little bigger, but in the end, I’m good with the pattern size.

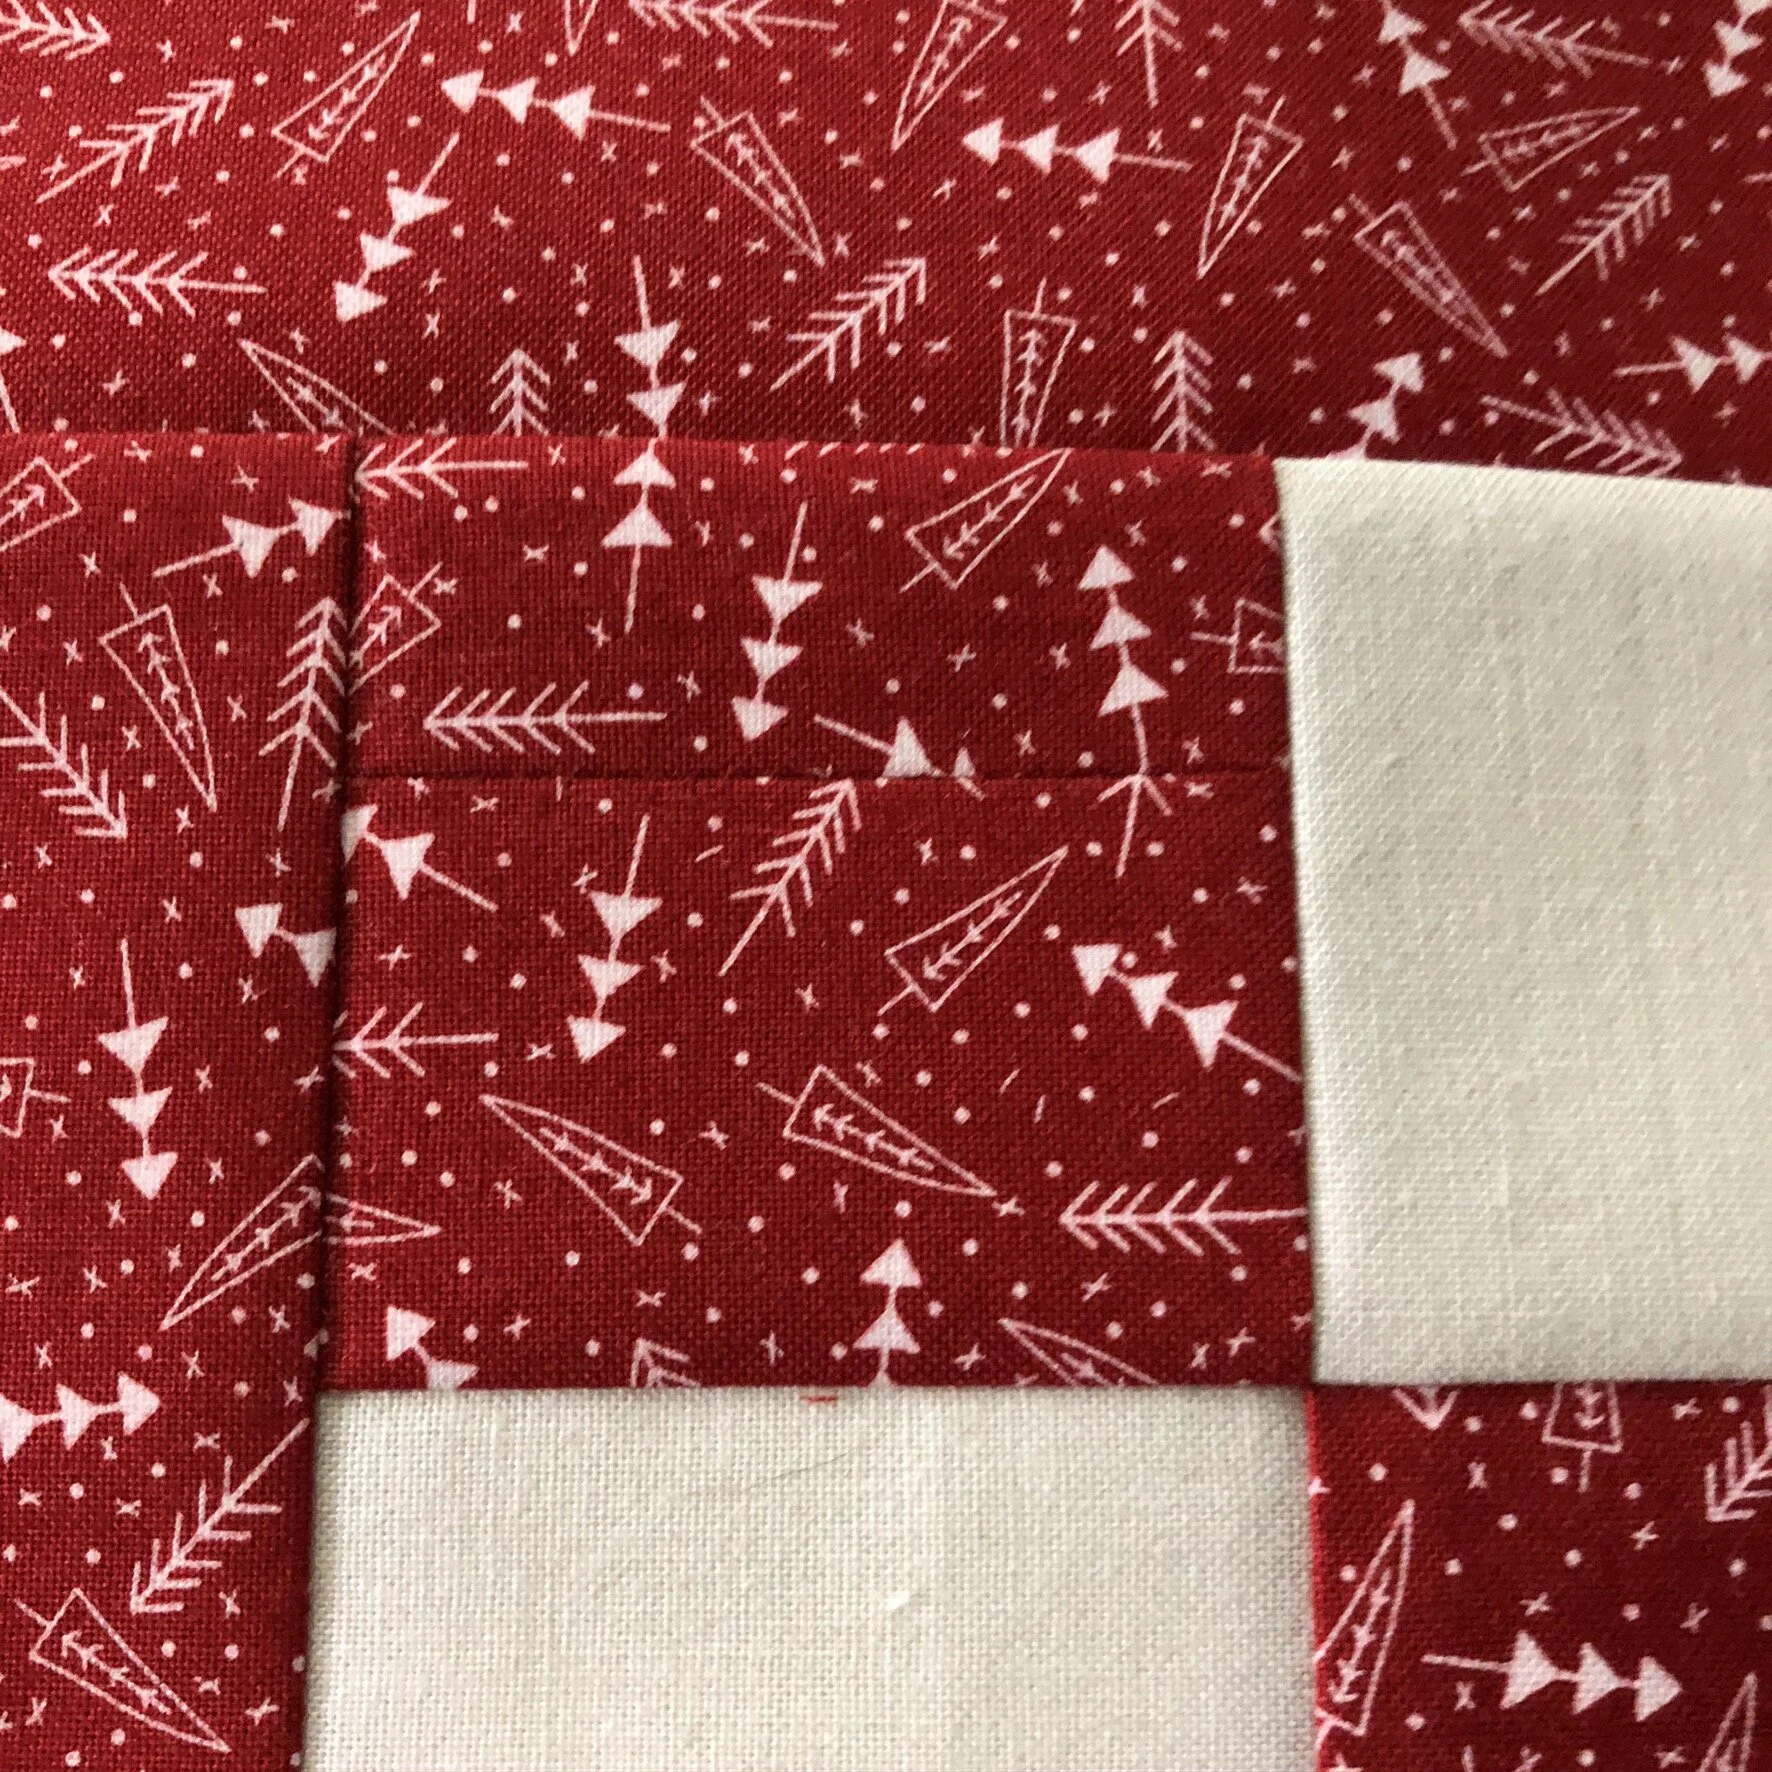
Finishing involved a center block and border pieces. The top came together fairly quickly, especially when I was able to match seams. It’s not my first time matching/nesting seams, but every time I do it, I get just a little bit of a thrill. I always anxiously peek at the intersection points and often make the slightest squeal of delight when everything matches up the way it’s supposed to. Sometimes I wonder if I’m going to stop doing that, but to be honest, I hope I don’t.

1B0955A9-4796-4A44-94D8-2238180C03FF.jpg

The next step is, of course, the quilting. As I’ve mentioned, I don’t have a very large throat space on my machine, so I often find free motion quilting, or really any quilting, to be troublesome. I also always want to be better than I am, and I know that’s more a function of not practicing than my actual ability. I understand that a new machine wouldn’t solve all of my problems, but I do imagine it would be helpful to be able to shove more quilt through the machine. I have an idea of what I want to do for the quilting. I’ve drawn it out on paper, we’ll see if I can actually accomplish it.

Jelly Snowflake Mystery Quilt Block 4

I managed to get myself caught up on the blocks for the Jelly Snowflake Mystery Quilt Sew Along! Block 4 was a relatively easy block, though it is a long rectangle, which I worry about a little because sometimes they have a tendency to get a little wobbly.

IMG_2071.jpg

It was a pretty easy block to put together. Once I had the pieces cut (which also didn’t take long with the Stripology XL ruler), I was able to assemble each block in about half an hour. That includes pressing and trimming. Considering I’m not the speediest sewer, I’m pretty pleased with that time.

99802A6B-396F-4314-82F5-A490925D6A29.jpg

I’m excited to put together the final layout. I couldn’t wait, so I laid it out and I’m letting the layout sit for a day or so. I generally like to do that will all of the quilts I make. I like to make sure that I’m don’t have two of the same fabrics next to each other, or two of the same color. I’ll usually lay it out, take a picture (or two) with my phone and stare at it, squint my eyes, and scroll back and forth from the image so I can get an overall picture.

Mistletoe Lane Stitch Along Week 2

Week 2 of the Mistletoe Lane Stitch Along went significantly quicker than week 1. This was a pretty easy stitch, and it was nice to add in some additional colors to the piece. I first stitched the dark green leaves and the berries. After that, I filled in the lighter green on the leaves and stitched the stocking. I love how they’re not traditional Christmas colors. I do usually decorate in more traditional colors, but I’m excited to have this in one of the rooms I don’t usually decorate to add a little holiday flair.

IMG_2020.jpg

I’m currently stitching week 3, which is the house. It is taking significantly longer, but I’m hopeful I’ll be able to get it done and caught up with week 4 (which is a nice small area) by this Friday.

Jelly Snowflake Mystery Quilt Block 3

So, I’m actually not as far behind as I said I was. I completed block 3 of the Jelly Snowflake Mystery Quilt in just over an hour this weekend. Compared to block 2, this one was a breeze. It helps that there weren’t any flying geese in this one!

I used my pretend design board to keep my pieces organized and it was so helpful. I messed up block 1 a couple of times when going back and forth between pressing and sewing together, so placing everything back on the board helped keep track of where everything should be.

IMG_2056.jpg

I did utilize chain piecing throughout and that seemed to help cut down on time. I did the two sections of the 4 patch and the square + green rectangle all at once, pressed and then completed the chain block. For the red pieces, I chain pieced the angled pieces, then pressed and added the squares. I’m really pleased with how this block finished, and super pleased with how quickly the four blocks came together.

IMG_2059.JPEG

Jelly Snowflake Mystery Quilt Block 2

What a shock, I’m behind! Block 2 of the Jelly Snowflake Mystery Quilt was a tough one for me. I’m not good at flying geese. It doesn’t matter what I do, how I cut, how I draw a line, how I sew, I inevitably end up with blocks that are off somehow.

I’ve been using my cheap-and-not-at-all-a-design-board piece of cardboard and that has helped me organize my blocks, along with the Alphabitties. I know I could easily MAKE a design board. Lori Holt just posted a video on it this weekend, but at the moment it’s spend time making a design board or sewing, and sewing has currently won. (If you haven’t checked out the video yet, I recommend it. The organization Lori has for her blocks is enviable!)

IMG_1992.JPEG

Someday, hopefully soon I’ll work on making my own design boards. I could also purchase them, but since I have the ability to make them, why wouldn’t I go the more affordable route? I DO need a glue gun anyway, so this is a good excuse, right? :)

Anyway, back to those flying geese. I don’t know why I have such a hard time with them. I’d like to blame my machine, but I’m pretty sure it’s more me trying to go too quickly and get things done and making a mess of things. I know that people are going to look at them and say “those look great, what are you talking about?” but if they’re not perfect, they’re wrong. (That’s a me thing though, I wouldn’t say that to anyone else!)

IMG_1993.JPEG

I did avoid trying to catch up on this block because of my fear of flying geese. And because I was going so slow, this block did take me a lot longer than I wanted it to, but they are done and I’m pretty pleased with them. I’m not sure I’ll be happy with using the lighter color on them, but using the lighter color also has the advantage of the mistakes blending in just a little bit better!

IMG_2053.jpg

Jelly Snowflake Mystery Quilt Block 1

Once again, I am behind on a quiltalong. I think I am destined to just not be able to keep up. That’s okay though, it’s still fun!

This week, I finished block 1 of the Jelly Snowflake Mystery Quilt. This was a fun block. I used my Stripology XL ruler to do all of the cutting and it went pretty quickly.

IMG_1956.JPEG

I did trim my jelly roll pieces to exactly 2.5” as Kimberly demonstrated in her video for the block. I need all the help I can get for getting precise blocks! You can see that I also used my Ruler Stickers from GE Designs on the ruler. Good thinking, right? Well…it’s good thinking when you actually pay attention and cut where the stickers are. If your brain thinks it knows better and cuts wherever it wants, you need to do some surgery on one block to make it a 2.5” square.

IMG_1986.JPEG

The good news is, I don’t think it’s very noticeable at all when you’re looking at the whole block, or when I don’t say “Can you see the mistake? It’s right here? See it?? See it…here!!??”

Overall, I’m super happy with the way the blocks came out and the process for making them. I did them over two separate days and the first two blocks took over 15 minutes longer to complete than the second pair of blocks I made. I’m sure that’s because I had gotten the hang of what they were supposed to look like.

IMG_1988.JPEG

You can’t see the mistake, right? ;-)