
I finished the latest project in the Journey 2 Nebula this week. Jaybird Quilts Jawbreaker is a pillow that uses the Hex n More Ruler to create triangles that turn into hexagons. Last week I had a little trouble with my rotary cutter, but I'm all healed now. You can barely even tell where I had the accident!
I watched Julie's video that had tips for assembling the hexagons and set to work. I don't have an ideal place in my sewing area to layout projects, so I usually do it on the spare bed. Then I have to walk between the two rooms, which isn't a huge deal, it's extra steps, but I like to figure ways to still be accurate without making too many trips. I did figure out a way to chain piece these rows and make it easier. First, I took a picture with my phone of the layout, so I had a reference to double-check the layout. Then, I stacked the triangles from one for and lined them up in order next to my sewing machine. Chain pieced them in pairs and brought them over to the ironing board to press, still attached. When pressing open, I picked up a tip from Kimberly Jolly of Fat Quarter Shop. I set my seams and then press them to one side, then flip them over and press open. I have tried both this and just pressing open in the same sewing session, and I find this way much easier. After pressing open, I bring them back to space next to my machine, still attached, and lay that down. Next, I clip the threads and rotate the pieces to the appropriate layout. After double-checking my layout, I sewed the first two and the last two together, cut the threads, checked the layout, and sewed those two pieces together. I stitched together the rest of the rows and just kept them stacked next to me, so I had them for reference from the next row.


I was a little anxious about trimming the pillow's center since I didn't have a ruler big enough to use for the total square. I followed Julie's direction in the video, and I successfully trimmed the oddly-shaped piece into a square! I was pretty darn proud of myself the other day when I did that successfully.

I used another strip from the jelly roll I used for the strip sets for my inner border. I added the two borders and let the top sit for a day to decide how to quilt it. I've seen some lovely quilted Jawbreakers on Instagram and Facebook, and even the simple quilting on the cover of the pattern is appealing. I love the hexagons and didn't want to take away from them at all, so I went with very simple stitching in the ditch. I've never been overly successful with this, but since I haven't tried it in a while, I went for it, and I'm pretty happy that my seams must have been straight because I didn't have trouble stitching in the ditch.
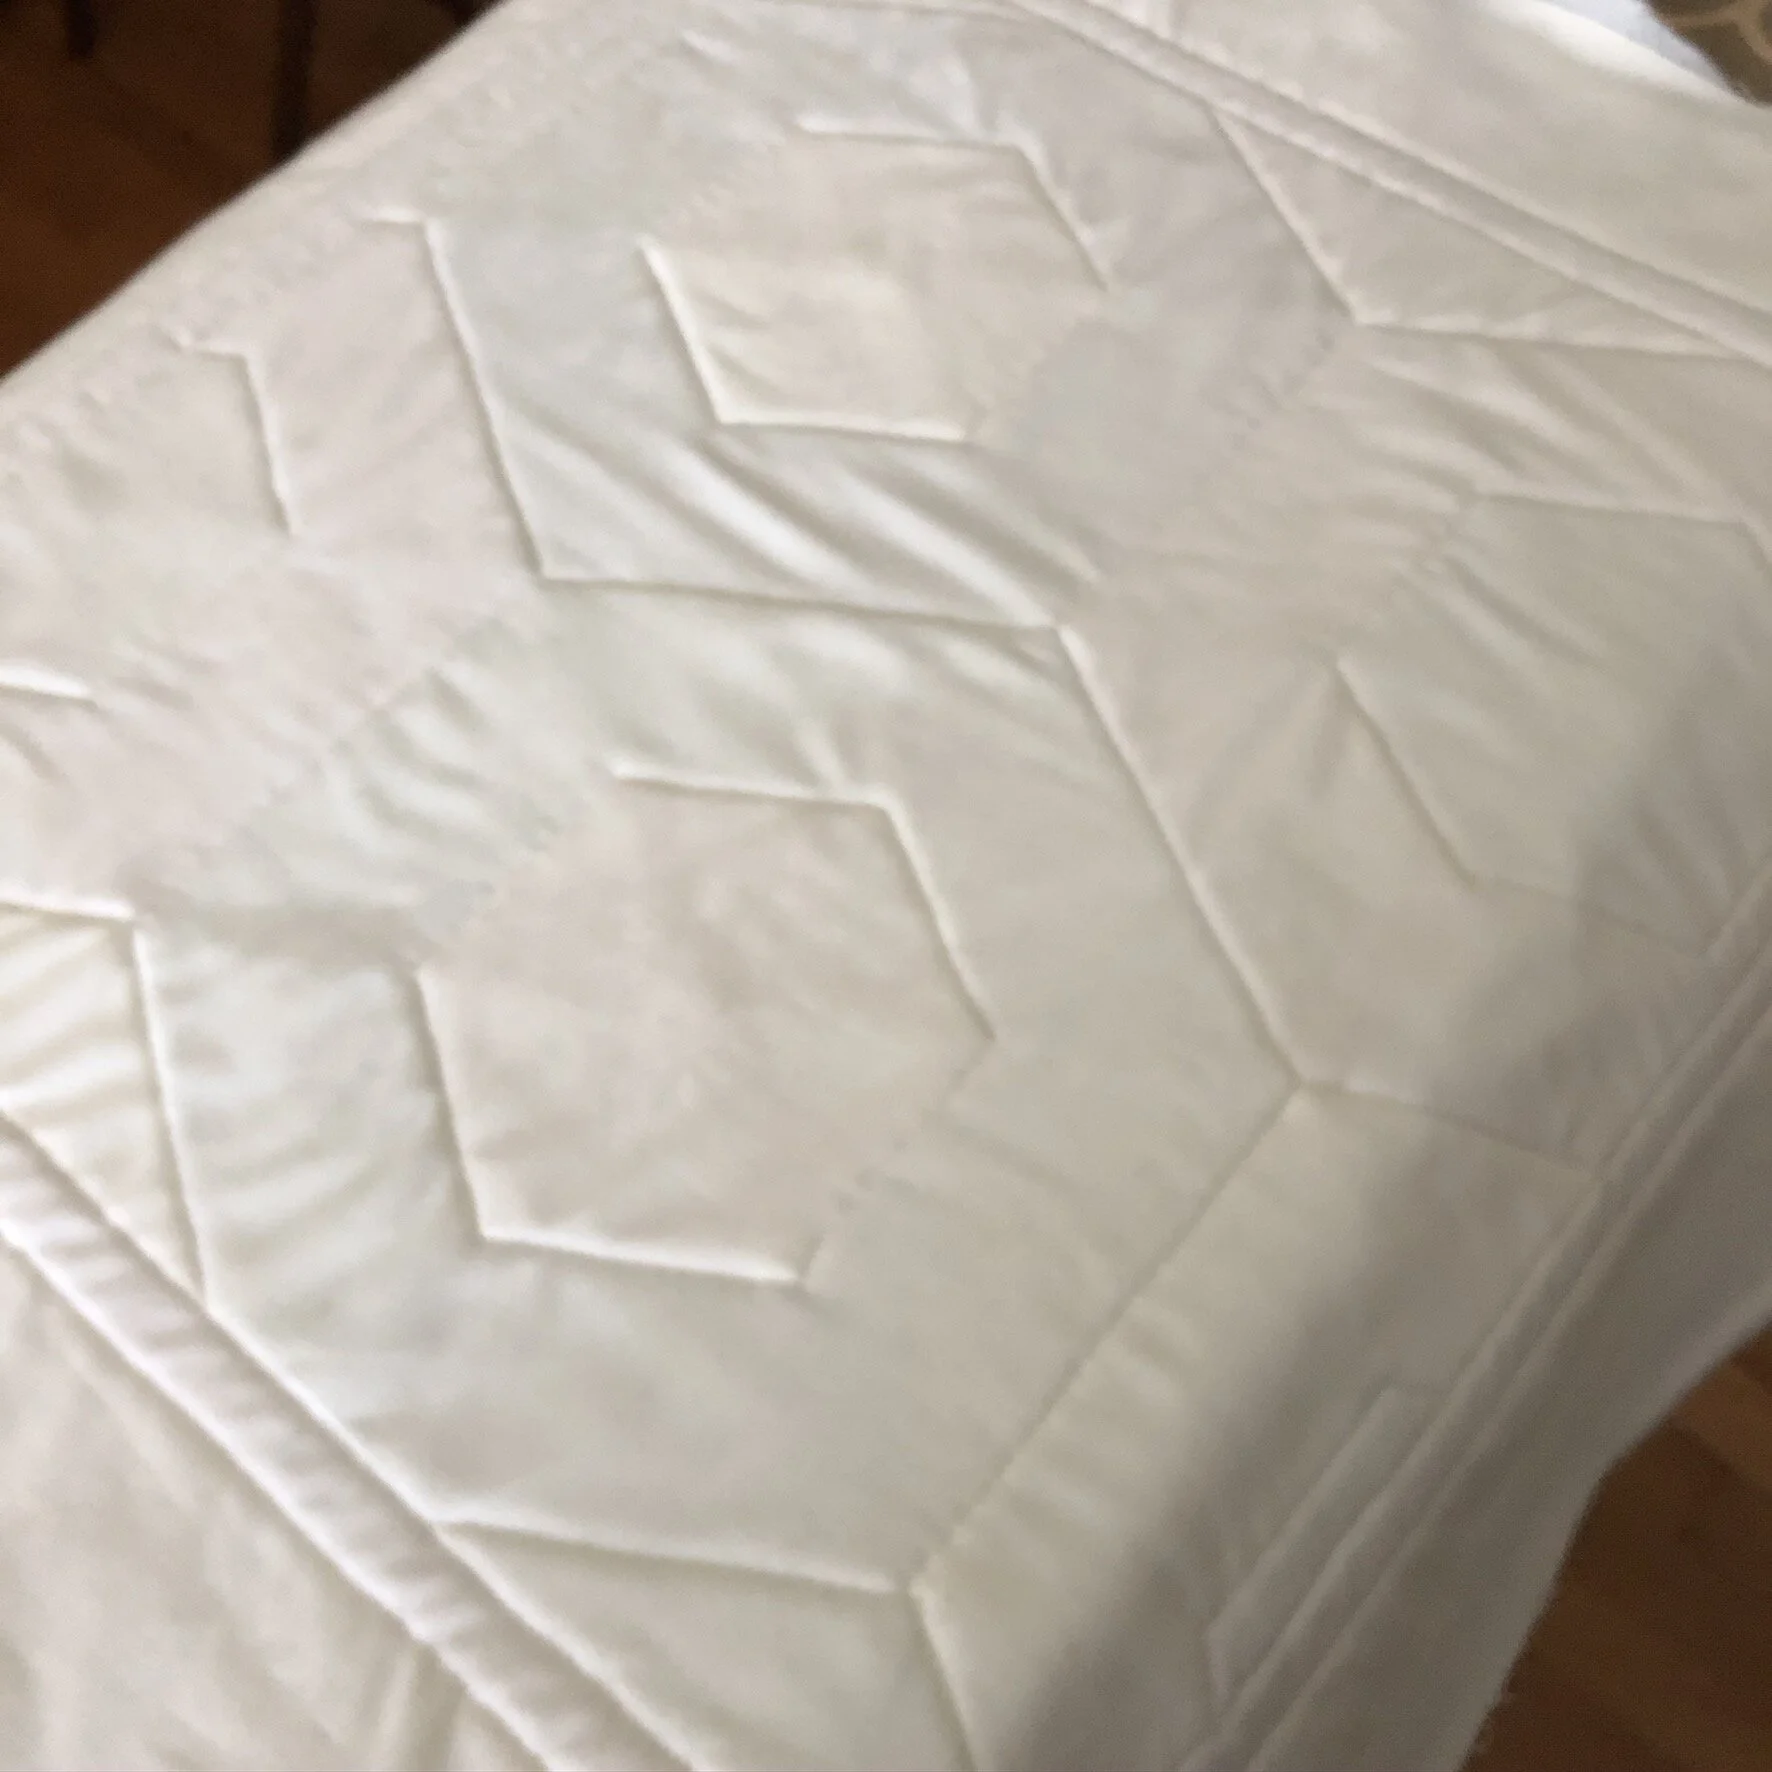
Assembling the pillow should have gone a little more smoothly than it did for me, and if I had paid more attention to what I was doing, it probably would have. After basting the front and back together, I realized that I did the opening vertical to what I was considering the top and bottom instead of horizontal. I momentarily debated ripping it out and starting over. In the end, I decided since this wasn't a learning-how-to-pillow journey, and since it's a pillow that will only be out for about a month and a half, and you can't tell it's wrong, I left it. I did insert a label the same way I did with the last pillow. I printed it on paper with my inkjet printer and then sewed it into the backing.
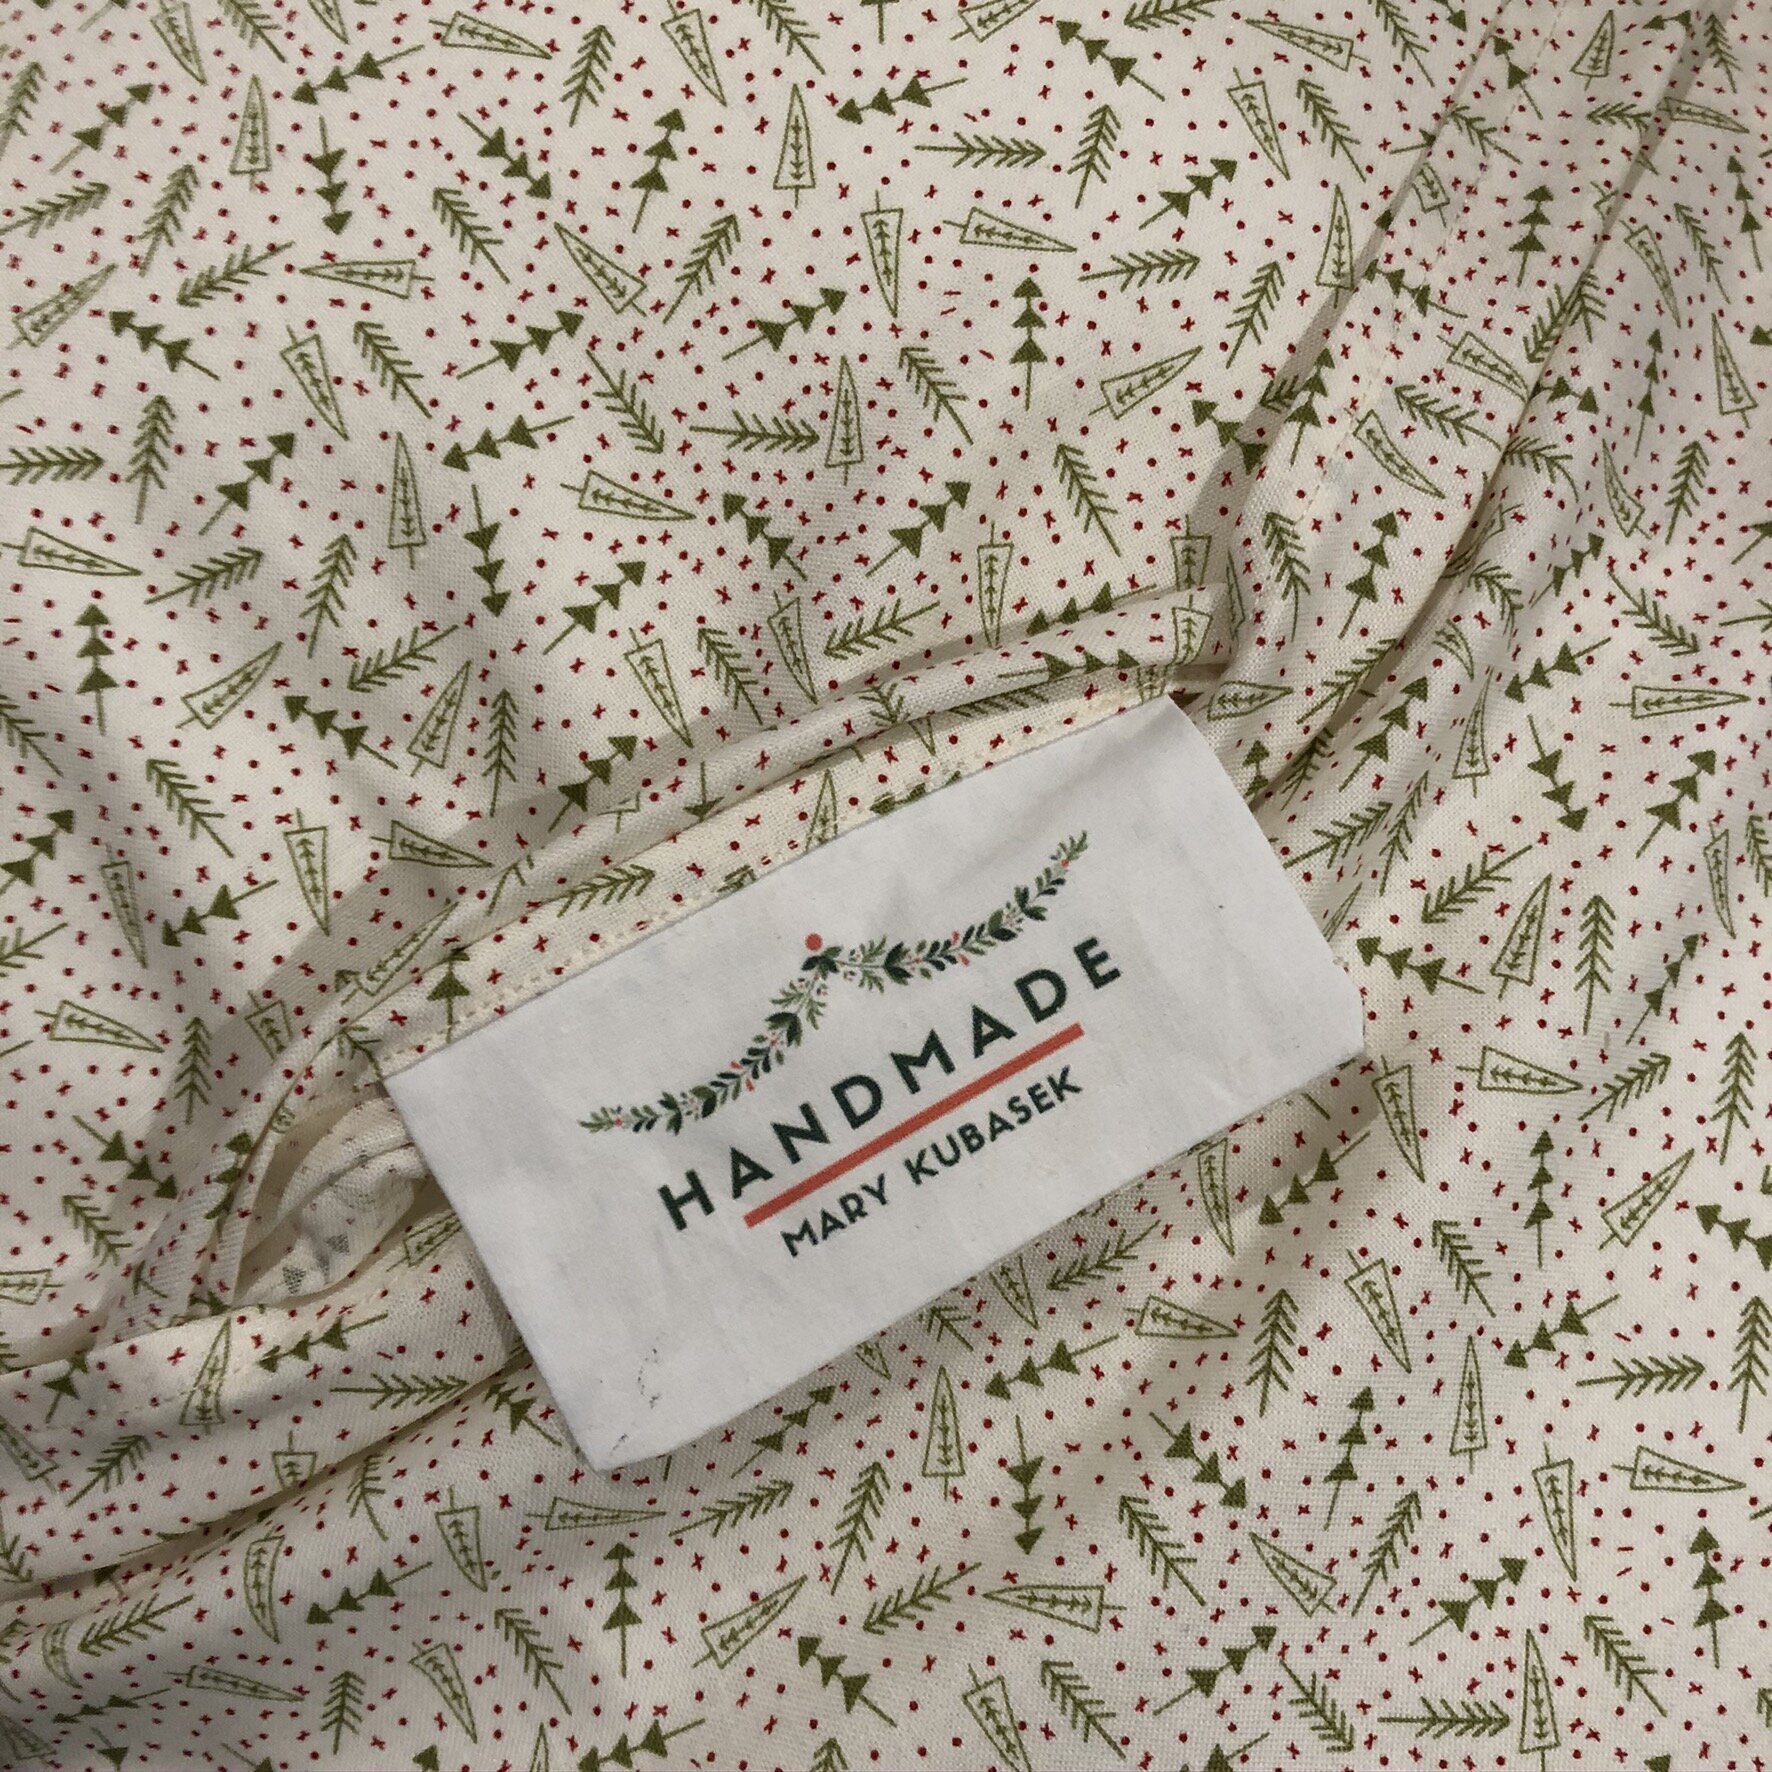
I love the finished pillow! I didn't purchase another pillow form, so this is just the same form from Amazon that I used on Lucky Charm. Before Christmas, I'll probably pick up another one so that I can use the pillow to decorate. I used the same fabric (and leftovers from the jelly roll) for the Jelly Snowflake. I still haven't quilted that project, but it's on the list before Thanksgiving! Whenever I look at how the hexagons came together so nicely, I am so pleased! I also really like how the black fabric pops. The tiny scattered trees is my favorite print in the collection, which is why I used it for the outer border, binding, and backing.

Details
Fabric: The Christmas Card by Sweetwater for Moda
Thread: Aurafill 50wt, 2000
Pattern: Jaybird Quilts Jawbreaker
Batting: 100% polyester
Total Hours Spent: 7 hours, 39 minutes

