Journey 2 Nebula - Lucky Charm: Cutting

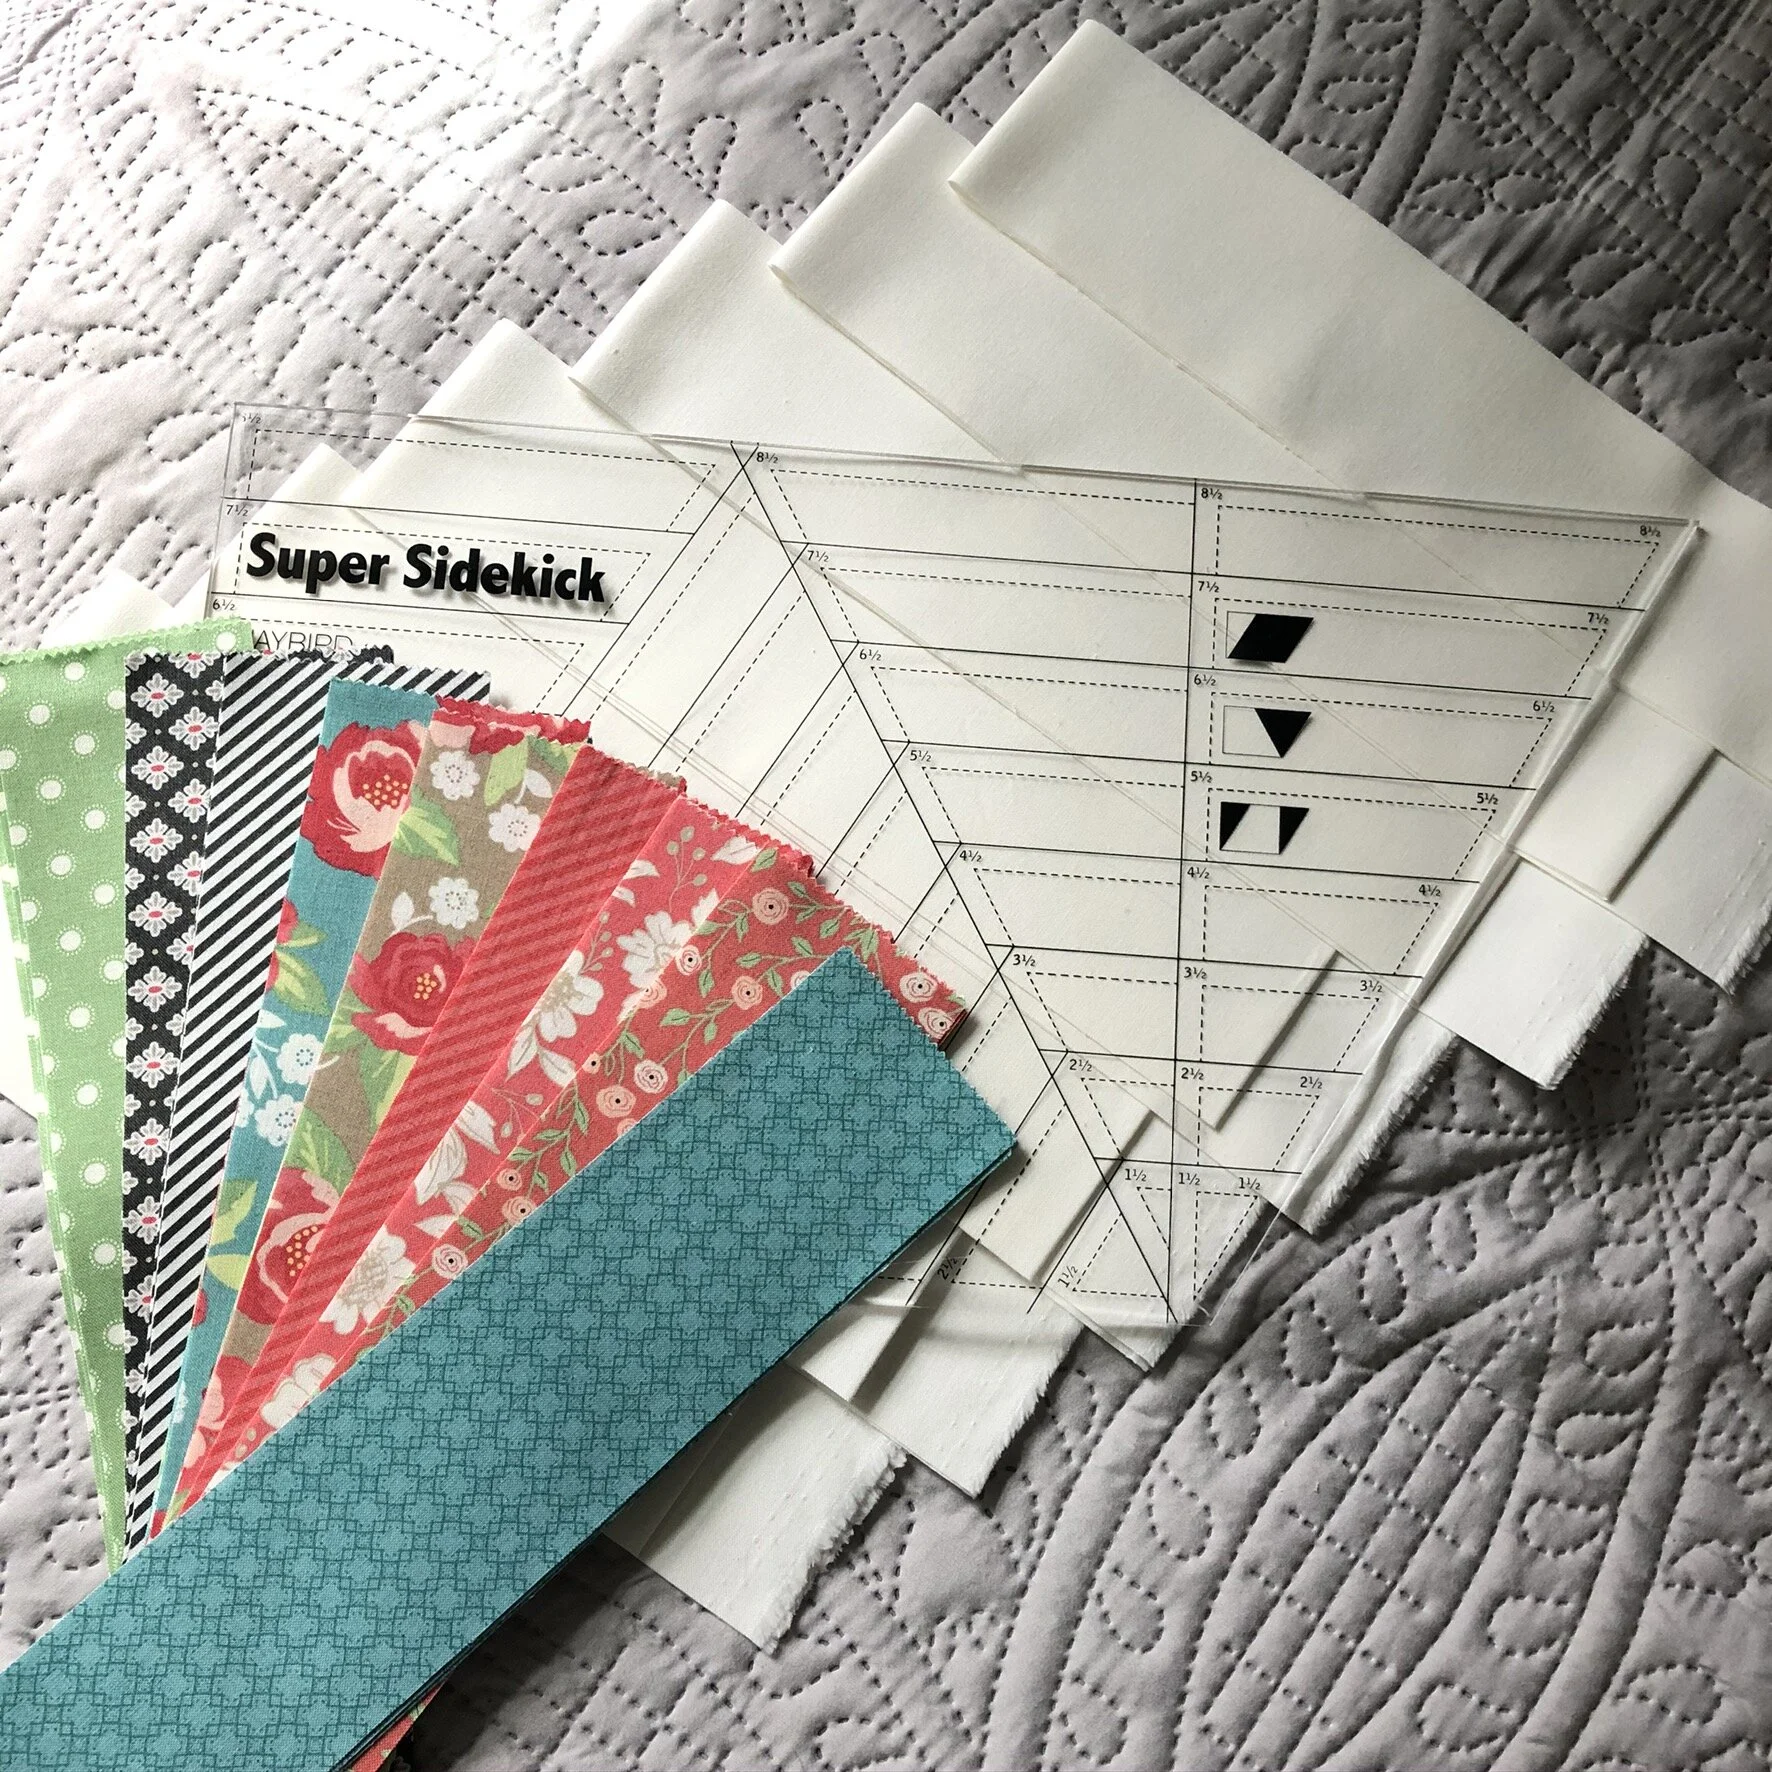
The next step in the Journey 2 Nebula started today! We began the Jaybird Quilts Lucky Charm pillow. It uses the Jaybird Quilts Hex n More Ruler, which I have used before. I find it a bit more fiddly than the Super Sidekick Ruler. I think that is because there are a couple of other angles to cut.

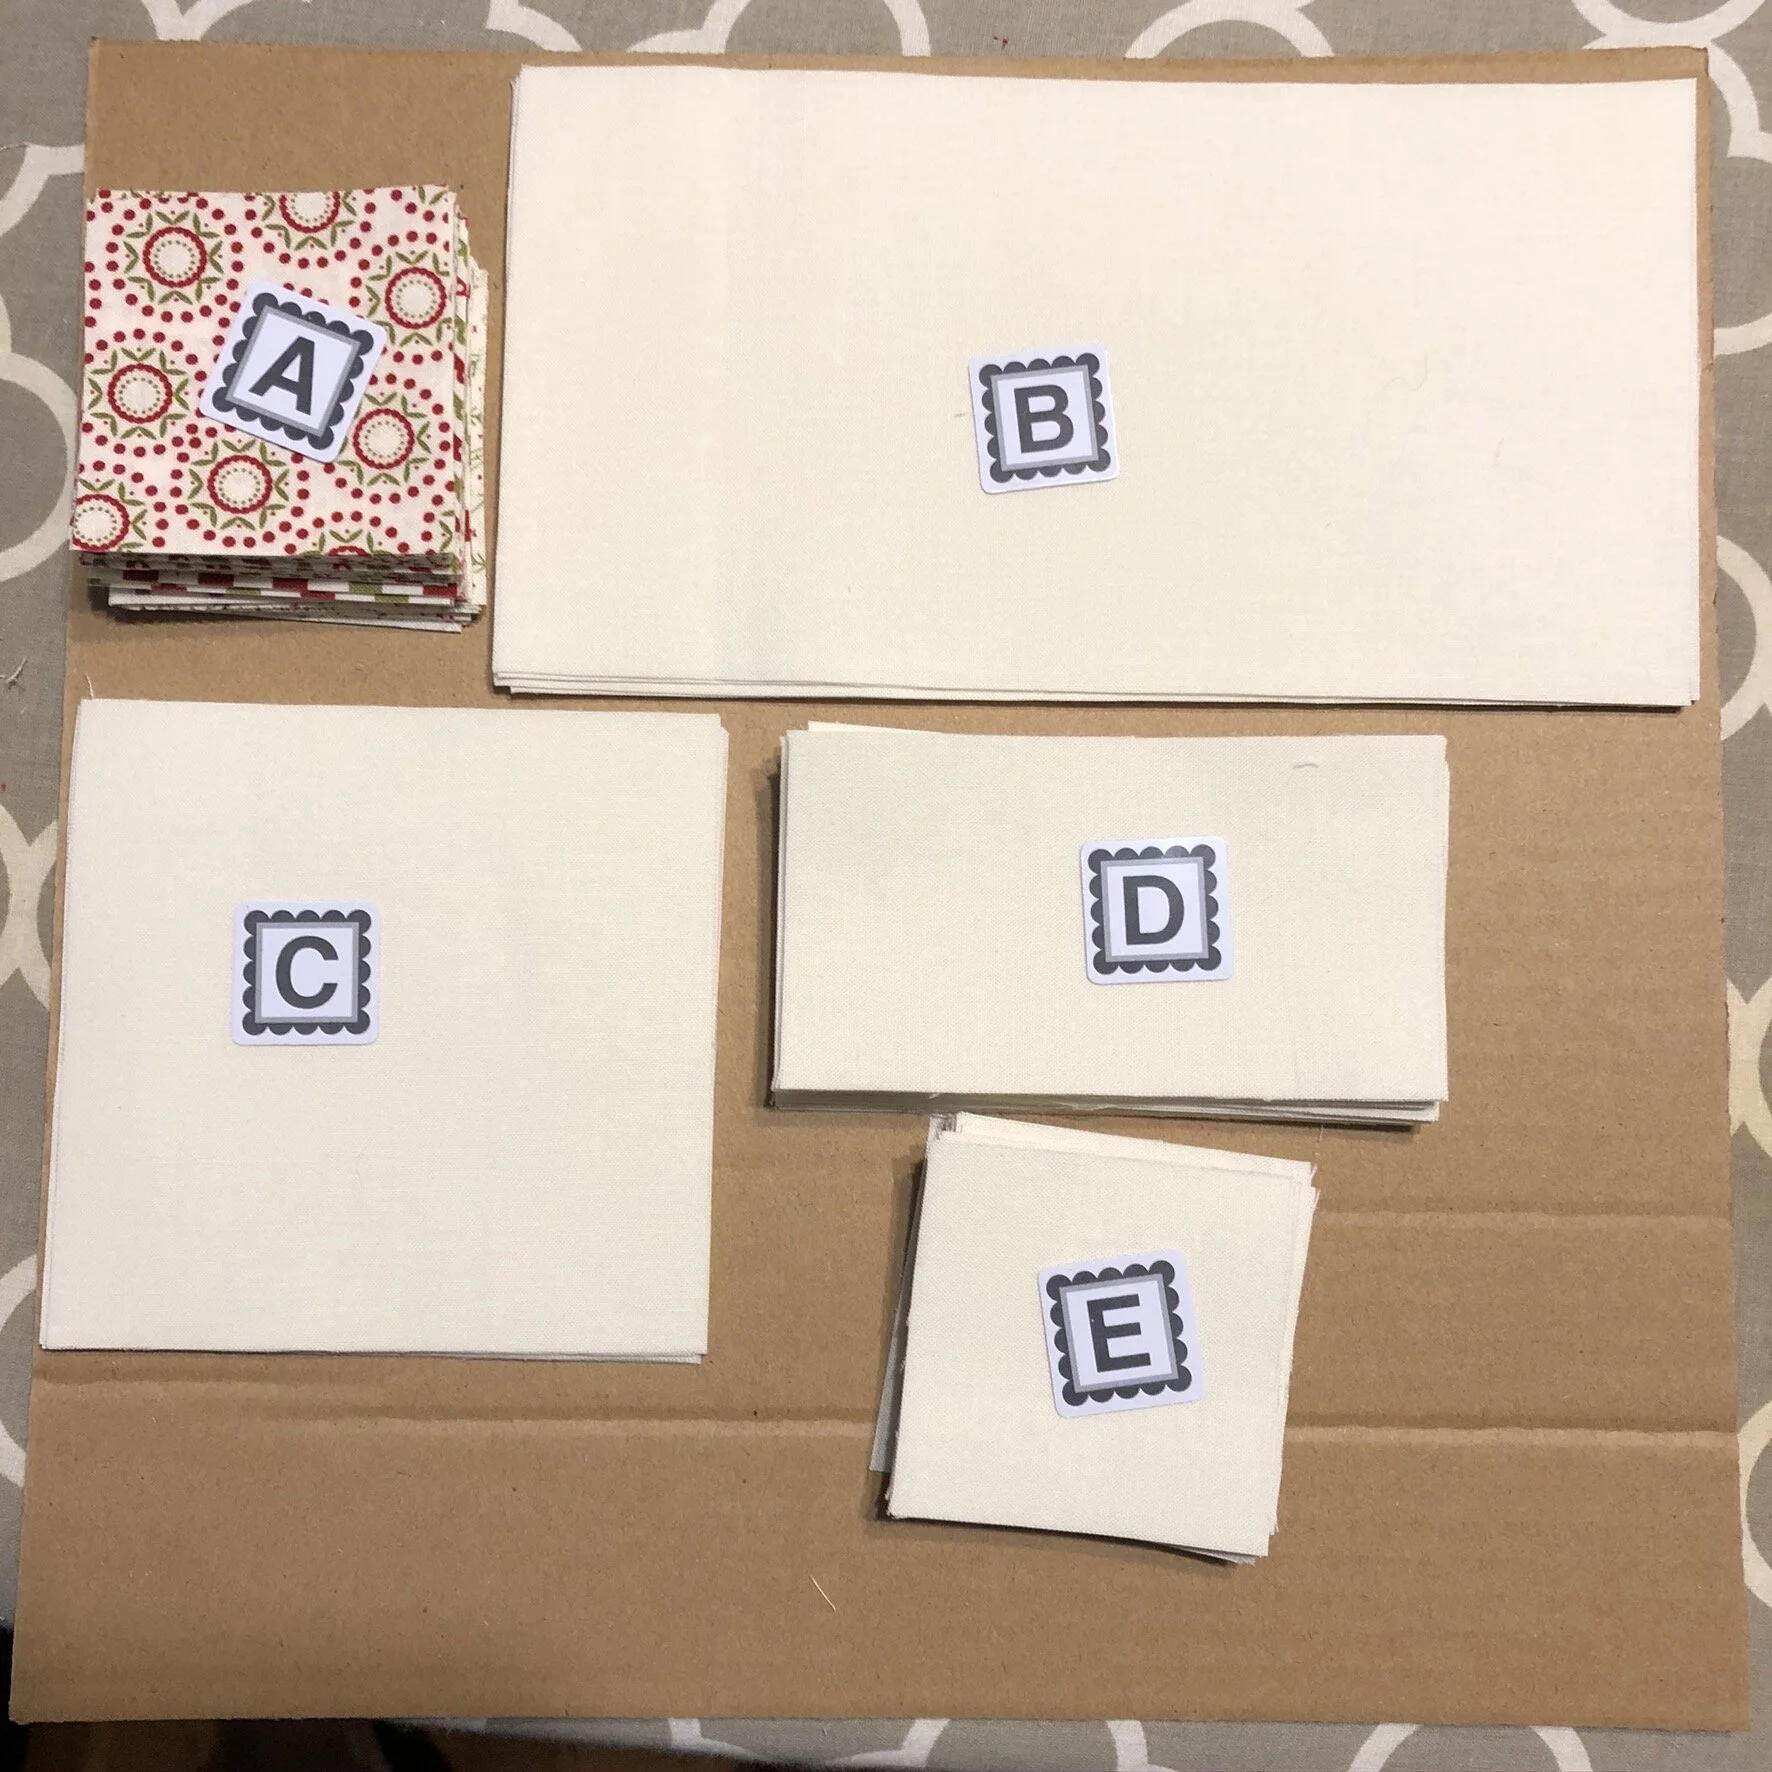
I'm using Moongate from Maywood Studios for this pillow. I have it leftover from the GE Designs Hope Quilt Along. I finished that top, but I haven't quilted it yet. Maybe a coordinating pillow will inspire me to get it done so that I can show it off! Last week, I took my scraps from that project and turned them into 5" squares.

IMG_2488.JPEG

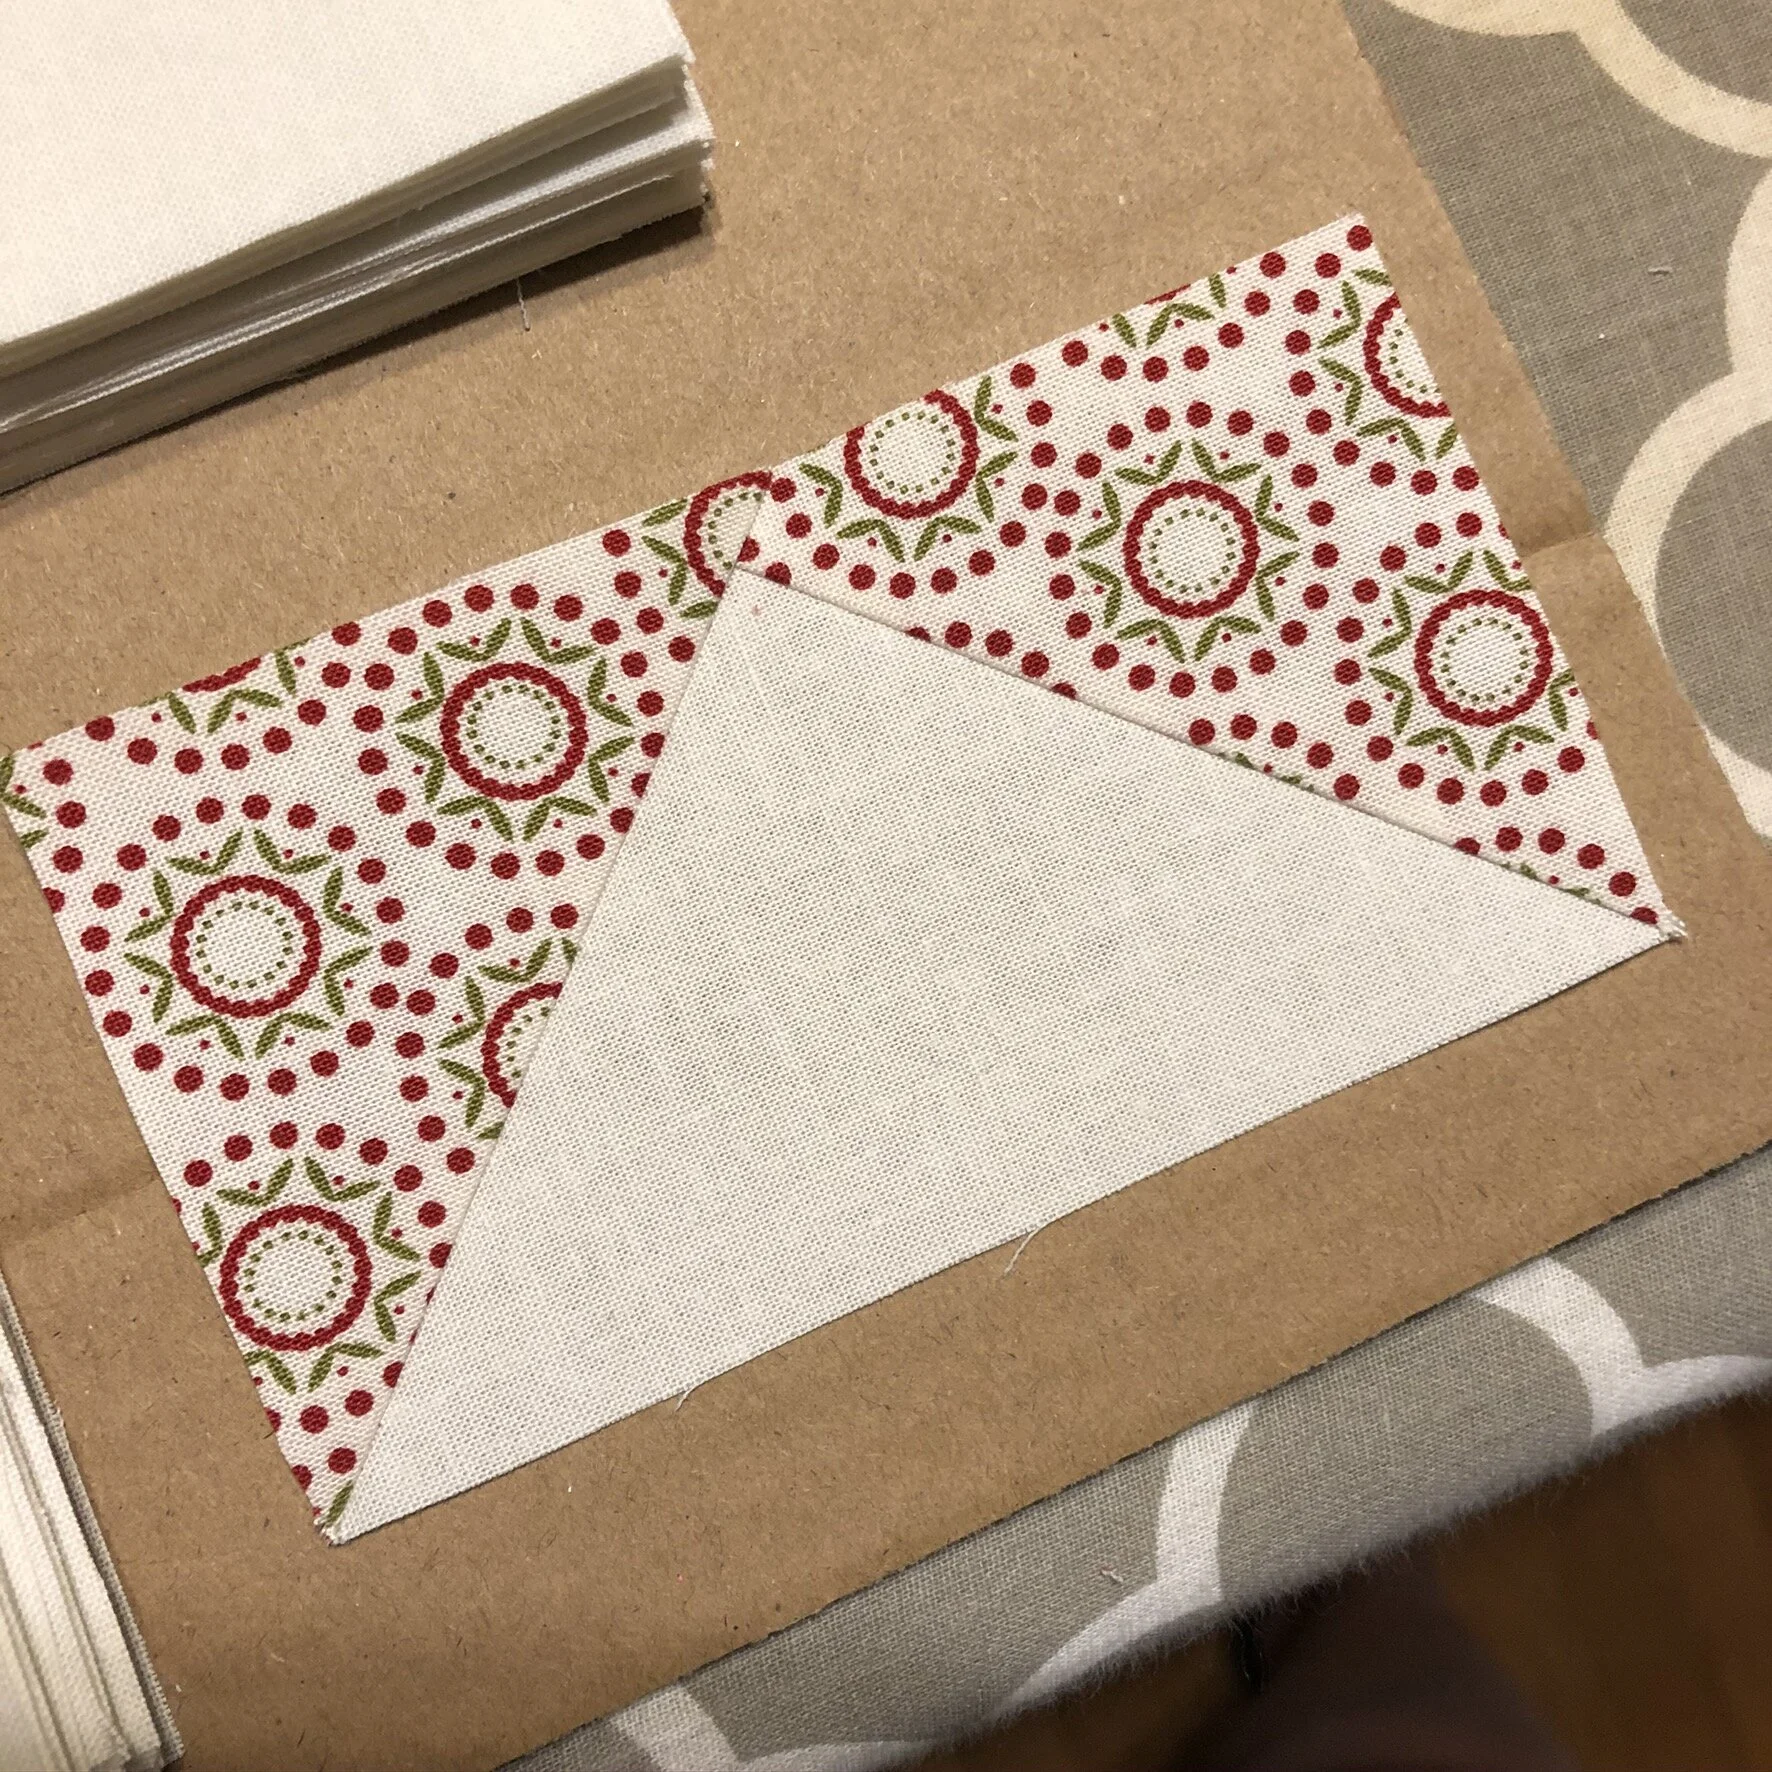
Today, after watching Julie's video for tips, I cut the half hexies. It's a good thing that I watched the video because it probably would've stressed me out to have a tiny bit of fabric missing from the edge. Julie said that it was okay, though!

IMG_2577.JPEG

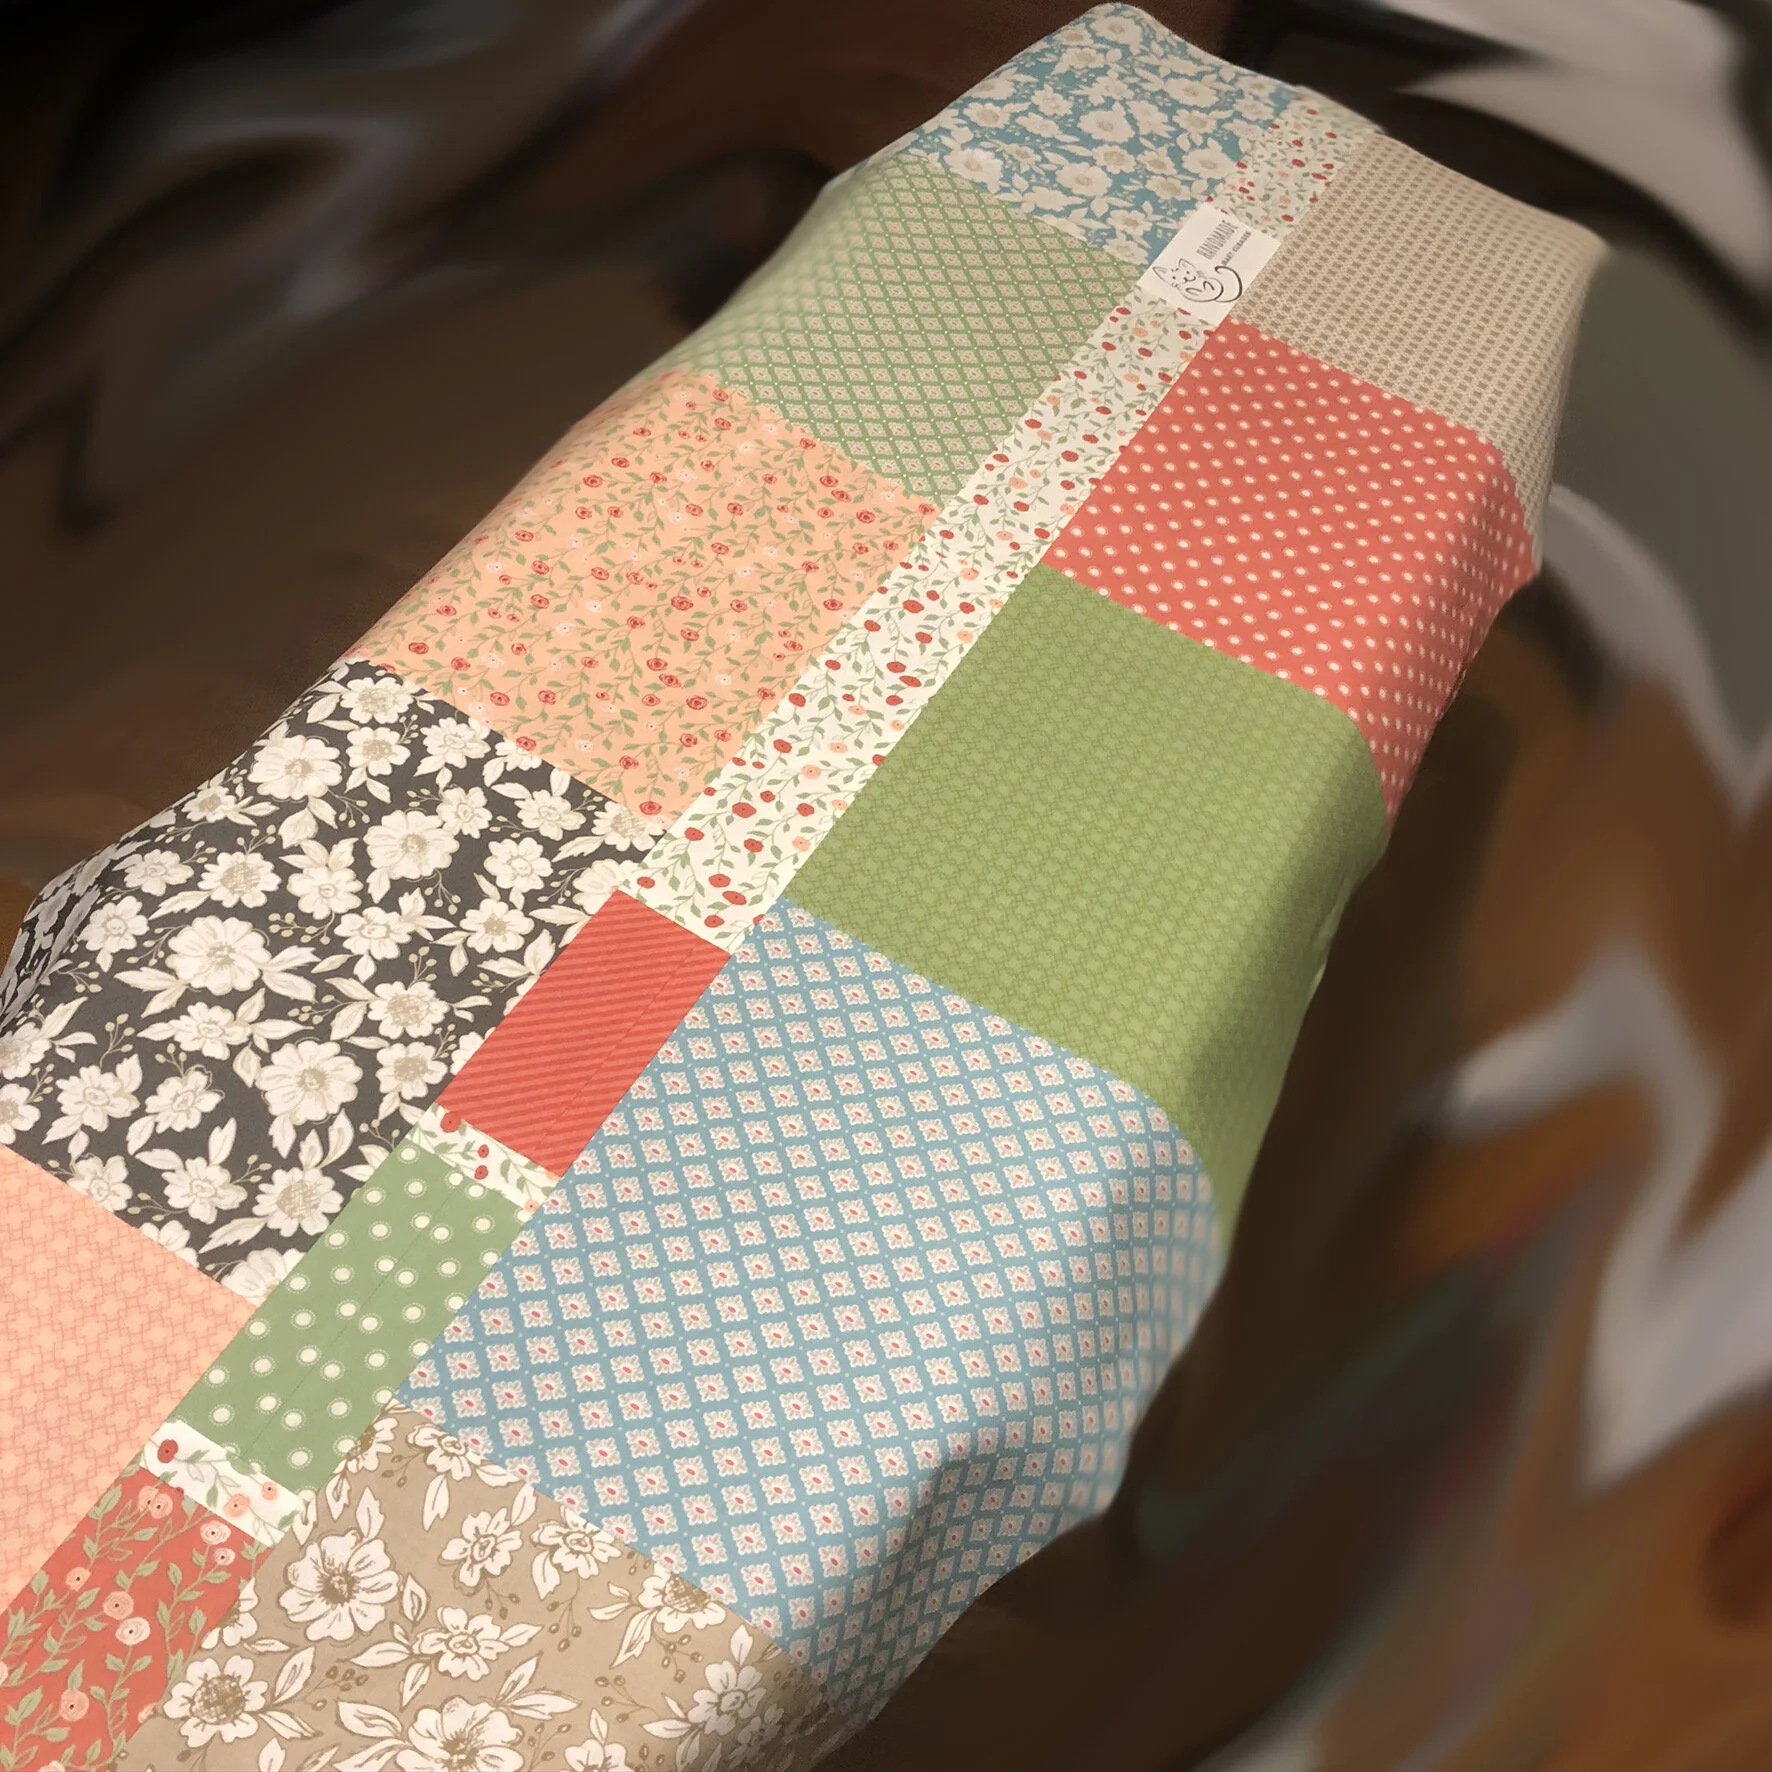
After cutting, I laid out all of the pieces until I had a few remaining that would be sliced and diced for the edges. Before I decided on what those would be, I made sure I was happy with the middle and that I would have enough variation for the edges. Overall, I think I'm pleased with the layout, but I'll keep looking at it until next week's tip video for sewing it together.

Journey 2 Nebula - Seaside: Finished!

This week, I finished the first step on the Journey 2 Nebula, the Seaside table runner from Jaybird Quilts. I watched Julie's video that had tips for successful piecing. Even with that, I have a few points that don't exactly match, but I know what adjustments I need to make, so I do not doubt that I'll successfully complete the diamond section of Nebula.

IMG_2555.JPEG

Since I'm not always happy with my quilting, I decided to go simple here to have a finished project. It's not that I can't do the quilting, I'm just the kind of person that wants to be perfect from the start, and free motion quilting is an entirely different skill from any that I have. It also doesn't help that my machine has a painfully small throat space. Even navigating the simple walking foot lines on the table runner got a little cumbersome.

For my binding, I went with a coordinating solid. I usually do a 2.5" binding, but since this is a smaller project, I went with 2.25". I know that the quarter-inch shouldn't make that much of a difference, but it did. It would've been faster to machine bind it, but I prefer hand binding. It always comes out cleaner. Even after attempting it many times over the years, I've never been happy with the finished results on anything I've done machine binding on.

IMG_2540.JPEG

Since I wanted to use up my scraps, I did a pieced backing for this project. I've started adding labels to my projects since I don't always know what I'm going to do with them. When figuring out the backing for this project, I selected the layer cake squares I knew I wanted to use for the front, then laid out the remaining squares. I wanted to make sure to get the label in there and liked the lighter flower print, so I decided to use that as a strip down the center. I wasn't going to have quite enough length, so I went even scrappier with it. I'm almost as happy with the back as I am with the front.

IMG_2558.JPEG

I really enjoyed this project, using my stash and seeing what everyone else is doing with theirs. It's a great way to use scraps, so I'm sure this will be a project that I revisit!

Details
Fabric: Bloomington by Lella Boutique for Moda (Petite Layer Cake), unknown white from stash, Bella Solid from Moda in Lead
Thread: Aurafil 50wt; piecing and quilting: 2000, binding: 5004
Batting: Happy Cloud from Fat Quarter Shop 80/20 Silky Blend
Pattern: Jaybird Quilts Seaside
Total Hours Spent on Project: 13 hours, 24 seconds

Sewcialites: Planning & Prep

For the last couple of weeks, I have been starting at my stack of fat quarters for the Sewcialites Quilt Along, wondering how I would decide which fabric to use for which block. Fat Quarter Shop released a coloring page, but these are prints, which changes the look, so I didn't think I would get an accurate representation.

I don't have fancy quilt design programs, but I remembered that I have Photoshop as I was staring at my computer. After work, I did some quick Googling and figured out how to create fill patterns and use those with the paint bucket tool. Then, after a little bit of trial and error, I was able to make my layout!

Sewcialites-Quilt-Coloring-Sheet-PDF.jpg

I have the same number of HSTs in the same layout as the original layout, but I did change the orientation of a few of them. I think messing around with those took me the longest out of the entire layout. I kept changing colors, color combinations and even had them all solid background for a bit. For the solid colors, I pulled a screenshot of the fabric I was going to use (I looked up the Confetti Cotton coordinates that went with the fabric line I'm using), used the color selector tool, then filled the HSTs with the color.

It wasn't without its hiccups. Once I filled with the pattern, it was difficult to change to another fabric on some of them because of the way the paint bucket tool works, but I used the polygon lasso tool to select the area I needed and then filled it. It doesn't look as perfect, but it's still good enough for me to get an idea of which fabric I'm using.

After I filled in all of the patterns and colors, I watched the Fat Quarter Shop Livestream, where Kimberly went through each of the blocks, matched them to their number, and then filled in the square at the top, so I have a second reference point. I'm giving myself a little pat on the back for this, and I'm excited to start Sewcialites.

Off to starch my fabric!

Journey 2 Nebula - Seaside: Cutting

I spent a couple of hours this week working on my Jaybird Quilts Seaside table runner. I've used the Super Sidekick Ruler many times over the years and have occasionally found it tedious (truth be told, there are times I find ALL cutting tedious), so I was a little apprehensive about starting.

IMG_2435.JPEG

I was pleasantly surprised this time when the cutting felt like it was a breeze. I'm not sure if it was because this was the first time I was starting with 2.5" strips that I cut myself instead of fiddling with a jelly roll or just excited to be working on the project, but the cutting seemed to go quickly. I did break it up into chunks, so I'm sure that helped as well.

IMG_2438.jpg

I know that some people found the Super Sidekick a little cumbersome for the smaller diamonds, but I think my familiarity with the ruler helped. The only issue I had was picking it back up off the mat to move it, but that has nothing to do with the ruler.

In her video on cutting, Julie recommended trimming off the points for best piecing results. I know that I'm not great at estimating what 1/4" looks like, so I trimmed mine and got a little pile of cute confetti in the process. While I won't be using this for anything, it was still fun to play with.

IMG_2458.JPEG

I've laid out my diamonds and will spend the next couple days making sure I like the layout, and there aren't any prints next to each other that I don't want next to each other.

Journey 2 Nebula - Seaside: Planning & Prep

I have spent a lot of time digging around in my stash, doing some figuring with pen and paper, and throwing fabric around the room in preparation for Journey 2 Nebula. As I mentioned, I wanted to purchase new fabric for this project, since new and shiny is fun, but I also have a lot of it that doesn't have a reason to be in my stash. I like to keep it mostly project-based to actually see what I'm doing with the fabric. It doesn't mean I'll stick with the intended project, but at least I've kept yardage and/or yardage and pre-cuts together.

After much digging, I decided on the Petite Bloomington Layer Cake by Lella Boutique that came in the May 2020 Sew Sampler Box. The pattern that came with the box was lovely, but it didn't speak to me, so I added the layer cake to my stash. It has 20 10" squares, and after putting pen to paper, I worked out that I would have enough for the contrast diamonds and a scrappy backing.

IMG_2357.JPEG

Next, I had to locate background fabric. This is harder in my stash. I've thought about purchasing bolts of a couple of solid basics, but I haven't made that leap yet. After more digging, I found an ancient layer cake that had background and backing yardage. I may revisit this particular layer cake later in the journey, but for now, I grabbed 5/8 yard of the white (I don't know which white it is, but it's likely a Bella Solid) for Seaside.

IMG_2419.JPEG

In addition to the pieced, scrappy backing I assembled this weekend, I also prepped my fabric for the front. I cut the background into 2.5" x WOF strips, and cut my layer cake pieces into 2.5" strips. I know it's a bit controversial, but I prefer to starch my projects, so I starched my layer cake pieces, knowing that they would shrink. This would not affect what I was going to do with the fabric, so I went for it.

IMG_2421.JPEG

I've completed several Jaybird Quilts patterns, so I'm familiar with how the rulers work, but I have found any time I participate in a quilt along I always pick up some tidbit, so I'm looking forward to starting tomorrow!

FFO: Mistletoe Lane

I have an actual finished object! It's not just a stitched project that I folded up and put into a bin. With inspiration from Priscilla and Chelsea from Stitching with the Housewives/Real Housewives of Cross Stitch, I took glue gun to fabric and made a thing!

I don't have much of a collection of finishing products, but I have slowly tried to add to my stash. I decided to go a little simple with this one since it's my first time finishing a cross stitch project that wasn't just putting it in a frame.

I got the frame from Amazon. It was one of the clip-style. I wasn't sure how they would be attached, but I was happy when it came in, and I unpackaged it and saw they were just held on by small screws. My trusty screwdriver took care of those in no time.

Then, the frame sat for several days while I mustered up the courage to do some gluing. A week or so ago, I purchased several 1/2 yard cuts from Fat Quarter Shop for finishing various cross stitch projects (most that aren't yet stitched). For this, I decided on Swell Christmas Pink and Red Plaid Yardage (now out of stock). I thought it would pull the red, pink, and green in this project together.

I watched one of the videos Priscilla and Chelsea made when they visited Fat Quarter Shop a few times to build up my confidence. Once I felt like I had absorbed all the knowledge I was going to, I started working out what size I wanted each of the parts. I cut my mat board for the fabric to 10.5," and my sticky board for my finished piece to 9", mostly because the Sticky Board I had on hand was 9" x 12".

I used a small piece of It's Sew Emma Cross Stitch Finishing Tape to secure the Swell Christmas fabric to the mat board before I started in with the glue gun so it wouldn't shift. Now, I hadn't touched a glue gun since sometime in the 1990s when I was a kid, and my mom was making a few decorative wreaths for the house that was all the rage back then. Actually, now that I think about it, I think my middle school replica of Mount Vernon was the last time I used a glue gun. I kind of when overboard on that project. If I had a picture, I'd show you. It was GINORMOUS.

Anyway, I carefully loaded my new glue gun, plugged it in, and waited for it to heat up. Once that was ready, I took glue to fabric and board and held my breath. I did use one layer of batting on top of the Sticky Board. I tried to center things as best I could while also trying not to burn my fingers. I pretty much succeeded!

They aren't colors that I usually decorate with, but I thought it might look nice with a multicolored light glass tree I have, so I'll definitely be using it in my house this Christmas. I'm so tickled with the final product!

IMG_2396.jpg

Details
Pattern: Mistletoe Lane from Fat Quarter Shop
Floss: Weeks Dye Works in called for colors
Fabric: 28 Count Lugana by Zweigart in Light Ash
Total Hours Spent on Project: 70 hours, 16 minutes (which seems like a lot, but I was easily distracted during this one)

I'm In! Journey 2 Nebula

When I saw the Nebula from Jaybird Quilts, I knew I wanted to make it, so I signed right up for the Fat Quarter Shop's block of the month. I've made a few of the Jaybird Quilts patterns already, including several that still aren't complete. Completed include a mini Science Fair, August Stars, and Snack Time. In process include Gravity (I'm a better piecer now, so I'll probably revisit at some point), and Science Fair (which is all pieced, I've just been suffering from my too-terrified-to-quilt-it issue).

Graphics for Journey to Nebula-3.jpg

I'm going to have a busy Fall into 2021 with the "group" projects I'm participating in. :) Even though I've completed several Jaybird Quilts patterns, I decided to sign up for the Journey 2 Nebula, partly for the connection, even though I’m not much of a social quilter, I’ve definitely been missing being around people while working from home since March. Julie will share tips and tricks through a series of six existing patterns and two bonus patterns.

I purchased the patterns a couple of weeks ago and wanted to buy new fabric for it, but I have decided to be a "grown-up" and use up some of my fabric stash. Because of this, I'm going to have to do some modifications to the fabric requirements (i.e., calls for 2.5" strip, but I'm using a layer cake), but this way I can use up some fabric stash that was from the Sew Sampler Boxes, purchased for a project I can no longer remember (hi, 2011 purchases!), or some scraps I have from other projects that were enough that I couldn't part with them.

I dug around and the bins and boxes and made excessive notes. I think I will have to make a few purchases for a background or binding here or there. Stay tuned to see what I've picked! I'm off to do some starching prep!

Sewcialites Quilt Along with Fat Quarter Shop

Last week, Fat Quarter Shop announced their nine-month quilt along, Sewcialites. You get to choose between 3" blocks, 6" blocks, or 9" blocks with a final setting of 27 1/2" square, 54 1/2" square, or 81 1/2" square.

Sewcialites-SM-300x300.jpg

I wanted to purchase NEW FABRIC for it so badly, but I have plenty of stash that needs using, so I went digging around in my various drawers and boxes. What I found, other than a lot of fabric, was a stack of fat quarters, background, backing, and binding I had purchased in April of 2017 and had intended to use for another project. I have absolutely no interest in that project anymore, as happens when you have big plans, and then everything else is more appealing.

This is Ava Rose from Riley Blake back from 2017. With all of the fat quarters and yardage, I have enough to make the 6" blocks, so that made my decision. There will likely be a couple of blocks that aren’t very high-contrast because I don’t have enough of the colorful ones, but I think I’m okay with that. I may pick up a couple of coordinating solids at the end for the HSTs, but luckily that is a decision I don’t have to make right now. I'm excited that I'm going to be able to participate, even if I don't get the joy of playing with new fabric, and it's another way to work down my stash, so win-win, right?

IMG_2312.jpeg

Sew Sampler Box August 2020

My August 2020 Sew Sampler Box from Fat Quarter Shop arrived today, two whole days before I was expecting it. It's been a tough week, so the minute the USPS truck drove to the next house, I ran outside to the mailbox, ran back in, sliced through the tape, and dug around in the box!

237EA7FA-BD7A-436B-9B22-5B33DE0EABAD.jpg

I like to check out the hints and guesses from other recipients when FQS posts it on their blog. I didn't have any ideas for this month's Rise & Shine theme.

I certainly wasn't expecting to be so excited about what I found in the package! Check it out!

E7085C14-7688-451C-A468-B9B40D2ABC43.jpg

Backyard Blooms by Allison Harris for Windham Fabrics Charm Packs - TWO of them! Chickens aren't really my thing, but I love the colors in this line, so bright and happy, and we could all use a little of that lately.

Kimberly Cuts 5 1/2" Square Rotating Cutting Mat, a Fat Quarter Shop Exclusive. I have a rotating cutting mat that's a bit larger, and I love the smaller size of this one. It looks like this one will also be available in a 12 1/2" size!

Lori Holt 5" Crazy Paper! I'm super excited about this. I've wanted to give Lori's Crazy Paper a try since I saw the first version on an FQS Livestream, so I'm happy to be able to give it a go!

Dritz Quilting Betweens Needles - can't have enough needles, can you? :)

Crazy Daisy Quilt Pattern. The star units use the Crazy Paper! I love the way the fabric line pops in this pattern. I'm currently trying not to purchase ALL the fabric, so I probably won't be buying the materials I need to do this project. BUT, I am considering turning the pattern into a table runner. I think that would be a fun sew and a good compromise for my wallet.

Tiny Little HSTs

When the July 2020 Sew Sampler Box arrived last month, I opened it excitedly, like I always do. The past few boxes haven't been my thing pattern-wise, but that's okay. I'm signed up to expand my skills, receive interesting notions and fabric, and honest, open the mailbox to something fun. This box, though there was something about it that appealed to me. I don't know if it was the color combination, the overall appearance, or all of it, but I wanted to make it.

C7910C6A-683D-4C02-8A65-51AEEF7AD6DA.jpg

As I usually do, I added all of the products needed to finish the larger size to my cart on Fat Quarter Shop and walked away. I do this a lot. It saves me from over-impulse-buying and keeps me from purchasing too much that I don't need. I checked the next day, and many of the fabrics I needed were now out of stock. I got a little annoyed but then decided I liked it enough to make the smaller version, so I purchased the finishing kit.

Boy, am I glad I made that choice! Not because I'm sad I would've missed out. I would've survived if I had, but now that I've started the teeny, tiny little half-square triangles, I'm so glad that I only had to make just over 100 versus MANY more.

Even using the Triangles on a Roll for 1" finished HSTs, it has been quite the project. I was hoping that I could get it done in a week, but with work and all of the other projects I'm working on, that didn't happen.

I'm about 1/3 of the way done with the small 9-patch blocks, and even though they're small and a bit fiddly, I do get excited every time I finish sewing, press them, and square them.

IMG_2214.JPEG

Jelly Snowflake Mystery Quilt Finishing

I finished assembling the top of the Jelly Snowflake Mystery Quilt on July 31, so I finished the assembly before July was over, and I’m super excited about it. It’s not often I manage to keep myself caught up, especially this time of year, when I’m spending time outside on the boat. I thought about making it a little bigger, but in the end, I’m good with the pattern size.

Finishing involved a center block and border pieces. The top came together fairly quickly, especially when I was able to match seams. It’s not my first time matching/nesting seams, but every time I do it, I get just a little bit of a thrill. I always anxiously peek at the intersection points and often make the slightest squeal of delight when everything matches up the way it’s supposed to. Sometimes I wonder if I’m going to stop doing that, but to be honest, I hope I don’t.

1B0955A9-4796-4A44-94D8-2238180C03FF.jpg

The next step is, of course, the quilting. As I’ve mentioned, I don’t have a very large throat space on my machine, so I often find free motion quilting, or really any quilting, to be troublesome. I also always want to be better than I am, and I know that’s more a function of not practicing than my actual ability. I understand that a new machine wouldn’t solve all of my problems, but I do imagine it would be helpful to be able to shove more quilt through the machine. I have an idea of what I want to do for the quilting. I’ve drawn it out on paper, we’ll see if I can actually accomplish it.

Quilty Confession: I Didn't Read the Manual

So, I have a confession to make. I've had my sewing machine for nearly ten years, and I didn't know until COVID-19 kept me home all the time that I could move my needle position. Yup, that's right. I've spent years sewing with it wondering how to get a 1/4" seam, and all I had to do was move my needle position.

I have a Janome DC2011. It's a decent machine and easy to use. I do have dreams of a fancy machine with a larger throat space, but it's going to be a lot of penny-saving before that happens. In March, I participated in the GE Designs quilt along with the Elvira pattern (and someday I will quilt that project and share it). I really wanted the project to come out well, so I started doing a bit of research on my machine. I wasn't able to find a lot of information on my specific model, but I did take a little time to read the manual for the first time. And there I discovered you CAN move the needle position on my machine.

Since this discovery, my piecing has been MUCH improved. I use the 1/4" Foot (O), and if I don't move my needle position, the seam allowance is larger than 1/4". I had often wondered why my piecing wasn't as good as it should have been, and now I know why. I was not using my tools to their advantage.

IMG_2149.JPEG

To figure out what my needle position needed to be, I used Pat Sloan's tips for testing your seam allowance where you take three 2.5" squares and sew them together and measure the center square. I admit that I don't check this EVERY time I sew, but I do check it every couple of projects now.

I have definitely learned my lesson. From now on, I'm going to read the manual! :)

IMG_2150.JPEG

Jelly Snowflake Mystery Quilt Block 4

I managed to get myself caught up on the blocks for the Jelly Snowflake Mystery Quilt Sew Along! Block 4 was a relatively easy block, though it is a long rectangle, which I worry about a little because sometimes they have a tendency to get a little wobbly.

IMG_2071.jpg

It was a pretty easy block to put together. Once I had the pieces cut (which also didn’t take long with the Stripology XL ruler), I was able to assemble each block in about half an hour. That includes pressing and trimming. Considering I’m not the speediest sewer, I’m pretty pleased with that time.

99802A6B-396F-4314-82F5-A490925D6A29.jpg

I’m excited to put together the final layout. I couldn’t wait, so I laid it out and I’m letting the layout sit for a day or so. I generally like to do that will all of the quilts I make. I like to make sure that I’m don’t have two of the same fabrics next to each other, or two of the same color. I’ll usually lay it out, take a picture (or two) with my phone and stare at it, squint my eyes, and scroll back and forth from the image so I can get an overall picture.

Mistletoe Lane Stitch Along Week 2

Week 2 of the Mistletoe Lane Stitch Along went significantly quicker than week 1. This was a pretty easy stitch, and it was nice to add in some additional colors to the piece. I first stitched the dark green leaves and the berries. After that, I filled in the lighter green on the leaves and stitched the stocking. I love how they’re not traditional Christmas colors. I do usually decorate in more traditional colors, but I’m excited to have this in one of the rooms I don’t usually decorate to add a little holiday flair.

IMG_2020.jpg

I’m currently stitching week 3, which is the house. It is taking significantly longer, but I’m hopeful I’ll be able to get it done and caught up with week 4 (which is a nice small area) by this Friday.

Jelly Snowflake Mystery Quilt Block 3

So, I’m actually not as far behind as I said I was. I completed block 3 of the Jelly Snowflake Mystery Quilt in just over an hour this weekend. Compared to block 2, this one was a breeze. It helps that there weren’t any flying geese in this one!

I used my pretend design board to keep my pieces organized and it was so helpful. I messed up block 1 a couple of times when going back and forth between pressing and sewing together, so placing everything back on the board helped keep track of where everything should be.

IMG_2056.jpg

I did utilize chain piecing throughout and that seemed to help cut down on time. I did the two sections of the 4 patch and the square + green rectangle all at once, pressed and then completed the chain block. For the red pieces, I chain pieced the angled pieces, then pressed and added the squares. I’m really pleased with how this block finished, and super pleased with how quickly the four blocks came together.

IMG_2059.JPEG

Jelly Snowflake Mystery Quilt Block 2

What a shock, I’m behind! Block 2 of the Jelly Snowflake Mystery Quilt was a tough one for me. I’m not good at flying geese. It doesn’t matter what I do, how I cut, how I draw a line, how I sew, I inevitably end up with blocks that are off somehow.

I’ve been using my cheap-and-not-at-all-a-design-board piece of cardboard and that has helped me organize my blocks, along with the Alphabitties. I know I could easily MAKE a design board. Lori Holt just posted a video on it this weekend, but at the moment it’s spend time making a design board or sewing, and sewing has currently won. (If you haven’t checked out the video yet, I recommend it. The organization Lori has for her blocks is enviable!)

IMG_1992.JPEG

Someday, hopefully soon I’ll work on making my own design boards. I could also purchase them, but since I have the ability to make them, why wouldn’t I go the more affordable route? I DO need a glue gun anyway, so this is a good excuse, right? :)

Anyway, back to those flying geese. I don’t know why I have such a hard time with them. I’d like to blame my machine, but I’m pretty sure it’s more me trying to go too quickly and get things done and making a mess of things. I know that people are going to look at them and say “those look great, what are you talking about?” but if they’re not perfect, they’re wrong. (That’s a me thing though, I wouldn’t say that to anyone else!)

IMG_1993.JPEG

I did avoid trying to catch up on this block because of my fear of flying geese. And because I was going so slow, this block did take me a lot longer than I wanted it to, but they are done and I’m pretty pleased with them. I’m not sure I’ll be happy with using the lighter color on them, but using the lighter color also has the advantage of the mistakes blending in just a little bit better!

IMG_2053.jpg

Mistletoe Lane Stitch Along Week 1

I haven’t been shy about sharing my love for Fat Quarter Shop. My wallet may not appreciate them, but I certainly do. I so enjoy all of the content they share with their customers, and the few times I’ve had to contact Customer Service, it has been an incredibly pleasant experience.

I was into cross stitch before Fat Quarter Shop really started to be part of bringing it back, but I have a serious backlog now, in part, because of the great projects I’ve discovered through them. The project that’s been consuming my time lately has been the Mistletoe Lane Stitch Along for Jolly July.

IMG_1939.JPEG

Week one took me significantly longer than I expected. Isn’t that always the way? I feel like every time I plan to do something, it takes twice as long as I think it’s going to. I did stitch the white letters before the red banner just to help prevent the white catching any of the white.

I am using the called for Weeks Dye Works colors, but I’m not using the fabric that Fat Quarter Shop suggested. They suggest a 25ct Lugana, but I prefer at least a 28ct fabric, and while I may not prefer stitching on it, I love they way 32ct looks. I’m using 28ct Lugana in Light Ash. I prefer the tone of this shade to the recommended. I also feel like the slight difference goes a bit better with my general decor.

IMG_1975.JPEG

I’m moving on to Week 2. Maybe I can finish it before the next part is released?


Jelly Snowflake Mystery Quilt Block 1

Once again, I am behind on a quiltalong. I think I am destined to just not be able to keep up. That’s okay though, it’s still fun!

This week, I finished block 1 of the Jelly Snowflake Mystery Quilt. This was a fun block. I used my Stripology XL ruler to do all of the cutting and it went pretty quickly.

IMG_1956.JPEG

I did trim my jelly roll pieces to exactly 2.5” as Kimberly demonstrated in her video for the block. I need all the help I can get for getting precise blocks! You can see that I also used my Ruler Stickers from GE Designs on the ruler. Good thinking, right? Well…it’s good thinking when you actually pay attention and cut where the stickers are. If your brain thinks it knows better and cuts wherever it wants, you need to do some surgery on one block to make it a 2.5” square.

IMG_1986.JPEG

The good news is, I don’t think it’s very noticeable at all when you’re looking at the whole block, or when I don’t say “Can you see the mistake? It’s right here? See it?? See it…here!!??”

Overall, I’m super happy with the way the blocks came out and the process for making them. I did them over two separate days and the first two blocks took over 15 minutes longer to complete than the second pair of blocks I made. I’m sure that’s because I had gotten the hang of what they were supposed to look like.

IMG_1988.JPEG

You can’t see the mistake, right? ;-)

Banana Leaves Quilt by Elizabeth Hartman

I have a major backlog of projects from the Fat Quarter Shop’s Sew Sampler boxes. In February I went through all of my projects, organized, and cataloged them. Shortly before that, I found out my co-worker was having a baby. I knew just the pattern I was going to make, Banana Leaves by Elizabeth Hartman. This pattern uses Essex Linen and Adventure by Elizabeth Hartman and was featured in the October 2019 Sew Sampler box.

This wasn’t my first Elizabeth Hartman pattern. I love her patterns, even though many of them require many different cuts. I utilized my Alphabities and scrap paper with labels to help keep track of the different pieces.

IMG_1547.jpg

You can see my Stripology XL ruler below my pieces. As an aside to this post, I just have to let you know how amazing this ruler is. Cutting has always been stressful for me. I want to make sure I’m getting perfect cuts, and they seem like they’re always just a hair off. That hasn’t happened since I’ve started using this ruler, and SO FAST!

Once I actually sat down and got to sewing, this pattern came together very quickly. I did a lot of it with chain piecing and grouped the leaves by letter. I finished one letter and moved onto the next. Some of my finished block sizes were off a smidge, mostly because sometimes my piecing isn’t as accurate as I would like. Either I move the fabric slightly, or my presser foot pushes the top fabric so it’s off just a touch. I’ve looked everywhere and it doesn’t look like my machine has an option to adjust the presser foot pressure.

IMG_1835.JPEG

I had big plans for quilting this one, and then I had a feeling co-worker’s baby was going to make his appearance sooner than expected, so I wanted to get it done. I went with simple zig zags with my walking foot. I love the way that the Essex Linen washes. I’ve used it before in other Elizabeth Hartman patterns and it becomes so incredibly soft. Someday I’ll make a quilt for myself with it and keep it. If I had been planning better, I might’ve put some thought into making sure that my lemurs were always right side up, but I’m okay with half of them being upside down.

IMG_1838.JPEG

This was the first time I’ve done a pieced backing and I really love the way it looks. I used the scraps from the leaves and randomly added them to either side of the label I printed. It was very freeform as I was creating it. Thanks to the pieced backing and the fact that I was a little skimpy with the extra fabric around the edge before quilting, I have quite a bit of the backing fabric left, but thankfully my scraps are minimal. I always feel guilty leaving scraps. I know I won’t go back to them and then they just end up cluttering my space.

Overall, I’m super pleased with the finished product. I hope the new baby is also pleased!

Jelly Snowflake Mystery Quilt

With everything going on in the world and spending a lot of time at home, I’m longing for joyous times. Christmas has always been a favorite holiday of mine, so when Fat Quarter Shop announced their Jelly Snowflake Mystery Quilt, how could I not participate?

I chose The Christmas Card by Sweetwater for the jelly roll, backing, and binding. It’s been hard to pick which 14 strips to use in the quilt, but I narrowed it down and starched. Now, I just have to decide which fabrics to use for part one.

IMG_1921.jpeg